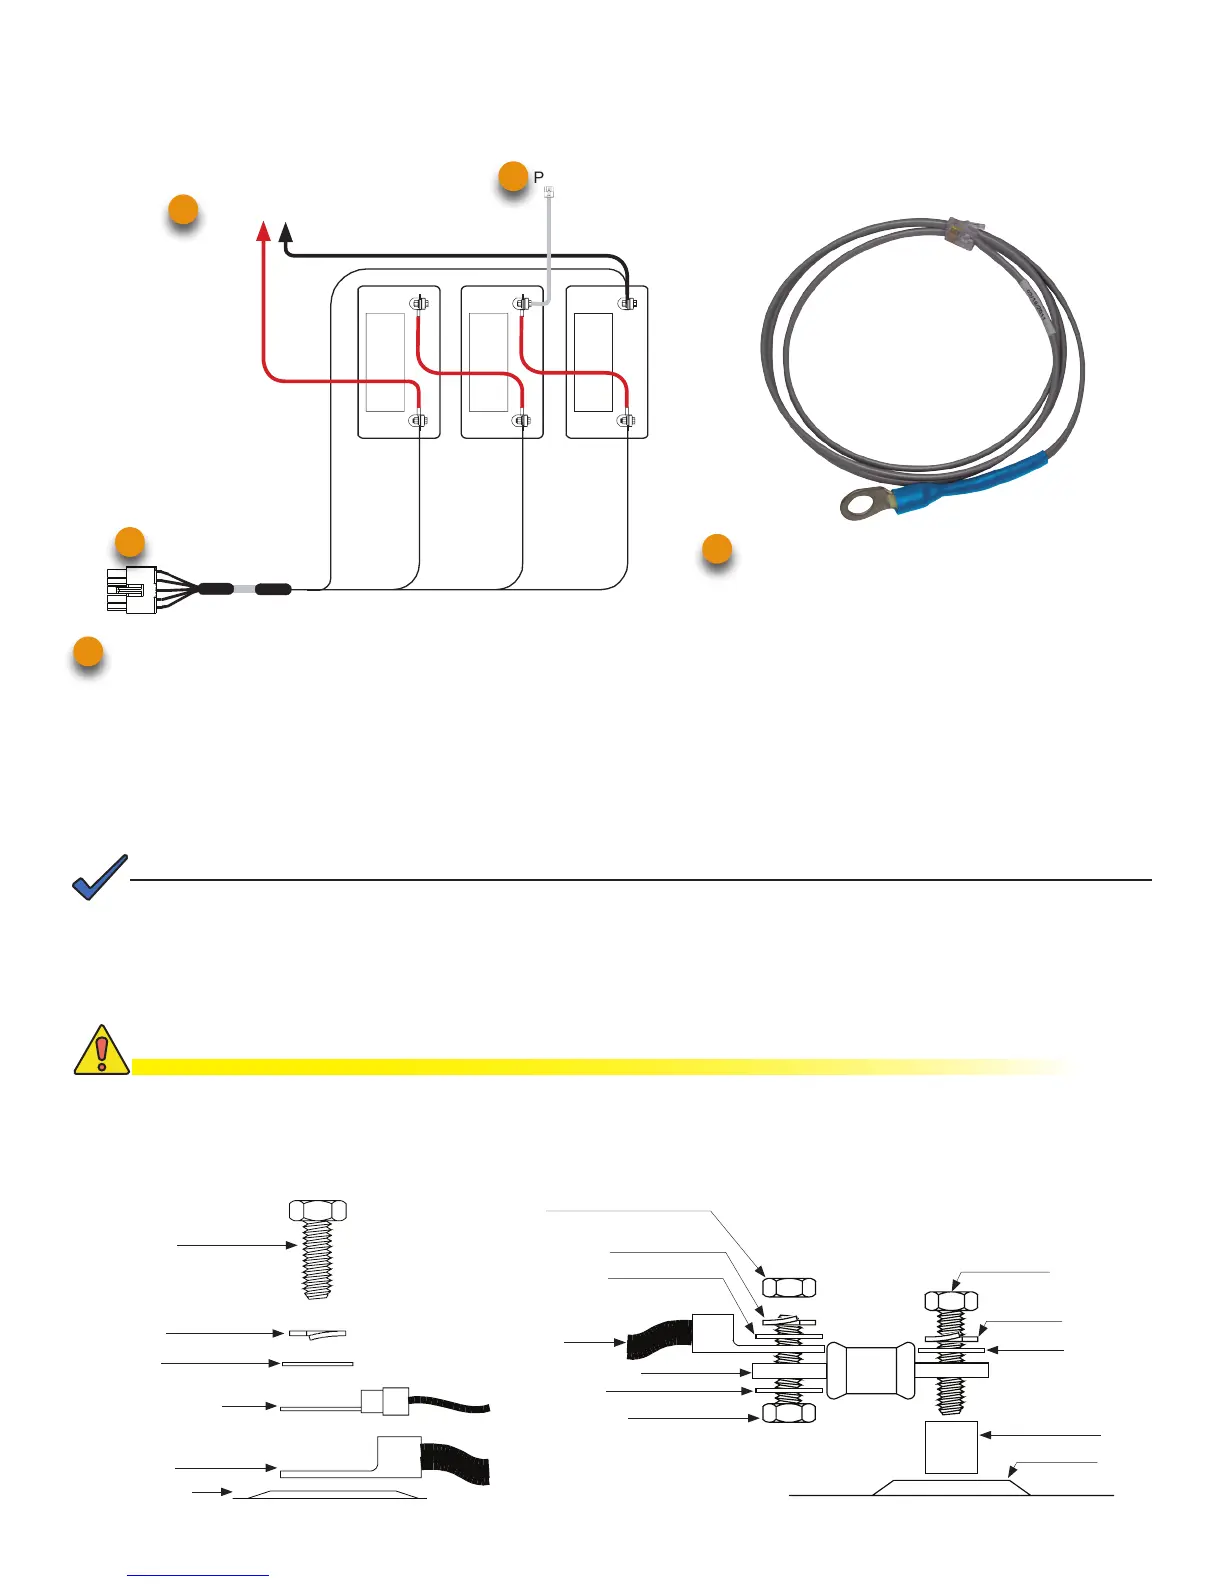
1. Battery Installation and Wiring Diagram
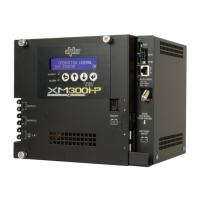
Battery Cable Kit, Precision Temperature Sensor / Smart AlphaGuard or Battery Sense Harness
Smart AlphaGuard (Embedded) — use Battery Harness, p/n 875-848-20,
(2 battery strings) — use p/n 875-848-21,
(3 battery strings) — use p/n 875-848-22,
(4 battery strings) — use p/n 875-848-23.
Re-use existing External Alphaguard Battery Sense Harness by installing a retrot kit. External AlphaGuard Battery Sense
Harness to Smart AlphaGuard (1 battery string) — use retrot cable p/n 875-910-20,
(2 battery strings) — use p/n 875-910-21,
(3 battery strings) — use p/n 875-910-22,
(4 battery strings) — use p/n 875-910-23.
Precision Temperature Sensor (PTS), p/n 746-331-20
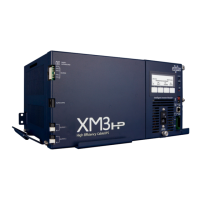
CAUTION!
Use 1/4-20 x 3/4” (19mm) bolts for threaded insert terminals. If using a spacer for the in-line fuse link, use 1/4-20 x
1” (25.4mm) bolts.
3/4" (19mm) x
1/4-20 Bolt
Split Washer
Flat Washer
Battery Sense Cable
or RTS
Battery Cable
Battery Terminal
Nut
Split Washer
Flat Washer
Battery
Cable
In-Line Fuse Link
Flat Washer
1" (25.4mm) or
3/4" (19mm) x
1/4-20 Bolt
1" (25.4mm) x
1/4-20 Bolt
Flat Washer
Split Washer
Spacer
Battery
Terminal
Fuse
Load batteries into cabinet with the positive terminals (+) facing forward.
Torque all nuts and bolts to 110 in-lbs. (12.43N-m)
Vbatt 3A 36V
Red, Pin 9
3A 2A 1A
A/B/C/D NEG
Black, Pin 5
Vbatt 2A 24V
Orange, Pin 4
Vbatt 1A 12V
Brown, Pin 10
To Power Supply
Black (String -) 0V
Red
PTS
3
3
1
11
11
3A
POS(+)
NEG(-) NEG(-) NEG(-)
POS(+) POS(+)
36VDC
2A 1A
Threaded Insert Terminals
The compatibility of the XM3 SAG system with certain vaults is dictated by the length of the SAG harness. Contact
your local sales representative for more information.
NOTE: