AlpsAV.com
11
MULTI- SCREEN INSTALLATION
IV
II
General recommendations
Check the wall structure being mounted to. Use a level to ensure the wall is at and note areas of
concern. Use washers, shims or spacers between the wall and the mount to create a at surface
for mounting. A at mount will make adjustments much easier and faster when aligning screens.
Note: The AlpsAV Soft-Touch Mount is ONLY suitable for installation perpendicular or slightly
angeled to the oor in portrait or landscape orientation. It is NOT suitable for overhead
mounting.
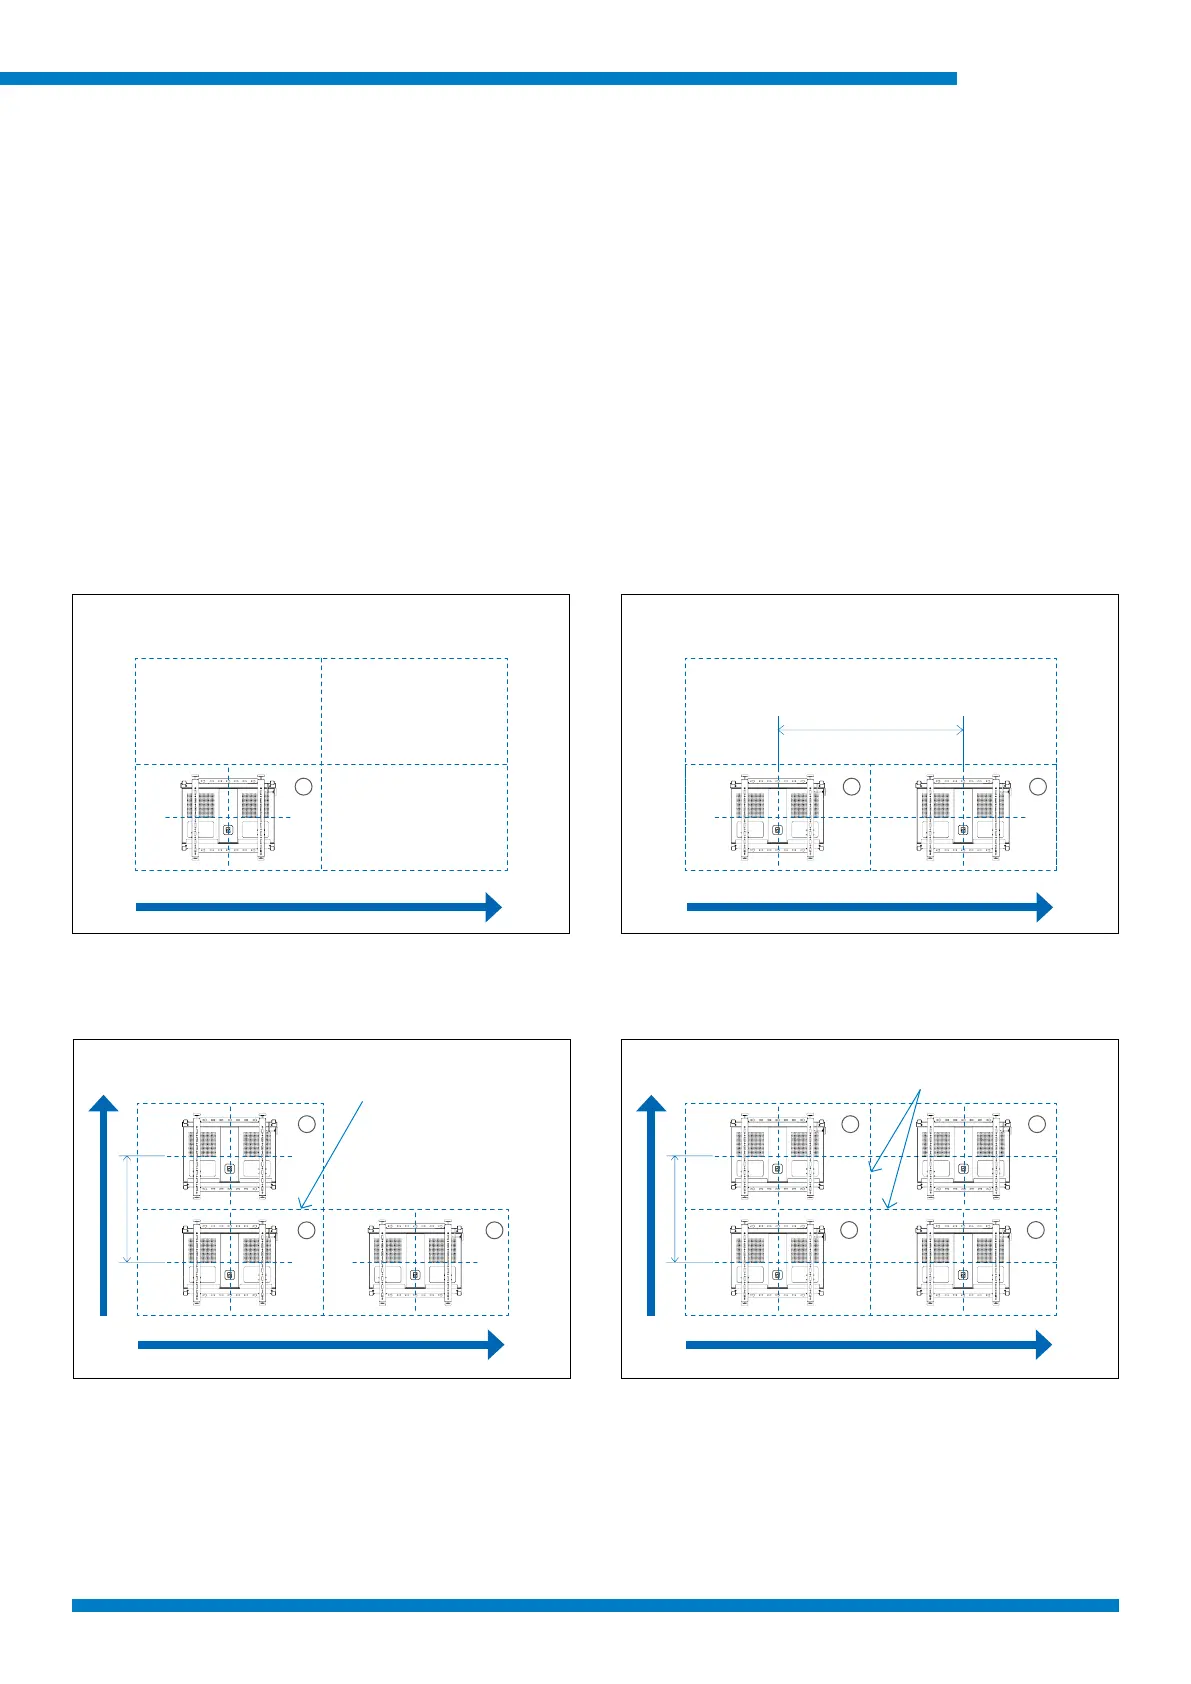
We recommend video walls start in a corner, we show starting at the bottom left then add the
screens row by row, aligning the screens as you build. Also, make sure depth and lateral micro
adjustments are centered before installation, making alignment quicker and easier.
Note: Walls are built from different materials and require different wall bolts for best performance
and safety. Please select suitable fixings or consult an expert for guidance.
Start from the bottom corner of the video wall
conguration.
Height of screen determines center to center distance
for next vertical mount location.
Width of screen determines center to center distance
for next horizontal mount location.
Build Horizontallly rst then add rows until all rows are
completed.
3 3 4
1
1
1
2
2
21
Align the one common border
before mounting the next screen
Align the two common borders
before mounting the next screen
I
III