AlpsAV.com
9
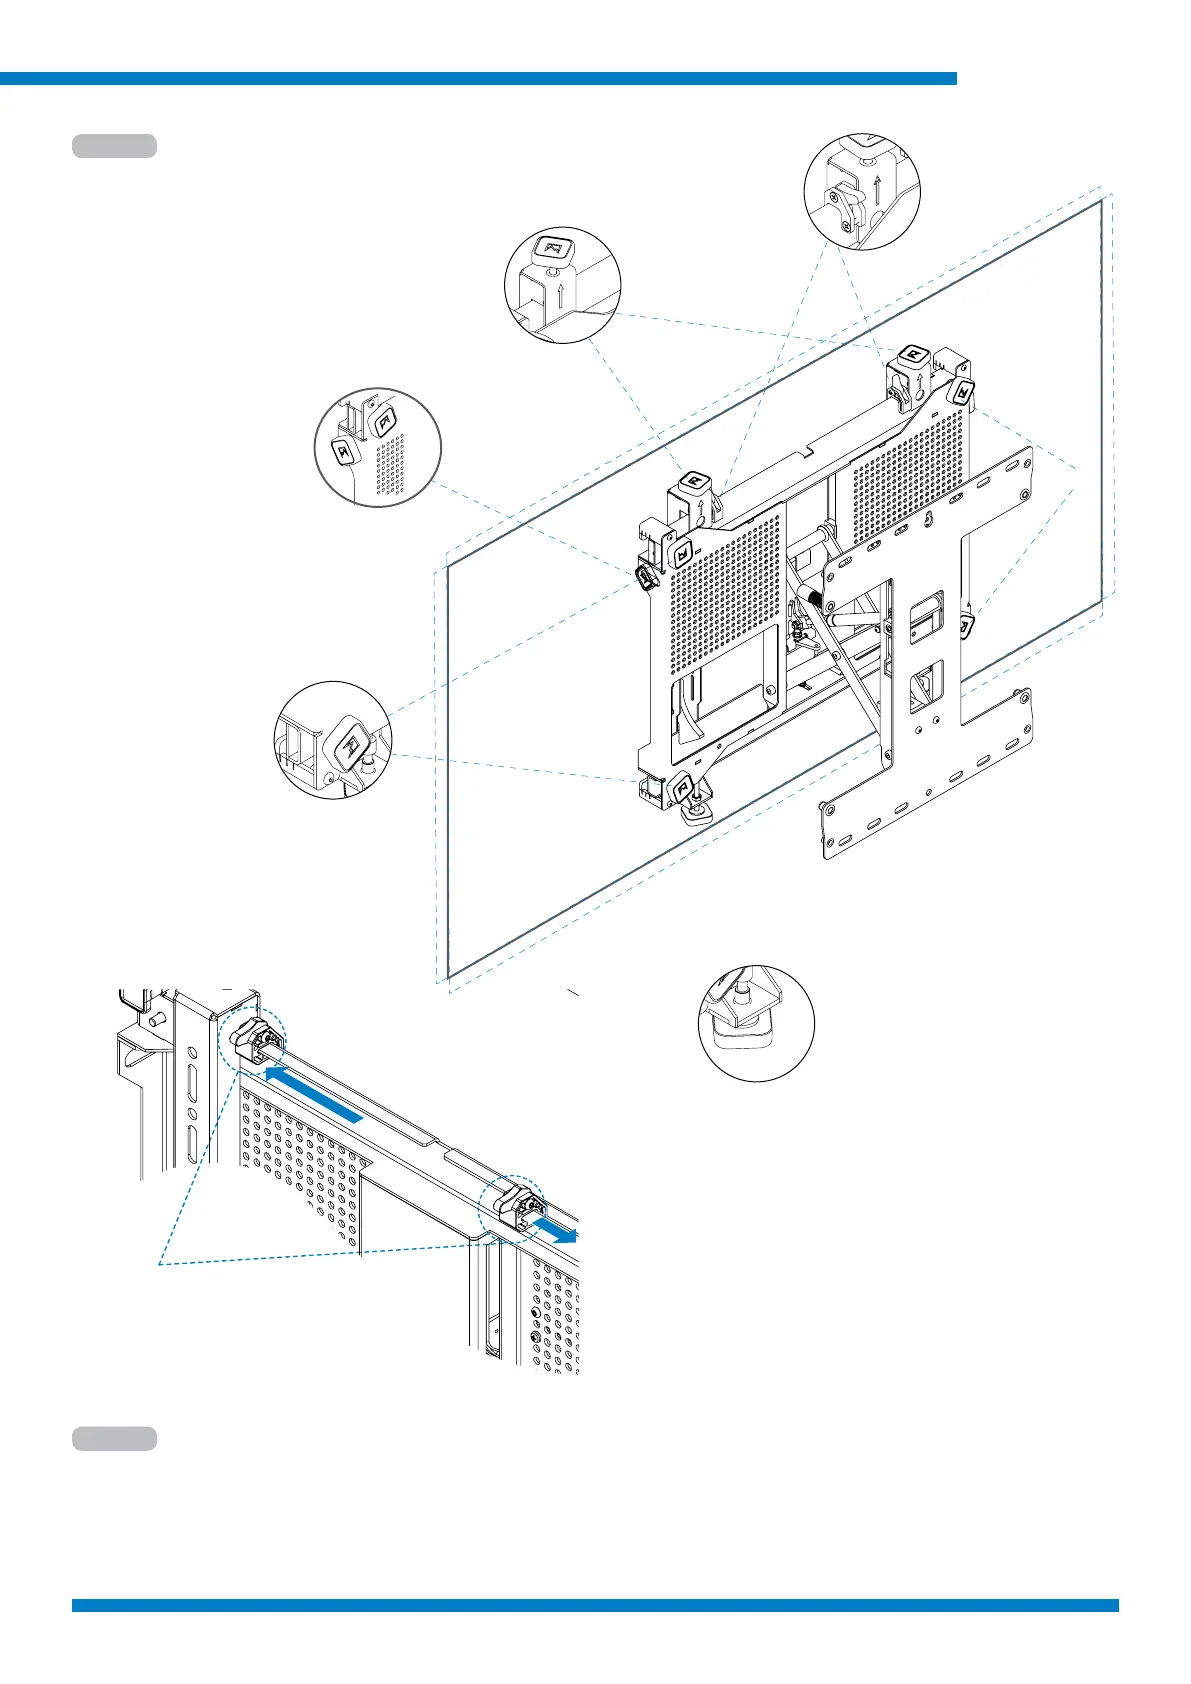
Step 4
Step 5
A : Height adjustment
B: Corner depth adjustment
C: Lateral macro adjust
D: Lateral micro adjustment
E: Screw to secure
Use level to make any needed adjustments to screen
Use locking handwheels (E) to secure screen.
Note: Once secured, locking handwheels must be loosened before any adjustments can be made.,
Height adjustment
Lateral macro
adjust
Lateral micro
adjustment
Tighten to secure
Corner depth
A
C
B
B
E
D
C
Lateral Smart-Lock
1) unlock lateral Smart-Lock,
2) slide screen into position,
3) slide Smart-Lock to interface arm,
4) lock Smart-Lock.
5) After Smart-Lock is in position,
the lateral micro adjustment can be
used.