4. #852 AR-7E ROTISSERIE INSTALLATION/OPERATION/SERVICE MANUAL
SECTION 1 ROTISSERIE INSTALLATION SECTION 1
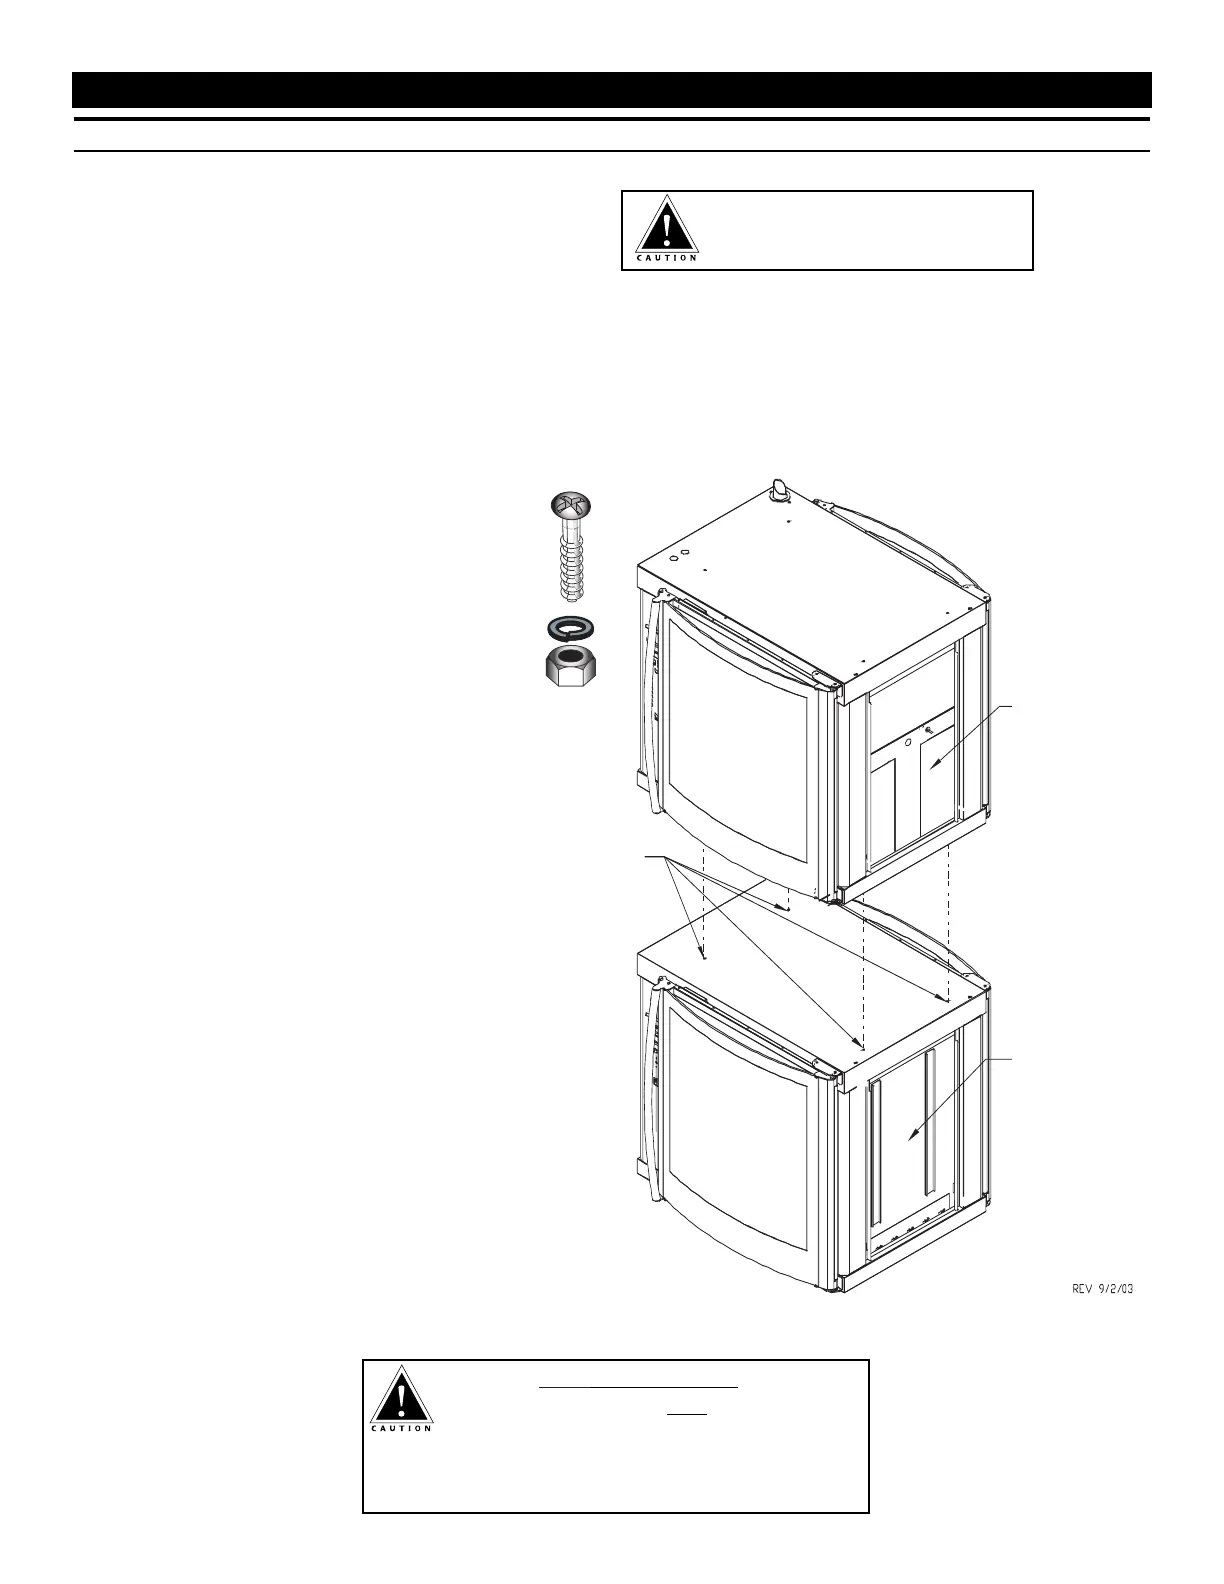
STACKING INSTRUCTIONS
A rotisserie can be stacked with
another rotisserie or can be stacked on
top of a matching holding cabinet.
NOTE: The AR-7VH Ventless Hood
cannot be installed when a
rotisserie is positioned at the
bottom of the stacking
combination.
Only screws, lock washers, and hex
nut are required to fasten units together
when stacking a rotisserie on top of a
matching holding cabinet. Additional
stacking hardware is required for all
other combinations (SEE PREVIOUS PAGE).
All fastening holes have been
prepunched. If the rotisserie oven is
positioned at the bottom of a stacked
configuration, make certain the oven is
on a non-combustible surface. The
stacking combination also requires the
minimum clearance of 6-inches (152mm)
at the back and both sides.
1. Remove the two side access panels of
both units.
2. Carefully lift and place the top unit in
position aligning the prepunched holes.
3. Insert the pan head slot screw into
each of the four holes.
4. Thread the lock washer and hex nut
on the screw protruding into the
bottom unit.
5. Securely tighten all four screws with
a screwdriver.
6. Replace the side panels on both units.
 Loading...