8
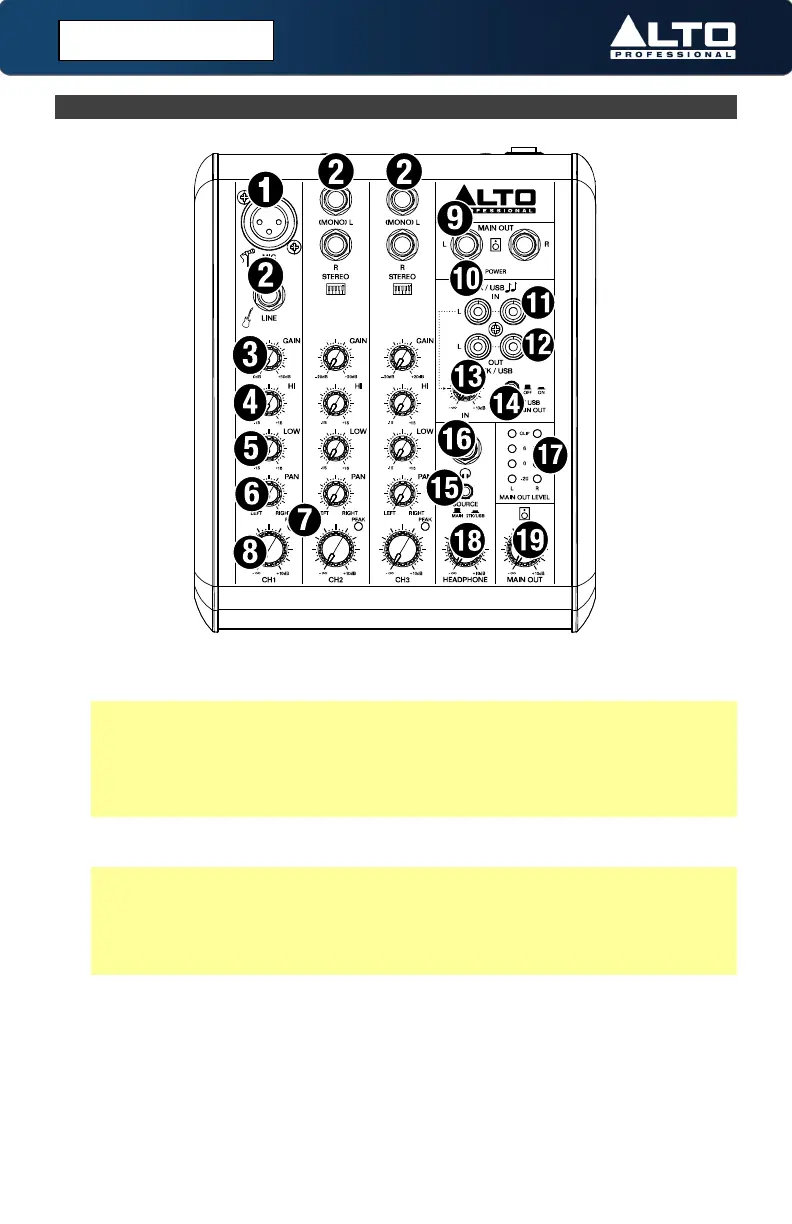
(3.1) Top Panel
1. Mic Input: Connect a microphone to this input using an XLR cable (sold
separately).
Note: This mic input is equipped with phantom power (18V with no phantom
power on/off switch) and is compatible with most condenser and dynamic
microphones. Phantom power can cause damage to certain types of
microphones, particularly ribbon microphones. Please use caution and consult
your microphone’s documentation to find out if it is usable with phantom power
before attempting to connect it to TrueMix 500’s Mic Input.
2. Line Inputs: Connect line-level devices to these inputs with 1/4" (6.35 mm)
cables (sold separately).
Note: The line inputs on channels 2 and 3 are stereo inputs.
Connecting a device using a single cable to only the L (Mono) input will send
the signal through both the Left and Right Main Output channels.
Connecting to only the R (Stereo) line input will send the signal through the
Right Mix channel only.
3. Gain: Turn this knob to adjust the channel audio level (pre-fader and pre-EQ
gain). Set the gain to a level at which the Peak LED just barely lights up during
the loudest parts of the track.
4. HI EQ (Treble): Turn this knob to adjust the high (treble) frequencies of the
channel’s output signal.
5. LOW EQ (Bass): Turn this knob to adjust the low (bass) frequencies of the
channel’s output signal.
(3.0) FEATURES
 Loading...