IPB-5000B
7. Basic Operation
7-3
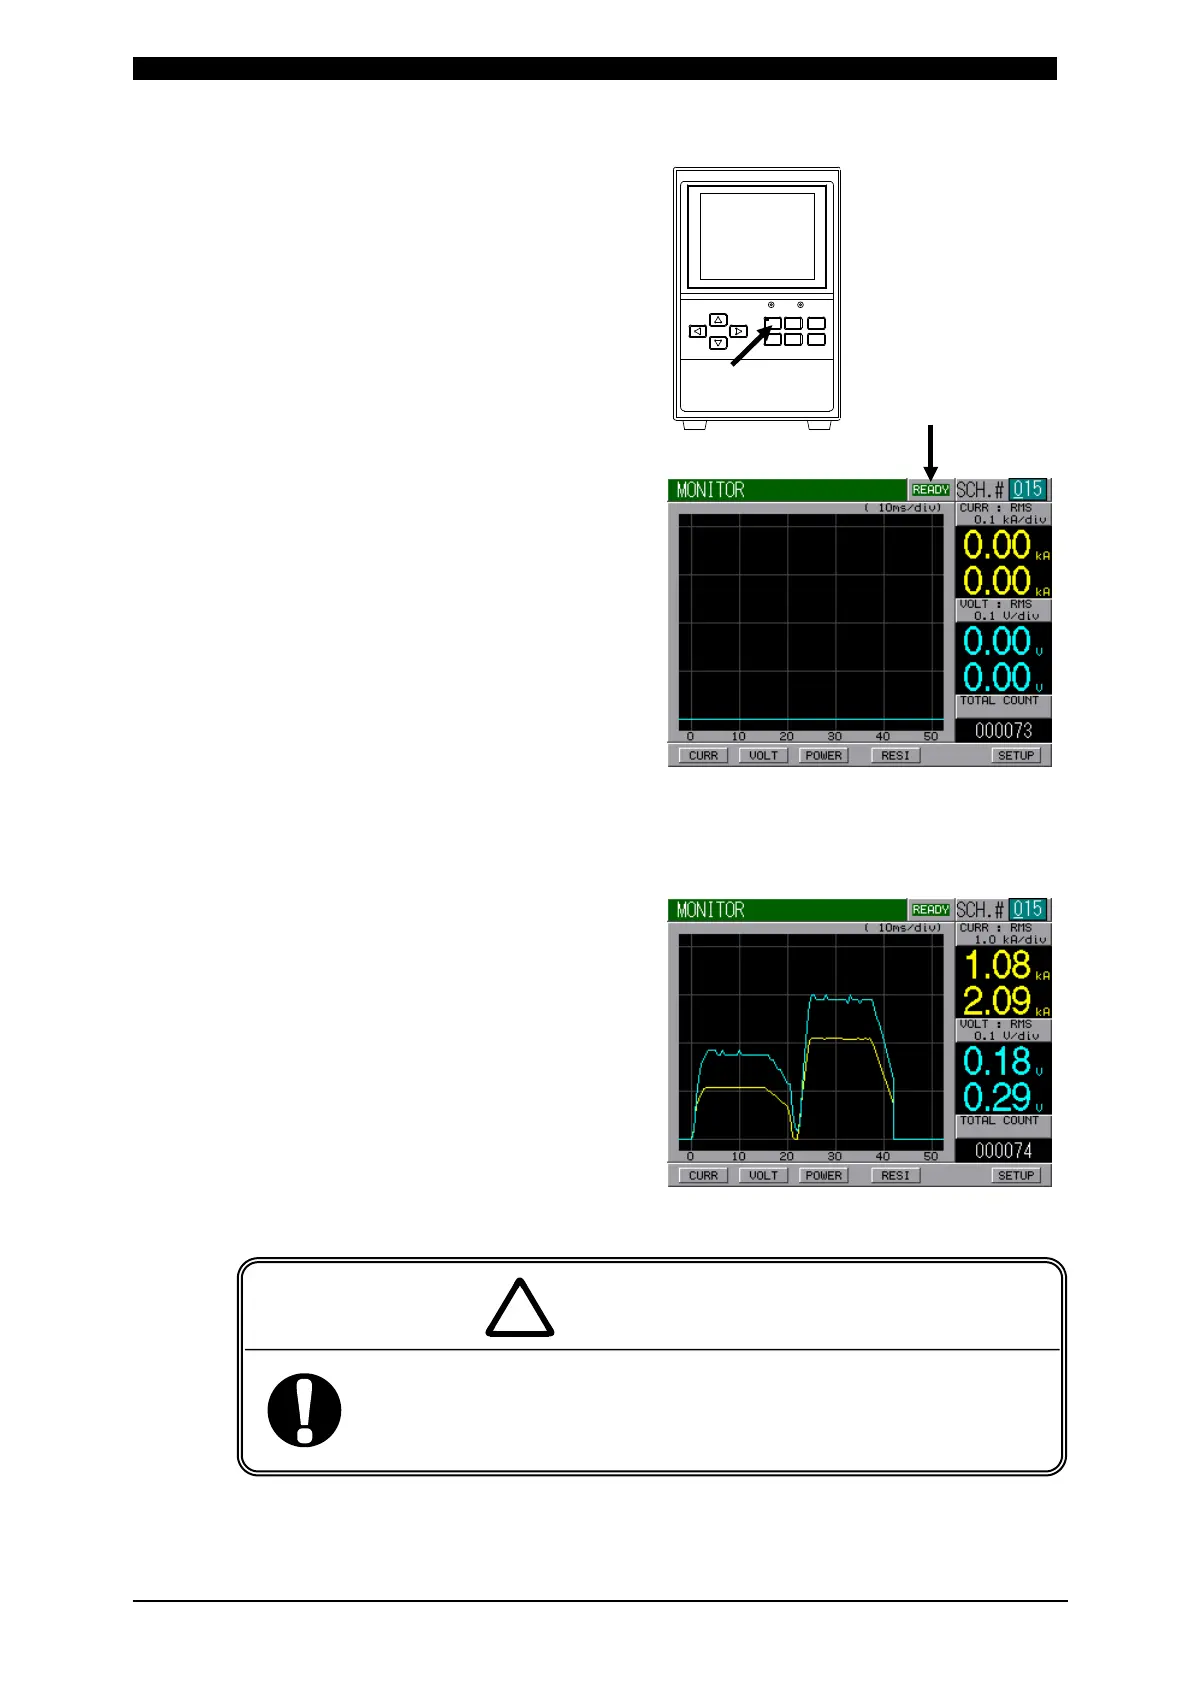
(7) Press WELD Key on Front Panel to
light up WELD Lamp (LED).
(8) Set ON (Closed circuit) to WELD
ON/OFF on Connecting Terminal
Strip for External Input/Output
Signal at Rear Panel.
Make sure that the letter of READY on
the upper right of Screen is
green-lighted.
(9) Set ON (Closed circuit) to SCH1, SCH2, SCH4 and SCH8 on Connecting Terminal
Strip for External Input/Output Signal at Rear Panel for setting SCH. #015.
(10) Set ON (Closed circuit) to 2ND STAGE
Start Input to begin testing the weld.
The squeeze signal is output, and then
the weld head begins to squeeze for
the weld.
As the figure on the right is displayed,
check that the weld schedule is
correctly set.
When confirming the operation, check that SQZ Time (Squeeze
Time) is sufficient.
If weld current flows before the welding electrode force becomes
sufficient, spatters are produced.
PO W ER
ST A RT
CURSOR
WELD MENU RESET
ENTER
+-
 Loading...


