B - 6
How to Prepare the Freezer Compartment
Installing Your Ice Maker
1
Remove freezer accessories, including all
baskets and shelves.
• See Owner’s Manual on instructions on removal
and replacement of freezer items.
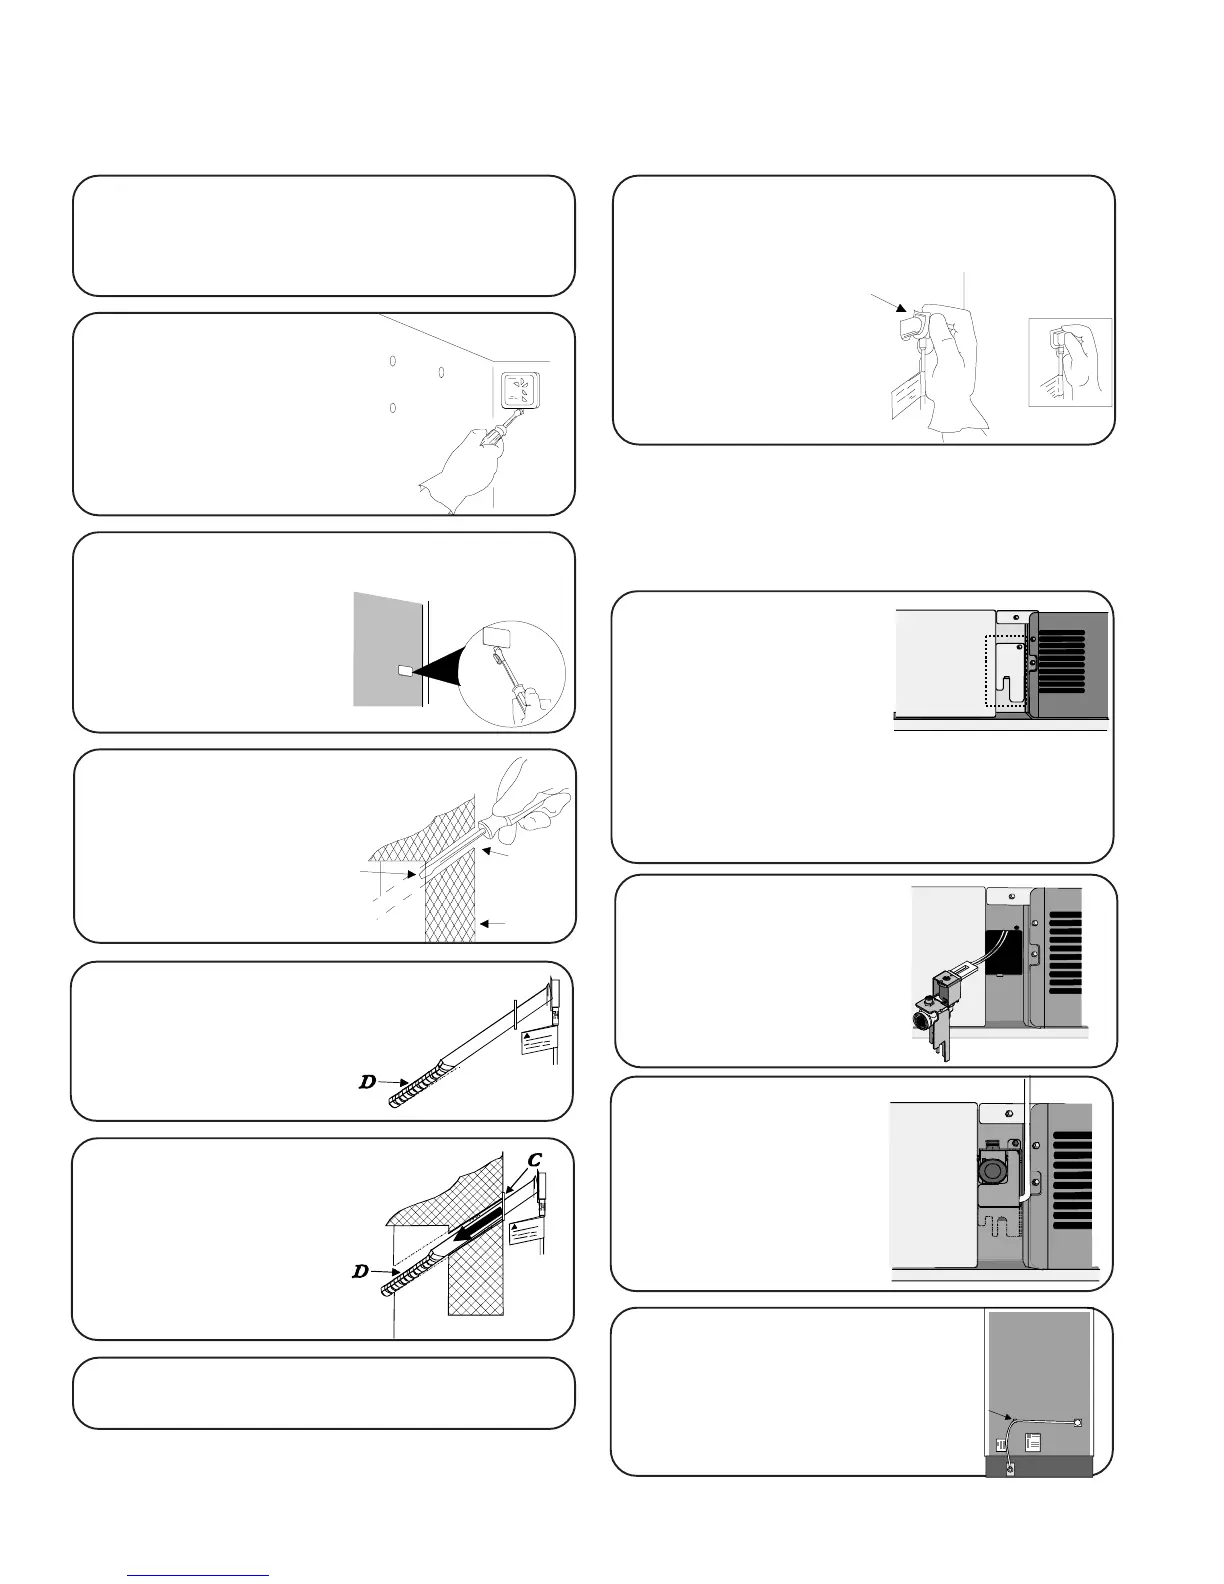
2
Pry water connection cover
from top left corner of
freezer section with flat
blade screwdriver.
3
Locate water tube inlet cover
on back of unit, and pry off with flat-
blade screwdriver
blade covered with
masking tape.
• Discard cover.
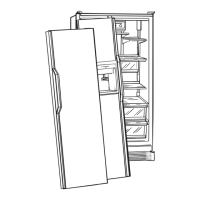
4
From back of refrigerator (A), use
screwdriver to pierce interior
sealing tape (B)
that covers the hole
for the water fill tube
inlet (C).
B
A
C
5
Cover end of fill tube (D)
with masking tape or small plastic
bag to avoid insulation from
entering tube during
insertion.
6
Insert fill tube (D) into
water fill tube inlet (C).
• If tube does not come
through the interior
freezer wall, use a pair
of needle-nose pliers to
pull tube through.
8
From back, push gently on the water fill
tube while twisting it slightly. Make sure
flange(E) is firmly seated in the hole
• Pull on grommet
to be sure that the
fit is tight. If tube comes
loose, repeat above
instructions.
7
Remove tape or plastic bag from the end
of the fill tube.
How to Mount the Water Valve
Assembly
1
Locate water valve
cover plate on back of
unit in lower left hand
corner. Remove cover
plate with a ¼” hex
nut driver.
• Retain screw for later replacement.
• Cut wire tie holding harness to cover plate. Take
care not to cut wires.
2
Plug harness from
inside machine
compartment onto
water valve
electrical terminals.
3
Tuck bottom
portion of valve
inside machine
compartment and
fasten valve to
cabinet with ¼”
screw from step 1.
4
Position valve water
line as illustrated and
secure with small plastic
clip (A) located in ice
maker kit.
E
A
 Loading...