EasyManua.ls Logo

Amana distinctions DCP073A25AA - User Manual

Amana distinctions DCP073A25AA
16 pages
Print Icon
To Next Page IconTo Next Page
Loading...
PACKAGED TERMINAL
AIR CONDITIONER / HEAT PUMP
INSTALLATION INSTRUCTIONS
ATTENTION INSTALLING PERSONNEL
As a professional installer you have an obligation to know
the product better than the customer. This includes all safe-
ty precautions and related items.
Prior to actual installation, thoroughly familiarize yourself
with this Instruction Manual. Pay special attention to all
safety warnings.
Often during installation or repair it is possible to place
yourself in a position which is more hazardous than when
the unit is in operation.
Only personnel that have been trained to install, adjust,
service or repair(hereinafter, “service”) the equipment spec -
ified in this manual should service the equipment. The manu -
facturer will not be responsible for any injury or property
damage arising from improper service or service proce -
dures. If you service this unit, you assume responsibility for
any injury or property damage which may result. In addition,
in jurisdictions that require one or more licenses to service
the equipment specified in this manual, only licensed per -
sonnel should service the equipment. Improper installation,
adjustment, servicing or repair of the equipment specified
in this manual, or attempting to install, adjust, service or
repair the equipment specified in this manual without proper
training may result in product damage, property damage,
personal injury or death.
WARNING
Before using your air conditioner, please read this man-
ual carefully and keep it for future reference.
This manual must be left with the owner of the
equipment.
IO-930
05/2022
19001 Kermier Rd., Waller, TX 77424
www.amana-ptac.com
© 2022 Goodman Manufacturing Company, L.P.
is a registered trademark of Maytag Corporation or its related companies and is used under
license to Goodman Company, L.P., Houston, TX, USA. All rights reserved.
Model:
DCP073A25AA
DCP073A35AA
DCP093A25AA
DCP093A35AA
DCP123A35AA
DCP123A50AA
DCP153A35AA
DCP153A50AA
DHP093A25AA
DHP093A35AA
DHP094A35AA
DHP123A35AA
DHP123A50AA
DHP124A35AA
DHP153A35AA
DHP153A50AA

Questions and Answers

Summary

Attention Installing Personnel

Safety Precautions

Important Safety Instructions

Operation of Current Device (Optional)

Details on the function and testing of the power supply cord's current detection device.

Air Conditioner Features

Compressor Restart Delay

Extends compressor life by preventing short-cycling, ensuring minimum 3 minutes for pressure equalization.

Memory

Unit remembers control settings (mode, fan, on/off) if power is lost and restores them upon restoration.

Automatic Evaporator Freeze Protection

Automatically turns off the compressor to prevent evaporator freezing when temperatures are too low.

Automatic Quick Warm-Up

For heat pump models, switches to electric heat if room temp drops significantly below set point.

LED Indicators and Buttons

Explains touch pad buttons (MODE, FAN, etc.) and corresponding status LEDs.

High Temperature Protection in Heating Operation

Switches off compressor/heater to prevent damage from high indoor air temperature.

Unit Configuration °F or °C

The unit can display temperature readings in either Fahrenheit or Celsius.

Control Panel Operation

Accessory

Dip Switches Configurations (Optional)

Details on accessing and configuring dip switches located behind the front panel for various unit settings.

Table 1 Dip Switch Configurations

Set Point Temperature Limits

Dip Switches Configurations by Panel Control (Optional)

Instructions for configuring dip switches using the unit's panel control interface.

Table 2 Dip Switches Configurations by Panel Control

Wall Thermostat Terminal (Optional)

Thermostat Wire Routing

Guidance on routing thermostat wires, recommending 18-20 gauge solid wire and proper placement.

Installation Instruction of PTAC Other Wall Thermostat

Steps for installing specific types of wall thermostats, including panel removal and wire connection.

Installation

How to Install the Unit

General instructions for installing the unit, including sleeve dimensions and securing the unit.

Unit Damage Hazard

Warnings about potential equipment damage or improper operation due to incorrect wiring.

Front Desk Control

Information on using the front desk control feature via FC(L) and FC(N) inputs and DIP switch settings.

Unit Installation

CAUTION

Warning against placing obstacles near the air-inlet or air-outlet of the unit.

Care and Cleaning

Front Panel and Case

Instructions for cleaning the unit's front panel and case using mild detergent and water.

Outdoor Coil

Guidance on checking and cleaning the outdoor coil, advising against high-pressure spray.

Air Filters

Importance of cleaning air filters regularly to maintain efficiency and prevent damage.

Vent Door Filter

Steps for cleaning the vent door filter, including unit removal and specific component handling.

Troubleshooting

Unit Does Not Start

Common causes and solutions for the unit failing to start, including checking power and protection modes.

Unit Not in Cooling; Heating Room

Troubleshooting steps for when the unit is not cooling or heating effectively, checking airflow and settings.

Display Has Strange Numbers; Characters

Addresses issues with the display showing unusual numbers or characters, possibly indicating °C setting.

Unit Making Noises

Normal operating noises such as clicking, gurgling, and whooshing are explained.

Water Dripping Outside

Normal condensation runoff in humid weather; checks for drain kit issues if installed.

Water Dripping Inside

Addresses water dripping inside, likely due to an unlevel wall sleeve requiring adjustment.

Troubleshooting

Ice or Frost Forms on Indoor Coil

Solutions for ice formation on indoor coil, relating to low outdoor temperature or dirty filters.

Compressor Protection

Explanation of compressor restart delays and protection mechanisms to prevent short cycling.

Electric Heating Failure

Recommendation to clean the evaporator every three months for proper electric heating function.

Overview

This document provides installation and operational instructions for a packaged terminal air conditioner/heat pump, designed for professional installers and end-users. It emphasizes safety precautions, proper installation procedures, and maintenance guidelines to ensure optimal performance and longevity of the unit.

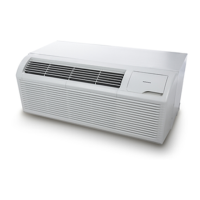
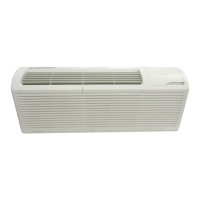
The device functions as a packaged terminal air conditioner and heat pump, offering both cooling and heating capabilities. It is designed to provide climate control for individual rooms or zones, making it suitable for various applications such as hotels, motels, and multi-family dwellings. The unit features a user-friendly control panel with buttons for mode selection, fan speed adjustment, power on/off, and set point temperature control. LED indicators provide visual feedback on the unit's operating status, including selected fan speed (HIGH, MED, LOW) and active mode (FAN, COOL, HEAT). A green LED indicates when the unit is powered ON.

One of the key usage features is the Memory function. In the event of a power loss, the unit retains all control settings, including mode, fan speed, on/off status, and configuration. When power is restored, the unit automatically resumes operation in the last saved mode and configuration, ensuring continuous comfort without needing to reconfigure settings.

The unit incorporates Automatic Evaporator Freeze Protection. This feature automatically turns off the compressor and activates the indoor fan if the evaporator temperature drops too low, preventing ice buildup and potential damage. The function deactivates once the evaporator temperature returns to a safe level.

For heat pump models, an Automatic Quick Warm-Up feature is included. If the room temperature falls significantly below the set point temperature (4.5°C / 8°F), the reverse cycle heat is temporarily shut off, and the electric strip heat engages for one cycle until the desired heating temperature is achieved. This ensures rapid heating when needed.

LED Indicators and Buttons on the touch pad allow for intuitive control. Users can select between COOL, HEAT, and FAN modes. In COOL mode, the unit automatically cools when the room temperature exceeds the set point and stops when it falls 2°C (4°F) below the set point, with a minimum compressor run time of 5 minutes. In HEAT mode, the maximum temperature can be set up to 29°C (84°F). Heat pump models can alternate between reverse cycle heat and electric heater modes based on the temperature difference between the set point and room temperature. The fan motor cycles with the compressor in HEAT mode. The FAN mode allows for fan operation only, without heating or cooling.

The FAN (FAN SPEED) button cycles through HIGH, MED, and LOW fan speed settings. A CONSTANT FAN function is available in cooling mode, which, when activated, keeps the fan running continuously, indicated by an illuminated light. When deactivated, the fan cycles on and off with the compressor.

The unit also supports DIP Switches Configurations for advanced settings. These switches, located behind the front panel, allow for customization of various parameters, including wall thermostat type, load delay, heating type, temperature display type (°F or °C), control type, setpoint limits, fan continuous run/cycle for heating and cooling, and low temperature protection. These configurations enable the unit to be tailored to specific installation requirements and user preferences. For instance, the Wall Thermostat Enable switch allows a wired wall thermostat to control the unit, while the Low Temperature Protection feature activates the fan motor and electric strip heat if the room temperature drops below 0°C (32°F), warming the room to 4.4°C (40°F).

High Temperature Protection in heating operation is a critical safety feature. It automatically switches off the compressor and/or electric heater to prevent damage from excessively high indoor blow air temperatures or errors in the indoor temperature sensor.

The DIP Switches Configurations by Panel Control offers an alternative method to adjust these settings directly from the control panel. By pressing and holding the up (+) and down (-) buttons simultaneously for 3 seconds, users can access and modify dip switch settings, with the LED display window showing two-digit codes for high (left) and low (right) functions.

Compressor Restart Delay is a feature designed to extend the compressor's lifespan by preventing short-cycling. When the compressor restarts, there is a minimum three-minute delay to allow refrigerant pressures to equalize, optimizing the cycling process.

For maintenance, the manual emphasizes the importance of regular cleaning. Air Filters should be cleaned every two weeks to maintain unit efficiency, reduce operating costs, save energy, prevent clogged indoor coils, and minimize the risk of premature component failure. Cleaning involves vacuuming heavy soil and rinsing with water. The Vent Door Filter also requires cleaning twice a year or as needed, especially if the vent door is open. The Outdoor Coil should be checked regularly for dirt buildup and professionally cleaned if clogged.

The manual also includes a Troubleshooting section to address common issues such as the unit not starting, inadequate cooling/heating, strange display numbers, and unusual noises. It provides solutions like checking power connections, resetting circuit breakers, cleaning filters, and verifying dip switch settings. For instance, if ice or frost forms on the indoor coil, it suggests checking the outdoor temperature and cleaning filters. If the compressor is in restart protection, a random startup delay of 3 minutes is normal.

Overall, the device is designed for efficient and reliable climate control, with features aimed at user convenience, energy efficiency, and product longevity, supported by clear installation and maintenance guidelines.

Amana distinctions DCP073A25AA Specifications

General IconGeneral
BrandAmana
ModelDCP073A25AA
Product TypeAir Conditioner
Refrigerant TypeR-410A
Fan Speeds3
Voltage115V

Related product manuals