1
FEATURES
• 720P camera streams directly to your mobile phone for instant video recording
• 3 Speed settings for beginner to advance pilot
• Obstacle avoidance technology at slow speed for beginner
• Automatically starts and lands with the push of a button
• Pilot with realistic Motion Controlled flight stick
• Built-in Gyro + Altitude Sensors For Incredibly Stable Flight
2
Thank you for purchasing the HOVER HAWK. Please read this instruction booklet carefully as it
contains valuable information on how to properly fly and care for your helicopter.
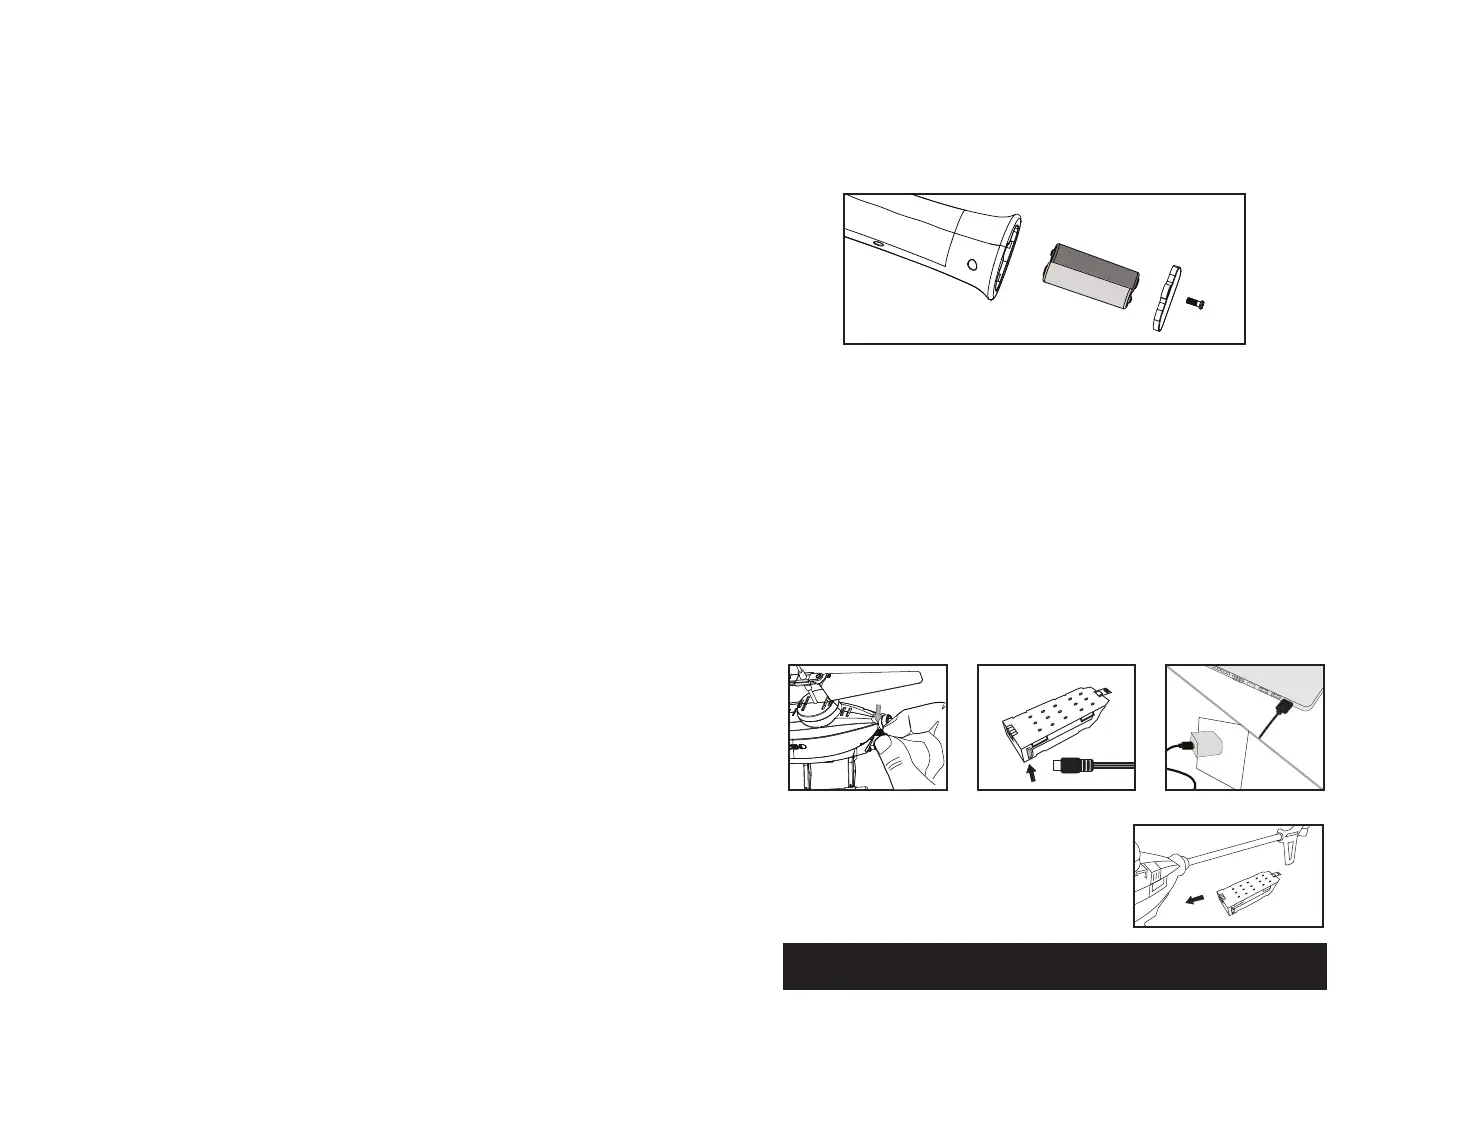
REMOTE CONTROL BATTERY INSTALLATION
1. Unscrew and remove the battery cover from the bottom of the controller.
2. Install 2 fresh “AAA” alkaline batteries into the controller. Replace the battery cover and secure it.
3. Press the power button.If the power indicator turns on you have installed your batteries properly.
Battery Compartment
(Not included 2 “AAA” batteries)
IMPORTANT: ALWAYS DISCONNECT CHARGER CORD AFTER CHARGING. NEVER LEAVE CHARGER CONNECTED
TO BATTERY OVERNIGHT OR FOR EXTENDED PERIODS OF TIME.
Battery
Cover
TABLE OF CONTENTS
Features..........................................................................................1
Remote Battery Installation........................................................................2
Charging The Hover Hawk Li-poly Batter...........................................................2
Install The Hover Hawk Battery.....................................................................2
Helicopter diagram, Remote Control diagram.....................................................3
Flight Preparation .................................................................................3
Flying Tips..........................................................................................4
Syncing Your Hover Hawk..........................................................................4
Speed Select Button................................................................................4
Slow Mode & Obstacle Avoidance Training Feature .................................................4
Calibrating The Helicopter........................................................................ 5
Automatically Take Off / Land......................................................................5
Flight Controls......................................................................................5
Helicopter Warning And Safety Precautions.....................................................6
Camera Video And Photo Streaming Setup......................................................7
Part Replacement Instructions....................................................................8
Hover Hawk Propeller System.....................................................................8
Replacing Connecting Rods .......................................................................8
Replacing the Upper Propeller Blade............................................................ ..9
Replacing the Bottom Propeller Blade.............................................................9
Battery Warnings..................................................................................9
Care and Maintenance..............................................................................9
Limited 90-Day Warranty.........................................................................10
FCC Information..................................................................................11
B.
A.
INSTALL THE HOVER HAWK BATTERY
Carefully insert the battery into the HOVER HAWK
battery compartment all the way in until it stops and is
flush with back of the helicopter (see diagram D).
NOTE: The battery only fits one way into the battery compartment.
Never force it.
C.
D.
Li-Poly Battery
CHARGING THE HOVER HAWK LI-POLY BATTERY
1. Pull off the battery from the helicopter, then connect the USB charger to the battery charging socket (see
diagram B). CAUTION: The USB plug fits the charging socket only in one way. Do not force it. Improper
connection will damage the HOVER HAWK’s battery.
2. Connect the other end of the USB cable to either your computers USB port or a UL/CE approved USB wall charger
(see diagram C). IMPORTANT: If using a high-speed USB wall adapter make sure that the output is less than 8
Volts otherwise the HOVER HAWK internal charging circuit will shut down for safety reasons and not allow the
HOVER HAWK to accept the charge.
3. The indicator light on the USB charger will turn to solid red to indicate that the battery is charging. The red LED
indicator will turn off when charging is completed. Average charging time is approximately 40-45 minutes.
Once fully charged the HOVER HAWK operates for approximately 6-8 minutes depending on the intensity of play.
LOW BATTERY INDICATOR: During play, when the HOVER HAWK's batteries begin to get low, the LED
lights on the body will start to flash, indicating that you have approximately one minute left to play.
Shortly thereafter, the HOVER HAWK will automatically begin to descend and land.
IMPORTANT: ALWAYS REMEMBER TO UNPLUG YOUR CHARGING CORD WHEN NOT IN USE!
- AAA +
- AAA +
 Loading...