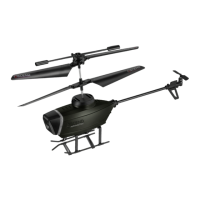
HELICOPTER DIAGRAM
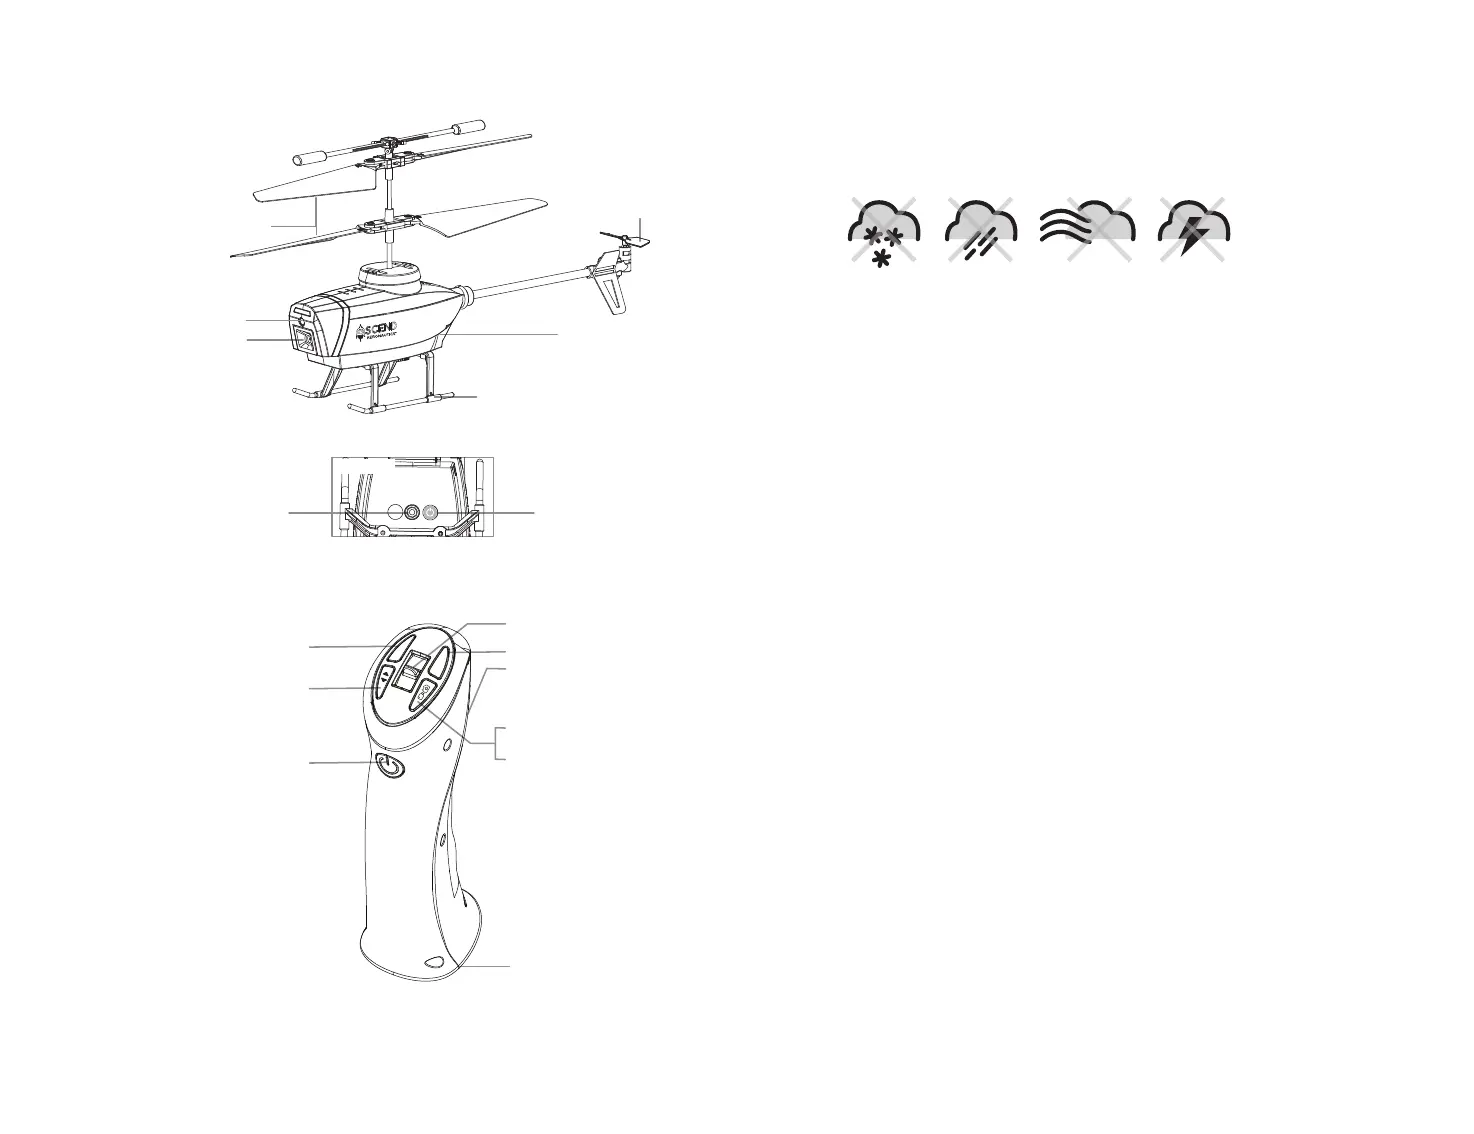
REMOTE CONTROL DIAGRAM
3 4
Power Indicator Light
Trim
POWER ON/OFF
POWER ON/OFF
Battery Compartment
Calibrate /
Auto Start & Land
Tail rotor
Landing Gear
Main Rotor Blades
SPEED
TRIM
Press & hold to begin
video recording
Press to take a photo
Speed Setting Button
Throttle
Camera
Motion Sensor
Motion Sensor
Battery
DO NOT FLY YOUR HOVER HAWK IN FOUL WEATHER!
WARNING
FLIGHT PREPARATION
• Verify that there are 2 “AAA” batteries inside the remote control unit and the HOVER HAWK battery
has been fully charged.
•
Make sure to be in a large open space preferably a field or a park with an open radius of at least 200 feet.
• Make sure to start your helicopter on a clean flat level surface before take-off.
•
IMPORTANT! Until you have experience in flying your HOVER HAWK, it is not advised to use in any
rate of wind. Pick a day with zero wind or extremely light wind condition when learning how to fly.
SYNCING YOUR HOVER HAWK
Important! When syncing your HOVER HAWK with the controller always make sure that the
helicopter is on a flat level surface and that your digital trim settings are in the center
position.
1. Before starting, make sure the power on your controller and the helicopter is off.
2. Turn on the helicopter and set it down on a flat, level surface. The LED lights on the helicopter
should begin to flash.
3. Quickly turn on the controller, and you will notice that the red LED light on the controller starts flashing.
4. Push the throttle forward and then pull it back. The LED lights on the helicopter and controller will rapidly
flash for a while and then turn solid. You have successfully synced your HOVER HAWK and are ready to fly.
If this doesn’t happen, repeat steps 1-4 again.
SPEED SELECT BUTTON
The HOVER HAWK has 3 speed settings; 1 (SLOW), 2 (MEDIUM) and 3 (HIGH). The Default setting
when you first turn on your HOVER HAWK is the 1 (SLOW) speed mode. To increase the speed simply
press the speed setting button (see remote diagram on pg 3) you will hear beeping sounds of the
controller will show you what speed setting you are on. Speed settings can be set before flight or
during the flight.
SLOW MODE & OBSTACLE AVOIDANCE TRAINING FEATURE
Simply press the Speed Button, you will hear a beep indicating you are in SLOW MODE. SLOW MODE
allows you to learn how to operate your HOVER HAWK. Also, there are set to avoid crashing into the
floor. New obstacle avoidance training feature will cause the helicopter to automatically circumvent
walls and other obstructions so new pilots can get the hang of flying. Set the HOVER HAWK speed in
the SLOW MODE speed mode and the obstacle avoidance feature will start working.
Note: the obstacle avoidance feature only works for
SLOW MODE
.
O I
BOTTOM view