2 User Instructions
2.1 Controls & Control elements
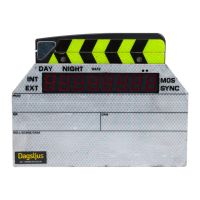
Viewing the slate face on you will find the following controls:
Bottom edge ON/OFF switch
Left side 5 PIN Lemo interface socket
Minijack timecode In/Out socket
(ACD 301 only)
Front LED display with Anti-glare mask
RED and GREEN single LED
Writing surface for boardmarker
Between clapstick and body Push button left. ( RED )
Push button right. ( BLUE )
All internal setting functions are carried
out using these two buttons in
combination with the Dipswitches.
Right side ACD 201 one slider which can be
moved either UP to reveal the batteries,
or moved DOWN to give access to the
Dipswitches.
On the ACD 301 you find two sliders
on this side of the slate. The Top slider
exposes the Dipswitches. The Bottom
slider locks the battery contact strip and
allows the exchange of batteries (9 or 8).
Back cover Has a short form instruction
manual laser engraved, it describes the
main functions of the slate.
Note. On delivery of the ACD 301 there is a Dummy cell inside
the battery
compartment. This is supplied for the operation with 8 cells only. The dummy is held in
place by a screw in a semi permanent fashion. Batteries ar usualy bought in 4 or 8 packs
and use of rechargeable nicads is very seldom. We think 8 batteries is the best
configuration and have fixed the dummy so that it cannot fall out and get lost.

 Loading...