EasyManua.ls Logo

American Standard Ameristar 2A7M3018-060A1000A User Manual

American Standard Ameristar 2A7M3018-060A1000A
8 pages
To Next Page IconTo Next Page
Page #1 background imageLoading...
Page #1 background image
© 2005 American Standard Inc. All Rights Reserved
Since the manufacturer has a policy of continuous product
and product data improvement, it reserves the right to
change design and specifications without notice.
11-AC20D1-1
These instructions do not cover all variations in systems
nor provide for every possible contingency to be met in
connection with installation. All phases of this installa-
tion must comply with NATIONAL, STATE AND LOCAL
CODES. Should further information be desired or should par-
ticular problems arise which are not covered sufficiently for the
purchaser’s purposes, the matter should be referred to your
installing dealer or local distributor.
A. GENERAL
WARNING:
This information is intended
for use by individuals possessing adequate backgrounds
of electrical and mechanical experience. Any attempt to
repair a central air conditioning product may result in
personal injury and or property damage. The manufac-
turer or seller cannot be responsible for the interpreta-
tion of this information, nor can it assume any liability in
connection with its use.
NOTE: AMERICAN STANDARD HAS ALWAYS RECOM-
MENDED INSTALLING AMERICAN STANDARD AP-
PROVED MATCHED INDOOR AND OUTDOOR SYSTEMS.
THE BENEFITS OF INSTALLING APPROVED MATCHED
SYSTEMS ARE MAXIMUM EFFICIENCY, OPTIMUM PER-
FORMANCE AND BEST OVERALL SYSTEM RELIABILITY.
Check for transportation damage after unit is uncrated. Report
promptly, to the carrier, any damage found to the unit.
To determine the electrical power requirements of the unit, refer
to the nameplate of the unit. The electrical power available must
agree with that listed on the nameplate.
B. LOCATION AND PREPARATION OF THE UNIT
1. When removing unit from the pallet, notice the tabs on the
basepan. Remove tabs by cutting with a sharp tool as shown in
Figure 2 (see page 2).
2. The unit should be set on a level support pad at least as large
as the unit base pan, such as a concrete slab. If this is not the
application used please reference ALG-APG0*-EN (*latest revi-
sion number).
3. The support pad must NOT be in direct contact with any
structure. Unit must be positioned a minimum of 12" from any
wall or surrounding shrubbery to insure adequate airflow. Clear-
ance must be provided in front of control box (access panels) & any
other side requiring service access to meet National Electrical
Code. Also, the unit location must be far enough away from any
structure to prevent excess roof run-off water from pouring
directly on the unit. When choosing the location of the unit(s),
sound transmission through air and refrigerant lineset should be
taken into consideration. It is recommended to locate unit(s)
away from areas (bedrooms, etc.) where such sound could be
objectionable.
4. The top discharge area must be unrestricted for at least
five (5) feet above the unit.
5. When the outdoor unit is mounted on a roof, be sure the roof
will support the unit’s weight. Properly selected isolation is
recommended to prevent transmission to the building structure.
6. The maximum length of refrigerant lines from outdoor to
indoor unit should NOT exceed sixty (60) feet.
7. If outdoor unit is mounted above the air handler, maximum
lift should not exceed sixty (60) feet (suction line). If air handler
is mounted above condensing unit, maximum lift should not
exceed sixty (60) feet (liquid line).
Condensing Units
INSTALLER'S GUIDE
ALL phases of this installation must comply with NATIONAL, STATE AND LOCAL CODES
5 FT. ABOVE UNIT — UNRESTRICTED
1
Models:
2A7M3018-060A1000A
IMPORTANT — This Document is customer property and is to remain with this unit. Please return to service information pack
upon completion of work.
Question and Answer IconNeed help?

Do you have a question about the American Standard Ameristar 2A7M3018-060A1000A and is the answer not in the manual?
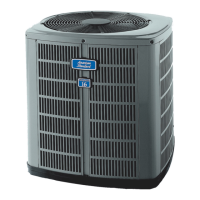
American Standard Ameristar 2A7M3018-060A1000A Specifications

General IconGeneral
TypeHeat Pump
Model Number2A7M3018-060A1000A
BrandAmerican Standard
SeriesAmeristar
Cooling Capacity (BTU/h)60000
Cooling Capacity (Ton)5
Heating Capacity (BTU/h)60000
Heating Capacity (Ton)5
RefrigerantR-410A
Voltage208/230
Phase1
Compressor TypeScroll
StagesSingle

Summary

A. GENERAL

Installation and Servicing Safety Warnings

Intended for experienced individuals; improper repair can cause injury or damage. Manufacturer not liable for interpretation.

Benefits of Matched System Installation

Recommends matched systems for maximum efficiency, optimum performance, and overall system reliability.

B. LOCATION AND PREPARATION OF THE UNIT

Unit Placement and Clearance Requirements

Unit must be positioned minimum 12 inches from walls/shrubbery, with front access for control box and service panels.

Airflow and Sound Considerations

Top discharge area requires 5 ft. unrestricted space. Locate units away from noise-sensitive areas to minimize sound transmission.

Support Pad and Structural Requirements

Unit must be set on a level pad at least as large as base pan, not in direct contact with structure.

Refrigerant Line Length Limits

Maximum recommended length for refrigerant lines from outdoor to indoor unit is sixty (60) feet.

C. INSTALLING REFRIGERANT LINES

Brazing of Existing Refrigerant Lines

Ensure all joints on existing refrigerant lines are brazed, not soldered, as condensing units have braze connections.

Gas Line Insulation Requirement

The gas line must always be insulated to prevent condensation and energy loss.

Scroll Compressor Dome Temperature Warning

Caution: Scroll compressor dome temperatures can be very hot, posing a burn risk if touched.

Factory Charge and Adjustment Guidance

Units are factory charged for 15 ft. lines. Final refrigerant charge adjustment is necessary per unit nameplate.

D. SERVICE VALVE OPERATION

Liquid and Gas Line Service Valve Operation

Describes operation of brass liquid and gas line service valves, noting pressure taps open to the field brazing side when seated.

Caution for Opening Service Valves

Extreme caution is advised when opening liquid/gas service valves. Turn stem counterclockwise until it contacts the rolled edge; no torque is required.

Brass Gas Line Ball Valve Operation

Explains the operation of the brass gas line ball service valve, which is fully open with a 1/4 turn.

BRAZING REFRIGERANT LINES

Brazing Preparation and Techniques

Preparation involves removing covers, cleaning tubes, and cutting/fitting tubing to minimize sharp bends.

Line Insulation and Contact Rules

Insulate the gas line and fittings. Do not allow uninsulated liquid line to contact the bare gas line.

Brazing Precautions and Nitrogen Purge

Prevent Heat Damage During Brazing

Use precautions like removing valve cores and using wet rags to prevent heat damage to valve cores and basepan during brazing.

Dry Nitrogen Purge for Brazing

Employ a dry nitrogen purge and brazing alloy without flux. Flow nitrogen through tubing via pressure tap ports during brazing.

LEAK CHECK

Pressure Tap Core Replacement Before Leak Check

Ensure the pressure tap port valve core is replaced before attaching hoses for evacuation procedures.

Leak Detection Procedure

Pressurize lines with dry nitrogen to 350-400 psi and check all field joints for leaks using soap bubbles or other methods.

SYSTEM EVACUATION

Evacuation Steps and Micron Gauge Use

Evacuate lines and indoor coil to below 350 microns using a vacuum pump and micron gauge.

Verification of Evacuation Completeness

Monitor micron gauge after pump shutdown; a rise above 500 microns in one minute indicates incomplete evacuation or a leak.

Refrigerant Charging and Venting Prohibition

Charge system with vapor refrigerant, do not vent any refrigerant into the atmosphere.

Valve Operation and Cap Replacement

Open liquid line valve, then gas valve. Replace all valve stem and pressure tap caps finger tight, then tighten an additional 1/6 turn.

Gas Valve Operation and Charge Adjustment

Opening Gas and Liquid Valves

Instructions for opening the gas valve (ball type and service valve) and liquid line shut-off valve.

Refrigerant Charge Adjustment for Line Length

System refrigerant charge may need adjustment if refrigerant lines differ from the recommended length or size.

E. ELECTRICAL CONNECTIONS

Electrical Safety Precautions

Always exercise basic safety precautions to avoid electric shock when installing or servicing equipment.

Power Supply and Grounding Requirements

Power wiring and grounding must comply with local codes. Power supply must match the equipment nameplate.

Disconnect Switch and Conduit Use

Install a separate disconnect switch at the outdoor unit. Use flexible electrical conduit to prevent noise transmission from vibration.

Low Voltage Wiring Guidelines

Color-coded low voltage wire recommended. Table 1 provides maximum wire lengths for 24V circuits.

G. COMPRESSOR START-UP

Initial Compressor Start-Up Procedure

Set thermostat to OFF, apply power for one hour to activate sump heat before setting thermostat to ON to prevent overload.

H. OPERATIONAL AND CHECKOUT PROCEDURES

Overview of Final Installation Checks

Details final operational and checkout procedures to ensure proper system performance after installation.

L. TROUBLESHOOTING

Troubleshooting Chart and Fault Analysis

Provides a chart for diagnosing system faults by checking various refrigerant and electrical circuit components.

SUBCOOLING CHARGING METHOD

Subcooling Charging for Above 55°F Ambient

Subcooling is the recommended method for charging cooling mode above 55°F ambient temperatures.

Stabilization and Measurement Requirements

Operate system for 20 minutes for stabilization. Measure liquid line temperature and pressure at service valves.

Determining Design Subcool and Pressure

Determine total line length/height and unit nameplate design subcool temperature to find target liquid line pressure.

Adjusting Refrigerant Charge

Add or remove refrigerant to match table pressure. Wait 20 minutes between adjustments for system stabilization.

CHECKOUT PROCEDURE

Refrigerant Line Leak Check

Verify that refrigerant lines have been checked for leaks after installation.

Suction Line Insulation Check

Confirm that suction lines and fittings are properly insulated.

Refrigerant Line Securing

Ensure all refrigerant lines are securely fastened and properly isolated.

Masonry Passage Sealing

Verify masonry passages are sealed, preventing mortar contact with copper tubing.

Electrical Connection Tightness

Check all electrical connections for proper tightness.

Outdoor Fan Operation Check

Observe outdoor fan for clearance and smooth operation during its cycle.

Indoor Coil Drain Check

Confirm that the indoor coil drain line is draining freely.

Airflow Path Check

Ensure supply registers and return grilles are open and unobstructed for proper airflow.

Return Air Filter Check

Verify that the return air filter has been installed correctly.

Thermostat Accuracy Check

Check thermostat thermometer accuracy against a reliable thermometer and adjust as needed.

Blower Speed Tap Check

Verify that the correct speed tap is being used for the indoor blower motor.

Complete System Mode Operation

Operate the complete system in all modes to ensure safe and correct operation.

Related product manuals