EasyManua.ls Logo

American Standard CADET 8115F User Manual

American Standard CADET 8115F
8 pages
To Next Page IconTo Next Page
Page #1 background imageLoading...
Page #1 background image
8115F
8115SF
Turn off hot and cold water
supplies before beginning.
CAUTION
Insert FAUCET (1) and CABLE CONNECTOR (2) through center hole
of mounting surface. Fig. A.
From under side of mounting surface thread the two MOUNTING
NUTS (2) onto FAUCET SHANKS (4). Fig. B.
Center FAUCET (1) and hand tighten MOUNTING NUTS (3) to
secure FAUCET (1).
1
Certified to comply with ANSI A112.18.1
Installation
Instructions
Single Control Centerset Lavatory
Faucet
with Speed Connect™ Drain
INSTALL FAUCET
Adjustable Wrench Screwdriver Channel Locks
Recommended tools
Tubing Cutter
Congratulations on purchasing your American Standard faucet with the
Speed Connect Drain, a feature found only on American Standard faucets.
Speed Connect Drain*
• 1/3 of the parts, installs in 1/3 of the time
• No tools needed
• Never needs adjustment
• Guaranteed to seal properly the first time, every time.
*Your new American Standard faucet is designed to work only with the Speed Connect Drain. Helpful tips for
removing your current drain can be found in the Troubleshooting section of these instructions.
To ensure that your installation proceeds smoothly-please read these instructions carefully before you begin.
Fig. A.
Fig. B.
1
Plumbers' Putty or Caulking
Apply a bead of putty along the edge of the underside of the FAUCET (1).
(HAND TIGHTEN)
3
1
2
4
3
PUTTY
M968797 Rev.1.8
TM
Question and Answer IconNeed help?

Do you have a question about the American Standard CADET 8115F and is the answer not in the manual?

American Standard CADET 8115F Specifications

General IconGeneral
Product TypeToilet
Bowl ShapeElongated
Gallons Per Flush1.6
MaterialVitreous China
ColorWhite
ADA CompliantNo
Flush TypeGravity
Water Consumption1.6 gallons per flush (gpf)
Rough-In Size12 inches
Trapway Size2 inches

Summary

INSTALL FAUCET

Insert Faucet and Connector

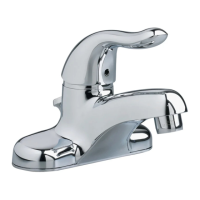
Insert faucet and cable connector through the center hole of the mounting surface.

Thread Mounting Nuts

Thread two mounting nuts onto the faucet shanks from under the mounting surface.

Secure Faucet

Center the faucet and hand-tighten mounting nuts to secure it in place.

INSTALL POP-UP DRAIN ASSEMBLY

MAKE WATER SUPPLY AND WASTE CONNECTIONS

Connect Water Supply Lines

Connect water supply to inlet shanks using flexible supplies or bull-nose risers.

Connect Hot and Cold Water

Connect hot water to left shank and cold water to right shank using sealant.

Connect Tailpiece to P-Trap

Connect the 1-1/4" O.D. tailpiece on the pop-up drain to the "p" trap.

TEST INSTALLED FITTING

Test Water Supply Connections

Turn on water supplies with handle off, check connections for leaks, ensure aerator is tight.

CHECK DRAIN CONNECTIONS

Test Drain Stopper Seal

Operate pop-up knob, fill sink, check stopper seal and retain water.

SERVICE AND TROUBLESHOOTING

Faucet Drip Resolution

Steps to address a dripping faucet, including operating handle and checking cartridge.
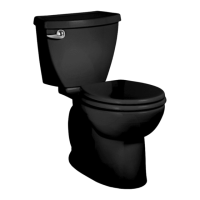
Related product manuals