Do you have a question about the American Standard Green Tea 7010.801 and is the answer not in the manual?
| Category | Toilet |
|---|---|
| Brand | American Standard |
| Collection | Green Tea |
| Model Number | 7010.801 |
| Bowl Shape | Elongated |
| Gallons Per Flush | 1.6 |
| Material | Vitreous China |
| Rough-In Size | 12 inch |
| Bowl Height | 16.5 inches |
| Water Consumption | 1.6 gallons |
| Color | White |
| ADA Compliant | Yes |
| Flush Type | Gravity |
| Flush Valve Size | 2 inch |
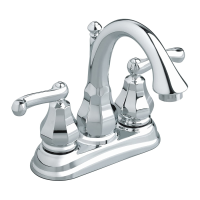
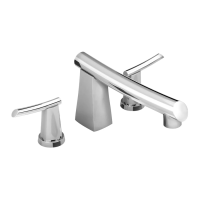
Insert SPOUT, CABLE CONNECTOR, SPOUT HOSE through center hole.
Assemble RUBBER WASHER and LOCKNUT onto SPOUT SHANK.
Use 1/2" IPS FLEXIBLE SUPPLIES or 3/8" 0.D. BULL-NOSE RISERS.
Use sealant, connectors, and COUPLING NUTS for supply lines.
Connect PULL-OUT HOSE to TEE and attach WEIGHTS to HOSE.
Push ADAPTER onto VALVE STEM, align correctly, and tighten SCREW.
Align LEVER HANDLE ASSEMBLY teeth and push onto ADAPTER.
Turn on WATER SUPPLIES and inspect all connections for leaks.
Operate HANDLES to flush lines, then re-install AERATOR.
Adjust cable for proper stopper lift and drain function.
Steps for safely removing the drain stopper.
Install stopper in Locked (vandal-proof) or Unlocked mode.