28 US/50 User's Guide
Part 5
QuickConnect Transducer Cable System (Optional Feature)
The “QuickConnect System” enables the practitioner to quickly and easily replace
the transducer cable in the office or clinic. Only transducer cables equipped with
the Amrex “QuickConnect System” may be replaced in this manner.
To REMOVE the Cable from the Transducer Handle:
1. Verify that the Power/Timer knob is turned counterclockwise to the Off position.
Reduce the Ultrasound Intensity control to "0" position and thoroughly clean
the transducer faceplate before placing the transducer in the transducer cradle.
2. Set all three Internal Power switches (Ultrasound, Stimulator and
Combination) to the up (off) position.
3. Disconnect the assigned ultrasound transducer from the generator's Ultrasound
Output Transducer Connector and remove the handle from the transducer cradle.
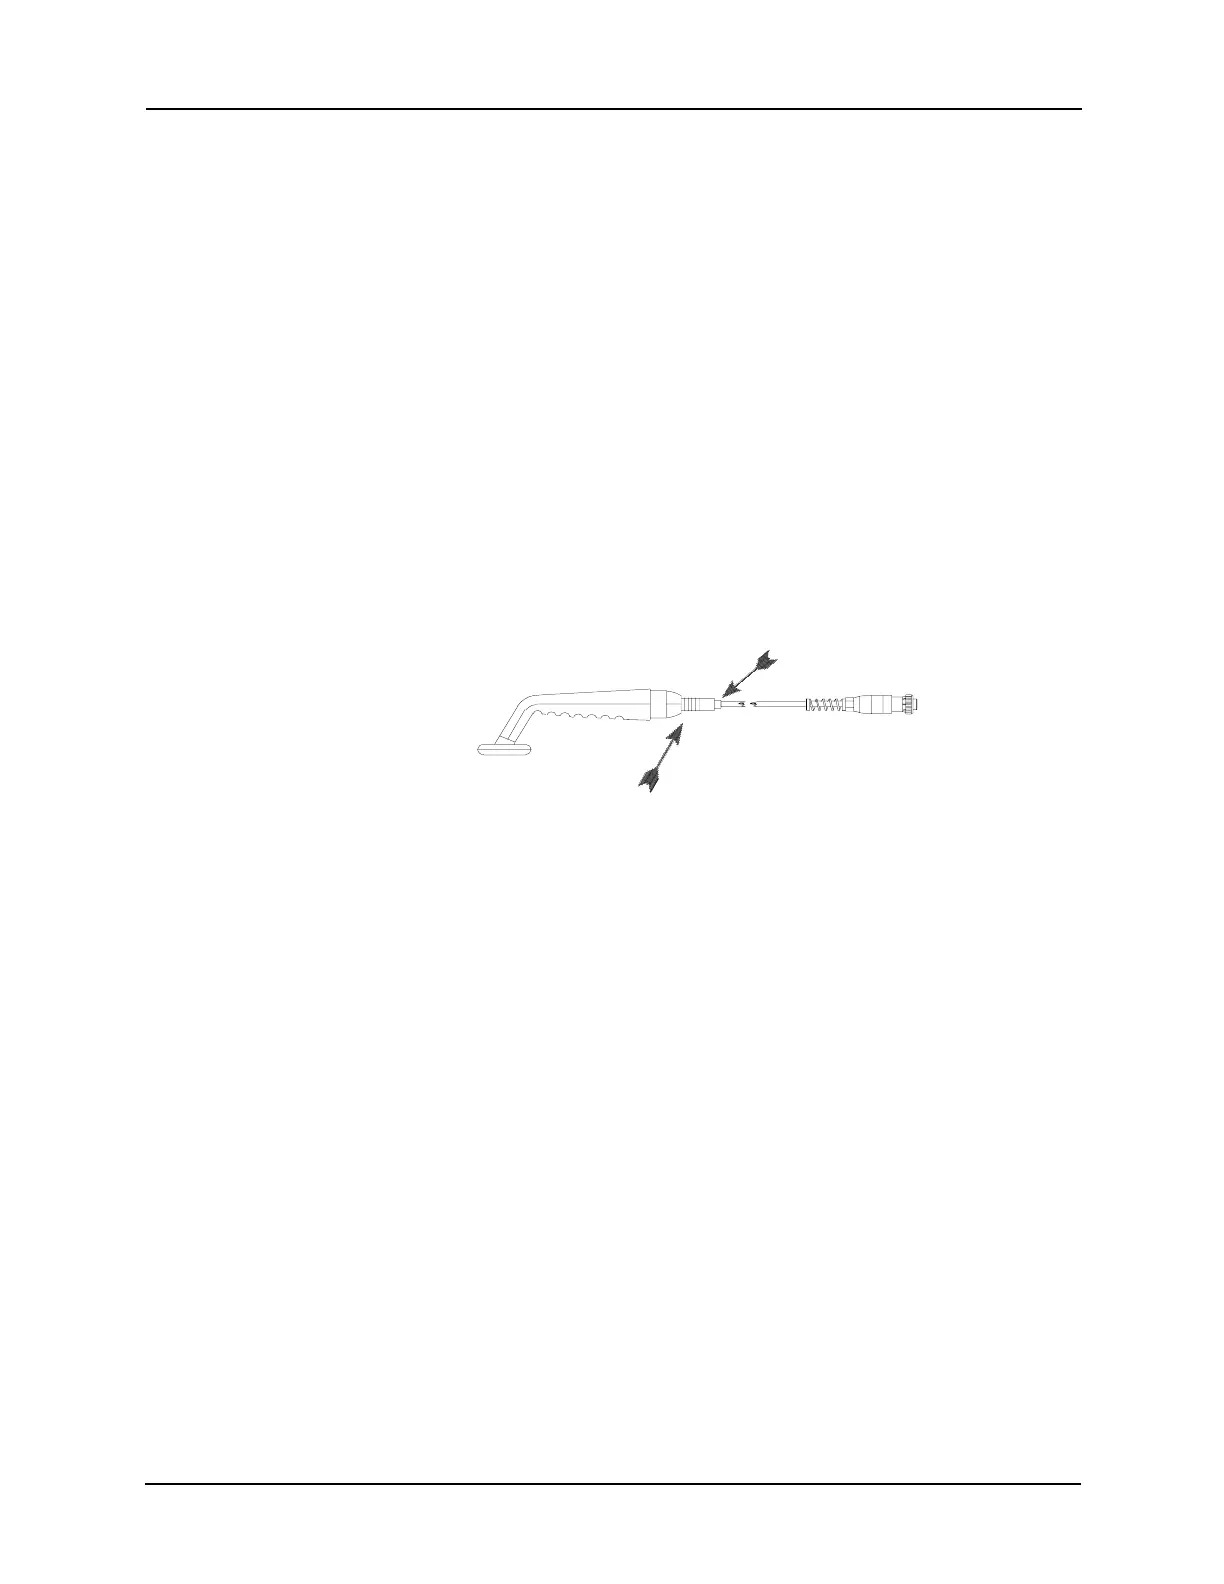
4. Firmly squeeze the rubber boot and pull away from the transducer handle.
To INSTALL the Cable:
5. Slide the rubber boot down the replacement cord to expose the connector.
6. Grip the metal ring lined area of the connector and firmly push it into the
transducer handle. A snap sound will indicate proper installation.
7. Slide the rubber boot up the cord, over the connector and into the transducer
handle.
Note: The QuickConnect cable must be properly connected to the
transducer handle before immersion in water.
8. Connect the assigned ultrasound transducer to the generator's Ultrasound
Output Transducer Connector and place the handle in the transducer cradle.
To order a “QuickConnect System" cable replacement, telephone Amrex Customer
Service at (800) 221-9069 and refer to Amrex Part Number P27-DCA.
To upgrade your unit to include the “QuickConnect System,” send the transducer
and the generator with your request for Amrex Part Number P2-RETRO, to
Amrex, 641 East Walnut Street, Carson, California 90746.
Firmly squeeze
Rubber boot