© 2016 Harman. All rights reserved. NetLinx, AMX, AV FOR AN IT WORLD, HARMAN, and their respective logos are registered trademarks of
HARMAN. Oracle, Java and any other company or brand name referenced may be trademarks/registered trademarks of their respective companies.
AMX does not assume responsibility for errors or omissions. AMX also reserves the right to alter specifications without prior notice at any time.
The AMX Warranty and Return Policy and related documents can be viewed/downloaded at www.amx.com.
3000 RESEARCH DRIVE, RICHARDSON, TX 75082 AMX.com | 800.222.0193 | 469.624.8000 | +1.469.624.7400 | fax 469.624.7153
AMX (UK) LTD, AMX by HARMAN - Unit C, Auster Road, Clifton Moor, York, YO30 4GD United Kingdom • +44 1904-343-100 • www.amx.com/eu/
Last Revised: 6/09/2016
Working With the Wizard
1. Before using the Wireless Setup wizard, obtain and enter the following
information to complete the configuration:
• Language: Pick the language you prefer to use in the WebUI application from the
drop-down list. (This is separate from OS/System or browser language settings.)
• Ge n e r a l : Create a unique Name for the NXA-WAPZD1100. Use only letters and
numbers for the name. Choose the country code.
• Management IP: If you select DHCP, you must connect your NXA-WAPZD1100 to
the local network via one of the Ethernet ports. The wizard will display the IP
address it acquires from the local network. Write this down, as you will need it
later. If you selected Manual, then enter the required network settings in the
(now) active text fields.
NOTE: The NXA-WAPZD1100’s default IP address is 192.168.0.2, with a network
mask of 255.255.255.0. The NXA-WAPZD1100 is shipped with its default IP address
settings as “DHCP”, but if it is installed outside of a DHCP network, the device will
revert to the default IP address.
• Wireless LANs: Enter the network name (ESSID). If you choose WPA-PSK for
security, enter a secure Passphrase for your WLAN. (Make a note of the
passphrase, as some users may need it when connecting their clients.)
• Guest WLAN (optional): click the check box to create a Guest WLAN in
addition to the corporate WLAN, then enter the name of the Guest WLAN.
• Administrator: Set up both the “admin” account, and the first network user
account (representing you as the administrator).
NOTE: The user name and password can be any combination of letters and
numbers, plus underscores or hyphens.
2. Review the wizard Confirmation entries. If you need to make a correction, click
Back until the appropriate setup screen appears, then make the changes.
3. When the wizard Finish screen appears, note the instructions, including the IP
address now assigned to the NXA-WAPZD1100.These will enable you to log into
the newly-configured XA-WAPZD1100.
NOTE: Complete information on other configuration, management and trouble-shooting
options is available through the NXA-WAPZD1100 Operation Reference Guide, available
at www.amx.com.
Connecting NXA-WAP1000s to Your LAN
To connect the NXA-WAP1000s to the Local Area network:
1. Distribute the NXA-WAP1000s around your worksite, making sure they are 100 to
200 feet apart to ensure the best coverage.
2. Record each WAP’s Ethernet MAC address (printed on the bottom of every WAP),
and note each devices’ exact worksite location.
3. Connect each NXA-WAP1000 to an Ethernet port. When the NXA-WAP1000s have
powered up, they will automatically discover the NXA-WAPZD1100.
Accessing the NXA-WAPZD1100’s Command Line Interface
Aside from using the NXD-WAPZD1100’s Browser-Based Configuration Pages, you can
also perform many management and configuration tasks using the NXD-WAPZD1100’s
Command Line Interface (CLI) by connecting directly to the Console port.
To access the NXD-WAPZD1100 CLI:
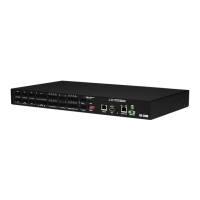
1. Connect an admin PC to the NXD-WAPZD1100 Console port (FIG. 1), using a DB-9
serial cable.
2. Launch a terminal program, such as Hyperterminal, PuTTy, etc. (FIG. 2)
3. Enter the following connection settings:
• Bits per second: 115200
• Data bits: 8
• Parity: None
• Stop bits: 1
• Flow control: None
4. Click OK or Open to connect (depending on your terminal client).
5. At the Please Login prompt, enter the admin login name (default: admin) and
password (default: admin).
You are now logged into the NXA-WAPZD1100 with limited privileges. As a user with
limited privileges, you can view a history of previously executed commands and ping a
device. If you want to run more commands, you can switch to privileged mode by
entering enable at the root prompt.
To view a list of commands that are available at the root level, enter help or ?.
FIG. 2
CONFIGURING A TERMINAL CLIENT

 Loading...
