ADM, HBOT & Sub Aspida
User Manual Int. Approved
Document ref: PSA-811-14 June 2017 Page 33 of 43
Copyright © 2017 Analox Ltd. All Rights Reserved.
Commercial in Confidence
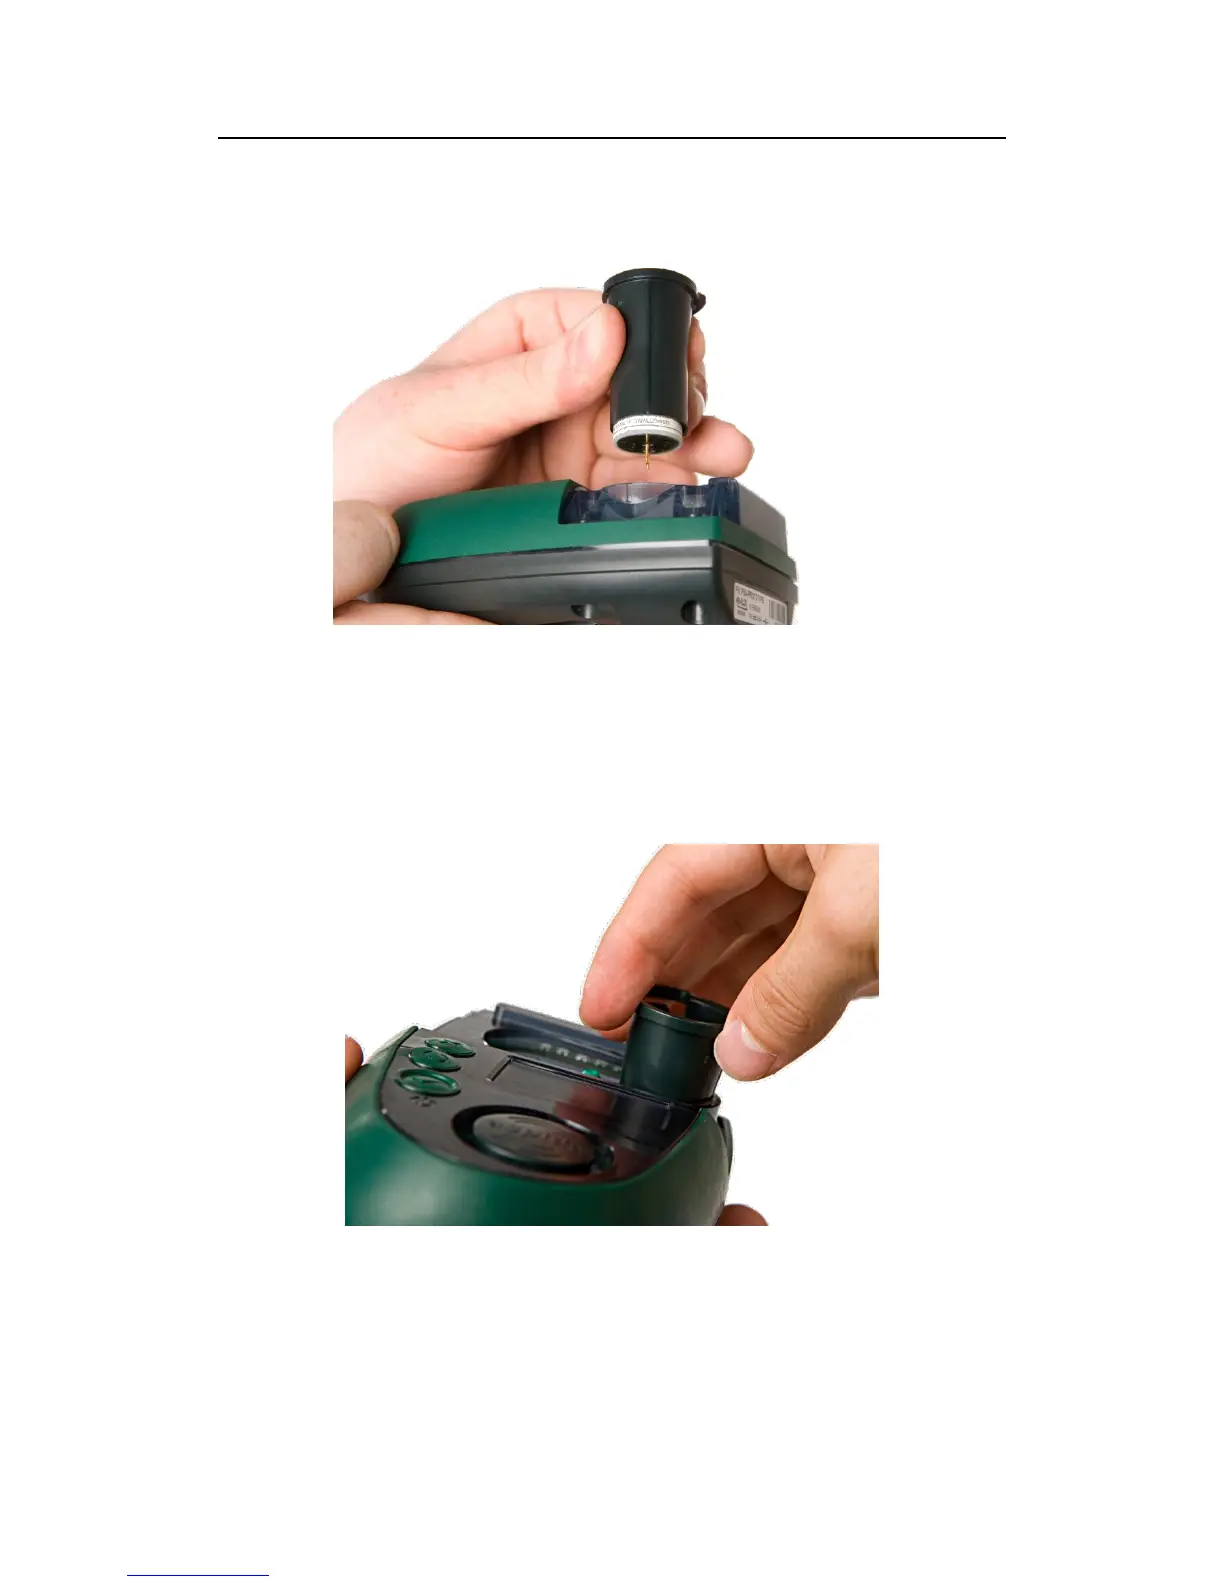
11) Align the extraction tool rib with the Aspida case alignment mark as in step 4 as shown in
Figure 25
Figure 25 - Align the new sensor with the Aspida device
12) Push the tool and sensor gently downwards into the case until the sensor locates firmly within
its socket.
13) Hold the top ring of the extraction tool gently, without squeezing the grip (Figure 26) and lift
the tool vertically upwards to remove the extraction tool whilst leaving the new sensor in
place. (A gentle twisting of the tool may help to separate the tool from the sensor).
Figure 26 - Remove the extraction tool