
M
Maureen SchultzAug 2, 2025
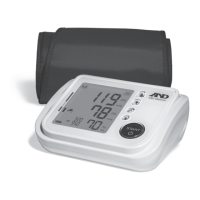
What to do if the cuff of AND tm-2655p will not inflate?
- EEric MillerAug 2, 2025
If the cuff won't inflate, it might be because the arm cuff cover is installed too tightly. Re-install the cover.
What to do if the cuff of AND tm-2655p will not inflate?
If the cuff won't inflate, it might be because the arm cuff cover is installed too tightly. Re-install the cover.
Why AND Blood Pressure Monitor won't measure and shows error?
The device may not measure (and display 'Eerr') for several reasons: * Ensure your arm is at heart level, and that you are relaxed and still during the measurement. * Avoid moving your arm during the measurement; relax and remain still. * Remove any thick jacket, as it may cause a faint pulse, leading to a measurement error. * If you have a very weak or irregular heartbeat, the device may struggle to determine your blood pressure.
What to do if nothing appears on the AND tm-2655p display?
If nothing appears on the display, even when the power is on: * Check if the power cable is properly connected; if not, connect it correctly. * Examine the fuses; if they have burned out, replace both with new ones of the correct size (5x20mm) and rated voltage/current as specified on the rear panel.
How to fix AND tm-2655p when printer doesn't print?
If the printer is not printing, consider the following: * Ensure printer paper is installed correctly. * Check if the printer head is up; if so, lower the lever to lock the printer paper in position. * Verify the printer paper is inserted straight and not jammed. * Confirm that the printer setting is correct.
Explains meanings of Warning, Caution, and Note symbols used in the manual.
Device meets EU medical product and EMC standards, indicated by CE mark.
Device meets Australian EMC standards, evidenced by C-Tick label.
Specifies suitable locations for device operation.
Guidance on grounding and fuses for electrical safety.
Actions for device failure, liquid spills, and emergency stops.
Advice on interpreting measurements and stopping operation.
Recommendations for regular device checks and upkeep.
Precautions for installation, storage, and checks before operation.
Safety during operation and procedures after use.
Instructions for proper disposal of the device and its components.
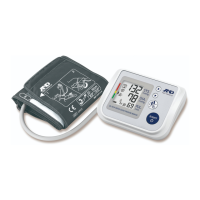
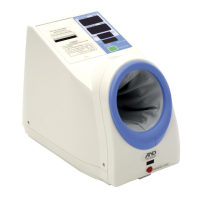
Highlights compact design, automatic cuff, printer, clock, counter, and safety system.
Details the automated cuff inflation and deflation process.
Explains the printing capabilities specific to the TM-2655P model.
Identifies and labels the major components of the main device unit.
Identifies switches, connectors, and openings on the rear panel.
Explains the meaning of various symbols used on the device and in the manual.
Conditions for ideal device installation like temperature and humidity.
Instructions for placing on a stable surface and adjusting height for measurement.
Steps to connect the device to an electrical outlet.
How to turn on the device and interpret initial displays.
Instructions for posture, arm insertion, and jacket removal.
Steps to start measurement, cuff pressurization, and deflation.
What happens after measurement, showing results and printer output.
How to stop, emergency actions, and waiting periods.
Instructions on how to enter the clock setting mode.
A practical guide with an example for setting the clock.
Steps for cutting, loading, and feeding the printer paper.
How to close and secure the printer cover after paper installation.
Specs, pinout, and available connections for Channel 1.
Technical parameters and pinout for Channel 1 communication.
Specs, pinout, and available connections for Channel 2.
Technical parameters and pinout for Channel 2 communication.
Instructions for safely replacing the fuses.
How to check and reset the device usage counter.
Precautions for device upkeep and professional service.
Guidelines for cleaning the housing, display, and arm cuff.
Solutions for issues related to no power or display problems.
Troubleshooting steps for cuff inflation and measurement failures.
Solutions for problems encountered with the printer.
| Brand | AND |
|---|---|
| Model | tm-2655p |
| Category | Blood Pressure Monitor |
| Language | English |