Step 2a: Nursery Unit - Installation
1. Remove the battery cover (by removing the 2 screws) on the bottom of the Nursery Unit
and insert 3 x AAA regular batteries (not included) into the battery compartment (for battery
backup in case of power failure).
ALWAYS MAKE SURE TO CHECK IF THE BATTERIES ARE INSERTED CORRECTLY!
2. Connect the AC adaptor to the Nursery Unit and plug the adaptor into the mains in the baby’s
room
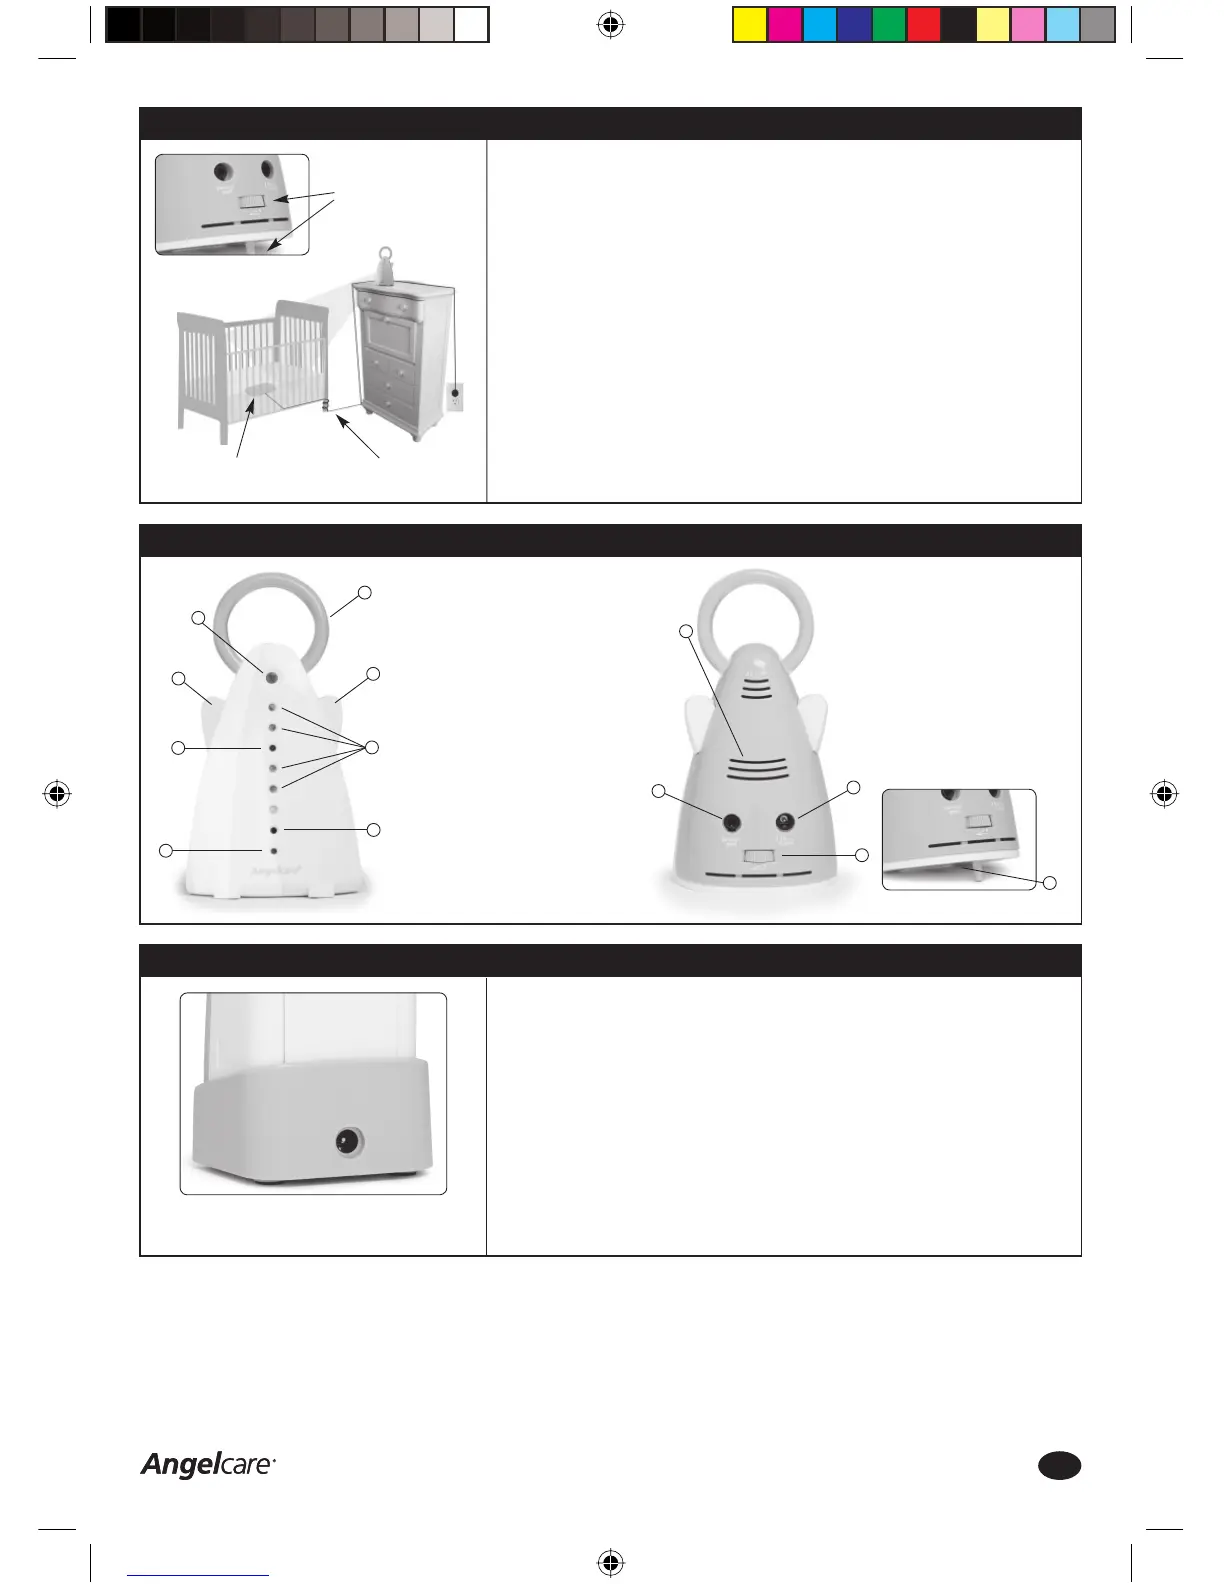
3. Place the Nursery Unit at least 50cm from the baby’s bed on a higher level to ensure the video
camera can capture the baby’s bed. If necessary, a tripod (not included) can be connected to
the bottom of the Nursery Unit.
4. If necessary, adjust the vertical angle of the camera by turning the dial on the back of the
Nursery Unit
5. Connect the plug of the SensorPad into the dedicated socket on the back of the Nursery Unit
6. If two Angelcare Baby Monitors are used in the same room, please ensure there is at least 1
metre between both Nursery Units
7. Push back and hold the LEFT WING of the Nursery Unit for 2 seconds to turn ON the Nursery
Unit
• Position the Nursery
Unit facing the cot bed
• Dial to adjust vertical
camera angle
SensorPad
Secure the SensorPad
cord
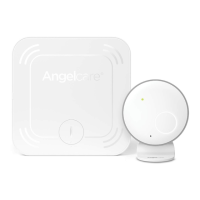
Step 2b: Nursery Unit - Overview Functions
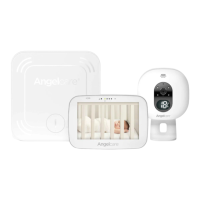
Step 3a: Parent Unit – Installation
1. The Parent Unit is portable and fully rechargeable
2. Remove the belt clip to remove the battery cover (by removing the single screw) on the back
of the Parent Unit and insert 3 x AAA NIMH rechargeable batteries (included) into the battery
compartment. NEVER USE REGULAR ALKALINE BATTERIES as these batteries are not suitable
and might explode
ALWAYS MAKE SURE TO CHECK IF THE BATTERIES ARE INSERTED CORRECTLY!
3. Connect the AC adapter to the charger and plug the adapter into the mains
PLACE THE PARENT UNIT IN THE CHARGER AND CHARGE THE BATTERIES FOR 16 HOURS
BEFORE FIRST USE!
4. Place the charger in a convenient place in your home, e.g. your living room. The maximum
distance between the Parent Unit and the Nursery Unit is approx. 100 metres indoors and 200
metres outdoors
Location of battery compartment
and AC adaptor socket
Location of the
Nursery Unit
FRONT
1. Nightlight
2. PUSH button for HOLD Function
3. Power ON/OFF
4. Nightlight ON/OFF
5. Video Camera
6. Power Indicator:
Green – Power
Red – Low Battery Indicator
7. Microphone
8. Infrared LED’s for Night Vision
1
4
2
3
5
7
6
8
BACK
9. Loudspeaker
10. SensorPad socket
11. AC adaptor socket
12. Dial to adjust vertical camera angle
13. Battery compartment
9
12
11
10
13
Consumer Helpline: 0845 009 1789 | www.angelcare-uk.co.uk
3
AC1100_Manual.indd 3AC1100_Manual.indd 3 19/5/11 2:38:58 pm19/5/11 2:38:58 pm