6
middle if needed but never outwards to the screw grooves of both ends.
NOTE: Make sure the meat or chicken is not too large to rotate freely in the oven. Maximum 1KG.
For a batter cooking experience, use yarn to tie the chicken to make sure enough space for
rotation.
➢ To install the rotisserie fork set, put the cuboid end into the hole on the left side, put another side
onto the rotating shelf on the right side.
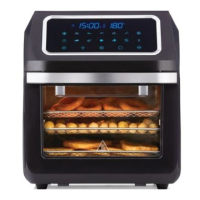
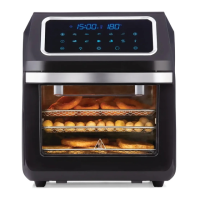
Rotisserie Basket
➢ Great for fries, roasting nuts and other snacks.
➢ Use the hasp to open and lock the rotisserie basket.
➢ To install the rotisserie basket, put the cuboid end into the hole on the left side, put another side onto
the rotating shelf on the right side.
Fetch Tool
➢ Used to remove the rotisserie basket or fork set from the appliance.
➢ Place the fetch tool under the shaft at both side of the rotisserie basket or fork set,then gently
extract the rotisserie basket or fork set out.
Drip Tray
➢ Cook with the drip tray for easy clean ups.
➢ Put the drip tray into the bottom of the appliance when in use. It is easy to take out for cleaning.
Door
➢ The door is detachable for easy cleaning.
➢ Open the door at a 30
o
angle from the appliance and gently put on or take off the door.
➢ The appliance will not work with the door open.