Do you have a question about the anko BFT1803R and is the answer not in the manual?
This document is a user manual for the Anko Tower Fan, Model No.: BFT1803R. It provides comprehensive instructions for the safe operation, assembly, and maintenance of the appliance.
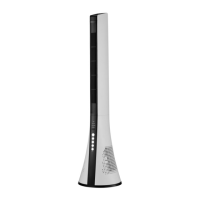
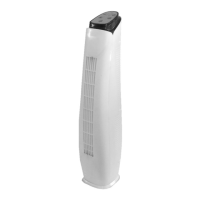
The Anko Tower Fan is designed to provide cooling airflow within a household environment. It operates as a standalone fan, circulating air to create a more comfortable indoor climate. The fan features multiple wind modes and speed settings, allowing users to customize the airflow to their preference. It also includes an oscillating function to distribute air across a wider area and an auto-off timer for convenient, power-saving operation. The fan can be controlled directly via a control panel on the unit or remotely using an included remote control.
Before first use, the tower fan requires minor assembly. The Tower Top needs to be attached to the Tower Bottom. This involves placing the Tower Bottom on a flat, stable surface, then aligning and lowering the six hooks of the Tower Top into the corresponding holes on the Tower Bottom. The user may need to apply a small amount of force to ensure the two halves align tightly. Once aligned, the Tower Top should be slid forward until the front and back faces are flush. Tapping the Tower Top with the palm of the hand while bracing the Tower Bottom's front face helps to fully assemble the unit. It is crucial to ensure the product is fully assembled before plugging it into an electrical outlet.
To operate the fan, insert the plug into a standard electrical power point and switch it on. The "Nor." indicator light on the front panel will illuminate red, signifying that power is supplied and the unit is in Standby Mode. To turn the fan on, press the On/Off button on the control panel or the corresponding button on the remote control. The red Standby indicator light will turn off, and a blue indicator light will illuminate. The fan will initially start with a "Mid" fan level but will then switch to "Low" fan speed and "Nor" (Normal) fan mode, which is the default setting. To turn the fan off, press the On/Off button on either the control panel or the remote control.
The fan offers multiple speed settings: Low, Mid, and Hi. To increase the fan speed, press the "Speed" button on the control panel or the corresponding button on the remote control. Each press will cycle through the speeds, increasing it from Low to Mid, then to Hi. Pressing the button again after "Hi" will cycle the speed back to "Low."
The tower fan includes a swing function to distribute air over a wider area. While the fan is in operation, press the "Swing" button on the control panel or the corresponding button on the remote control to activate the oscillating movement. The tower will begin to swing from side to side. To stop the swing function or to fix the fan in a set position, press the "Swing" button again.
The fan offers three distinct wind modes: Normal, Natural, and Sleep, allowing for varied airflow experiences. To cycle through these modes, press the "MODE" button on the control panel. Alternatively, on the remote control, there are dedicated buttons for Normal Mode, Natural Mode, and Sleep Mode.
This power-saving feature allows the user to set a specific time for the fan to automatically turn off. To activate the timer, press the "TIMER" button on the control panel or the corresponding button on the remote control. The timer will advance in 0.5-hour increments, starting from 0.5h, and can be set up to a maximum of 7.5 hours. The set time is indicated by the sum of illuminated indicator lights on the control panel (e.g., if the 0.5h, 2h, and 4h lights are on, the total timer setting is 6.5 hours). To turn off the timer or reset it to a new time, continue pressing the "TIMER" button until no time lights are illuminated, cycling the timer back to its off state.
The fan comes with a remote control for added convenience. The remote control duplicates all the functions available on the fan's control panel. It requires 2 x AAA batteries (not included). To install batteries, slide down the battery cover on the back of the remote, lift it off, insert the batteries matching the polarity icons, and then securely refit the cover. It is important not to mix new and old batteries or different types of batteries. To prevent corrosion, batteries should be removed if the remote control will not be used for an extended period. For effective operation, point the remote control directly at the fan's control panel, as this is where the receiver is located.
The manual emphasizes several safety instructions. The appliance should always be operated on a flat, level, steady, and stable surface to prevent overturning. It should not be used by persons with reduced physical, sensory, or mental capabilities, or lack of experience and knowledge, unless supervised. Children should be supervised to ensure they do not play with the appliance or packaging materials. The appliance should not be disassembled, as there are no user-serviceable parts inside. It is crucial to keep the appliance dry and not immerse it in water or other liquids, or use it near sinks, baths, or showers. The power supply lead should be positioned to avoid being walked on or pinched. The fan is intended for household use only and should not be used outdoors or in oily/dirty areas where air vents could become blocked. It should not be operated if dropped or if any part, including the cord or plug, is damaged. If the supply cord is damaged, it must be replaced by qualified persons. Accessories not intended for use with the appliance should be avoided. The unit should not be installed near heat sources, on uneven surfaces, or where it could be exposed to direct sunlight, excessive dust, or mechanical vibrations. A minimum clearance of 300mm around the sides, back, front, and top of the appliance must be maintained. Curtains or other items should not drape across the appliance or its openings. Fingers or other objects should never be inserted through the fan guard or ventilation openings. The appliance should be unplugged during lightning storms or when unused for long periods.
Regular cleaning is recommended to maintain the fan's performance and longevity. Before cleaning, always ensure the unit is turned off and unplugged from the power outlet. The body assembly of the fan can be cleaned using a clean, damp cloth, and then wiped dry. It is critical never to spray liquids directly onto the fan or submerge it in water or any other liquid. Flammable liquids, harsh chemicals, abrasive creams, steel wool, or scouring pads should not be used for cleaning, as these can damage the appliance. Any servicing beyond ordinary cleaning should only be performed by a qualified electrical person.
When the fan is not in use for an extended period, it should be properly stored. First, switch off and unplug the unit. The power cord can be neatly coiled and stored within the base of the Tower fan. Care should be taken not to kink or pull the cable tightly during storage. The fan should then be stored in a cool, dry, and well-ventilated area to protect it from damage and dust accumulation.
| Brand | anko |
|---|---|
| Model | BFT1803R |
| Type | Pedestal Fan |
| Power | 45W |
| Voltage | 220-240V |
| Frequency | 50Hz |
| Speed Settings | 3 |
| Oscillation | Yes |
| Tilt Adjustment | Yes |
| Height Adjustment | Yes |
| Blade Size | 18 inches |