Control Modes
Timer mode
• Continuous mode
One Antari (Timer mode and Continuous mode)
01) Fasten the effect light to a firm trussing. Leave at least 0,5 meter on all sides for air circulation.
02) Plug the end of the electric mains power cord into a proper electric power supply socket.
03) When the Antari is not connected with a DMX cable, it functions as a stand-alone device.
Please see pages 12-14 for more information about Timer mode and Continuous mode.
Multiple Controllers (DMX Control)
01) Fasten the effect light to a firm trussing. Leave at least 0,5 meter on all sides for air circulation.
02) Always use a safety cable (ordercode 70140 / 70141).
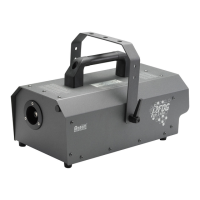
03) Use a 5-pin XLR cable to connect the Antari.
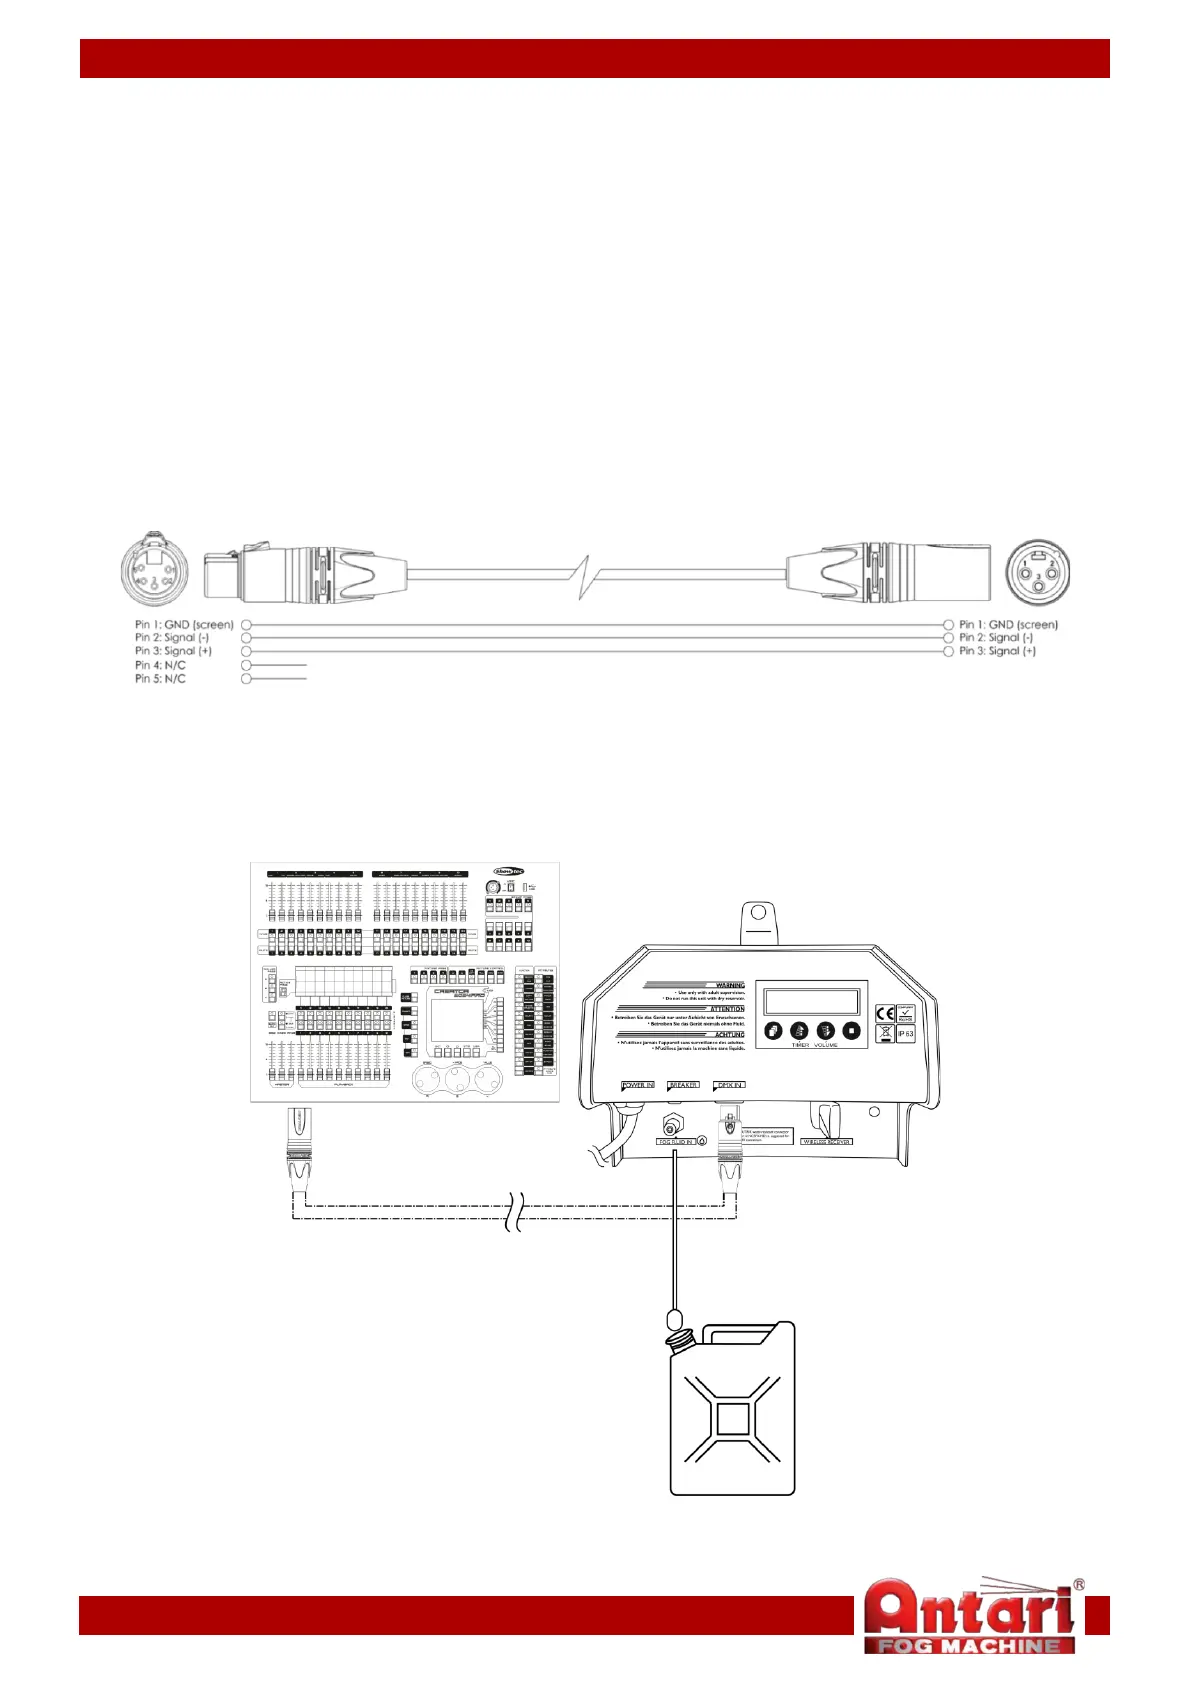
04) Link the units as shown in fig. 06. Connect the unit's DMX "in" socket with the controller's "out" socket,
using a DMX signal cable.
05) Supply electric power: Plug the mains power cord into proper electric power supply socket.
06) Do not supply power before the whole system is set up and connected properly.
Multiple Controllers DMX Set Up
Note : Link all cables before connecting electric power
9