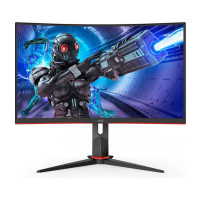
This document serves as the user manual for the AOC C27G3U and C27G3U/BK LCD monitors, providing comprehensive instructions for setup, adjustment, and maintenance.
The AOC LCD monitor is designed to provide a high-quality visual experience, suitable for various applications from general computing to gaming. Its primary function is to display visual output from a connected computer or other video sources, offering users a clear and vibrant image. The monitor supports Adaptive-Sync technology, which helps to eliminate screen tearing and stuttering, providing a smoother gaming experience when paired with compatible graphics cards. This feature is particularly beneficial for fast-paced games, ensuring that the display's refresh rate is synchronized with the graphics card's frame rate.
Usage Features:
The monitor offers a range of features to enhance user experience and adaptability.
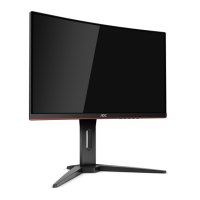
- Physical Adjustments: The monitor stand allows for significant physical adjustments to optimize viewing comfort. Users can adjust the viewing angle, with a tilt range from -5° to 23°, and a height adjustment of up to 130mm. These ergonomic adjustments are crucial for reducing strain during prolonged use. When adjusting the angle, it is important to hold the stand firmly to prevent the monitor from toppling and to avoid pressing on the LCD screen itself, as this could cause damage. The manual explicitly warns against tilting the monitor downward by more than -5 degrees to prevent potential screen damage, such as panel peeling.
- Connectivity: The monitor provides multiple input options to connect to various devices. It includes DisplayPort (DP) and HDMI ports for video input, ensuring compatibility with a wide range of modern graphics cards and devices. Additionally, it features USB 3.2 Gen1 ports, including one with charging capabilities, and an earphone jack for audio output. These connectivity options make the monitor versatile for different setups, allowing users to connect peripherals directly to the monitor for convenience.
- On-Screen Display (OSD) Settings: The OSD menu is the primary interface for configuring the monitor's display settings. It is accessed via dedicated hotkeys located on the monitor's bezel.
- Hotkeys: The monitor features five hotkeys: Source/Exit, Game Mode/<, Dial Point/>, Menu/Enter, and Power.
- The Power button turns the monitor on and off.
- The Menu/Enter button displays the OSD and confirms selections. Holding it for about 2 seconds turns off the monitor. It also serves as part of the OSD lock/unlock function.
- Game Mode/< allows users to quickly switch between various game modes (FPS, RTS, Racing, Gamer 1, Gamer 2, Gamer 3), each optimized for different game types.
- Dial Point/> toggles the display of a crosshair on the screen, a feature often used in first-person shooter games.
- Source/Exit functions as a hotkey for input source selection when the OSD is closed. When the OSD is closed, pressing it continuously for about 2 seconds performs an auto-configure function (for models with D-Sub, though this model primarily uses DP/HDMI).
- OSD Menu Navigation: The OSD is navigated using the hotkeys. Users press the Menu-button to activate the OSD, then use the < or > keys to browse functions. Pressing Menu-button again activates a highlighted function, and < or > keys adjust its settings. The AUTO-button (often the Source/Exit button in this context) is used to exit the OSD.
- Luminance Settings: This section allows adjustment of Contrast, Brightness, Eco mode, Gamma, DCR (Dynamic Contrast Ratio), and HDR Mode.
- Contrast and Brightness control the overall luminosity and distinction between light and dark areas.
- Eco mode offers preset modes like Standard, Text, Internet, Game, Movie, Sports, and Reading, each optimizing the display for specific content.
- Gamma adjusts the tone response curve, with options for Gamma1, Gamma2, and Gamma3.
- DCR can be enabled or disabled to dynamically adjust contrast based on screen content.
- HDR Mode provides settings for HDR Picture, HDR Movie, and HDR Game. It's important to note that when HDR Mode is active, Contrast, Eco Mode, and Gamma settings cannot be adjusted.
- Color Setup: This menu allows fine-tuning of color temperature and DCB (Dynamic Color Boost) modes.
- Color Temp. offers Warm, Normal, Cool, sRGB, and User-defined settings. The User mode allows individual adjustment of Red, Green, and Blue gains.
- DCB Mode includes Full Enhance, Nature Skin, Green Field, Sky-blue, Auto Detect, and OFF. These modes enhance specific color ranges for a more vivid display. DCB Demo is also available to showcase the effect of DCB.
- Picture Boost: This feature allows users to highlight a specific area of the screen with enhanced brightness and contrast. Settings include Bright Frame (on/off), Frame Size, Brightness, Contrast, H. position, and V. position for the boosted frame. Similar to HDR Mode, when HDR Mode is active, Picture Boost settings cannot be adjusted.
- OSD Setup: This section configures the OSD itself, including Language, Timeout (duration the OSD remains on screen), DP Capability (1.1/1.2), H. Position, V. Position, Volume, Transparence, Break Reminder, and USB power settings. The Break Reminder feature alerts users after continuous work for more than one hour, promoting breaks.
- Game Setting: This menu is dedicated to gaming-specific enhancements.
- Game Mode provides the same presets as the hotkey, optimizing for FPS, RTS, Racing, and three customizable Gamer profiles.
- Shadow Control allows adjustment of dark area visibility without affecting other parts of the image, helping players spot enemies in dark corners.
- Overdrive adjusts the response time of the pixels, with options like Weak, Medium, Strong, and Boost, to reduce motion blur.
- Game Color adjusts color saturation for a more vibrant gaming experience.
- LowBlue Mode reduces blue light emission, offering modes like Reading/Office, Internet, and Multimedia, to reduce eye strain.
- MBR (Motion Blur Reduction) helps to reduce blur in fast-moving scenes.
- Adaptive-Sync can be turned On/Off.
- Frame Counter displays the vertical frequency (FPS) on the screen.
- Note that MBR and Overdrive Boost are only available when Adaptive-Sync is off and the vertical frequency is up to 75 Hz.
- Extra: This menu includes Input Select, Off Timer, Image Ratio (Wide/4:3), DDC/CI (on/off), and Reset options. The Reset option restores all OSD settings to their factory defaults.
- Plug and Play (DDC2B): The monitor supports VESA DDC2B, allowing it to communicate its identity and display capabilities to the connected host system, simplifying setup and configuration.
Maintenance Features:
Proper maintenance ensures the longevity and optimal performance of the monitor.
- Cleaning: The cabinet should be cleaned regularly with a soft cloth and a soft detergent to remove stains. Strong detergents should be avoided as they can damage the cabinet. When cleaning, care must be taken to prevent liquid from leaking into the product. The cleaning cloth should not be too rough to avoid scratching the screen surface. Crucially, the power cord must be disconnected before cleaning the product to prevent electric shock.
- Installation and Placement:
- The monitor should be placed on a stable surface (cart, stand, tripod, bracket, or table) recommended by the manufacturer.
- Adequate ventilation is essential. The manual recommends leaving at least 4 inches (10cm) of space around the sides and top, and 12 inches (30cm) at the back, to prevent overheating, which could lead to fire or damage.
- Objects should never be pushed into the monitor's slots, nor should liquids be spilled on it, as this can cause fire or electric shock.
- The front of the product should not be placed on the floor.
- For wall mounting, an approved mounting kit and adherence to the manufacturer's instructions are necessary.
- Power Management: The monitor should be operated only from the specified power source. It is equipped with a three-pronged grounded plug for safety; if the outlet does not accommodate this, an electrician should install a correct outlet or an adapter should be used to ground the appliance safely. The monitor should be unplugged during lightning storms or extended periods of non-use to protect against power surges. Overloading power strips and extension cords should be avoided to prevent fire or electric shock. For satisfactory operation, only UL-listed computers with appropriate receptacles (100-240V AC, Min. 5A) should be used. The wall socket should be easily accessible.
- Troubleshooting: The manual includes a troubleshooting section to help users resolve common issues such as the power LED not turning on, no image on the screen, fuzzy pictures, flickering, or color defects. This section guides users through checking cable connections, power supply, video card settings, and OSD adjustments.
- General Safety: If the monitor emits strange smells, sounds, or smoke, the power plug must be disconnected immediately, and a Service Center contacted. Ventilating openings should not be blocked. The monitor should not be subjected to severe vibration or high impact conditions during operation or transportation.