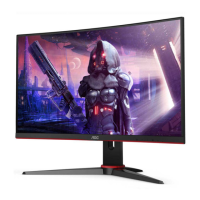
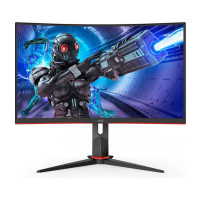
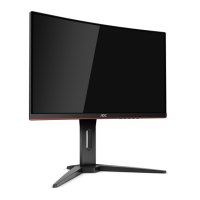
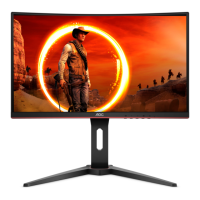
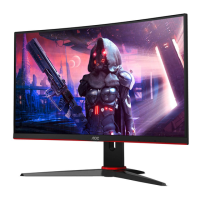
This document is the user manual for the AOC C27G3 LCD Monitor, a display device designed for various computing applications, including gaming.
Function Description
The AOC C27G3 is an LCD monitor primarily used for displaying visual output from a computer or other video sources. It supports multiple input types, including HDMI and DisplayPort (DP), allowing for versatile connectivity with different devices. The monitor is equipped with Adaptive-Sync technology, which helps to synchronize the display's refresh rate with the graphics card's frame rate, reducing screen tearing and stuttering, particularly beneficial for gaming.
The monitor features an On-Screen Display (OSD) menu for adjusting various display settings, including luminance, color, and game-specific enhancements. It also includes hotkeys for quick access to common functions like power, game modes, and input selection.
Important Technical Specifications
Panel:
- Model Name: C27G3
- Driving System: TFT Color LCD
- Viewable Image Size: 68.5 cm diagonal
- Pixel Pitch: 0.3108mm(H) x 0.3108mm(V)
- Display Color: 16.7M Colors
- Horizontal Scan Range: 30k-160kHz (HDMI), 30k-200kHz (DP)
- Horizontal Scan Size (Maximum): 596.736mm
- Vertical Scan Range: 48-144Hz (HDMI), 48-165Hz (DP)
- Vertical Scan Size (Maximum): 335.664mm
- Optimal Preset Resolution: 1920x1080@60Hz
- Max Resolution: 1920x1080@144Hz (HDMI), 1920x1080@165Hz (DP)
Other Specifications:
- Plug & Play: VESA DDC2B/CI
- Power Source: 100-240V~, 50/60Hz, 1.5A
- Power Consumption: Typical (Default brightness and contrast) 29W, Max. (brightness = 100, contrast = 100) ≤ 49W, Standby mode < 0.3W
- Connector Type: HDMI/DP/Earphone out
- Signal Cable Type: Detachable
Environmental Conditions:
- Operating Temperature: 0°~40°
- Non-Operating Temperature: -25°~55°
- Operating Humidity: 10%~85% (non-condensing)
- Non-Operating Humidity: 5%~93% (non-condensing)
- Operating Altitude: 0~5000 m (0~16404ft)
- Non-Operating Altitude: 0~12192m (0~40000ft)
Preset Display Modes (Examples):
- VGA: 640x480@60Hz (31.469 kHz H-Freq, 59.94 Hz V-Freq) up to 640x480@120Hz (60.938 kHz H-Freq, 119.72 Hz V-Freq)
- SVGA: 800x600@56Hz (35.156 kHz H-Freq, 56.25 Hz V-Freq) up to 800x600@120Hz (76.302 kHz H-Freq, 119.972 Hz V-Freq)
- XGA: 1024x768@60Hz (48.363 kHz H-Freq, 60.004 Hz V-Freq) up to 1024x768@120Hz (97.551 kHz H-Freq, 119.989 Hz V-Freq)
- SXGA: 1280x1024@60Hz (63.981 kHz H-Freq, 60.02 Hz V-Freq) up to 1280x1024@75Hz (79.976 kHz H-Freq, 75.025 Hz V-Freq)
- FHD: 1920x1080@60Hz (67.5 kHz H-Freq, 60 Hz V-Freq)
- FHD(HDMI/DP): 1920x1080@144Hz (158.113 kHz H-Freq, 144.001 Hz V-Freq)
- FHD(DP): 1920x1080@165Hz (183.154 kHz H-Freq, 165.003 Hz V-Freq)
Usage Features
Setup and Installation:
The monitor comes with a stand and base that can be easily assembled or removed. It also supports VESA wall mounting, allowing for flexible placement. Users are advised to leave adequate space around the monitor for proper air circulation to prevent overheating.
Adjusting Viewing Angle:
The monitor offers tilt adjustment from -5° to 23° and height adjustment up to 130mm for optimal viewing comfort. Users are cautioned not to touch the LCD screen or press on it while adjusting the angle to prevent damage.
Connectivity:
The C27G3 includes HDMI-1, HDMI-2, DP, Earphone, and Power ports. Users should connect the power cord, then the display signal cable (HDMI or DP) to their computer, and finally plug both the computer and monitor into a power outlet.
Adaptive-Sync Function:
This feature works with both DP and HDMI inputs and is compatible with various AMD Radeon™ graphics cards (RX Vega series, RX 500 series, RX 400 series, R9/R7 300 series, Pro Duo (2016), R9 Nano series, R9 Fury series, and R9/R7 200 series, with some exceptions). Adaptive-Sync helps eliminate screen tearing and stuttering by synchronizing the display's refresh rate with the GPU's frame rate.
OSD Setting (On-Screen Display):
The OSD menu provides comprehensive control over monitor settings.
- Luminance: Adjusts Contrast (0-100), Brightness (0-100), Eco Mode (Standard, Text, Internet, Game, Movie, Sports, Reading), Gamma (Gamma1, Gamma2, Gamma3), DCR (Off, On), and HDR Mode (Off, HDR Picture, HDR Movie, HDR Game). Note that when HDR Mode is active, Contrast, Eco Mode, and Gamma cannot be adjusted.
- Color Setup: Allows adjustment of Color Temp (Warm, Normal, Cool, sRGB, User-defined RGB gains), DCB Mode (Full Enhance, Nature Skin, Green Field, Sky-blue, Auto Detect, OFF), DCB Demo, and individual Red, Green, Blue gains (0-100). When HDR Mode is active, Color Settings cannot be adjusted.
- Picture Boost: Features Bright Frame (on/off), Frame Size (14-100), Brightness (0-100), Contrast (0-100), H. position (0-100), and V. position (0-100) for a specific area of the screen. This feature is also affected by HDR Mode, preventing adjustment when HDR is active.
- OSD Setup: Configures Language, Timeout (5-120 seconds), DP Capability (1.1/1.2), H. Position (0-100), V. Position (0-100), Volume (0-100), Transparence (0-100), and Break Reminder (on/off).
- Game Setting: Offers various game modes (FPS, RTS, Racing, Gamer 1, Gamer 2, Gamer 3, off), Shadow Control (0-100), Overdrive (Weak, Medium, Strong, Boost, Off), Game Color (0-20), LowBlue Mode (Reading/Office, Internet, Multimedia, Off), MBR (0-20), Adaptive-Sync (On/Off), and Frame Counter (Off/Right-up/Right-Down/Left-Down/Left-Up). MBR and Overdrive Boost are only available when Adaptive-Sync is off and the vertical frequency is up to 75 Hz.
- Extra: Includes Input Select, Off Timer (0-24hrs), Image Ratio (Wide, 4:3), DDC/CI (yes/no), and Reset (yes/no).
- Exit: Exits the main OSD menu.
Hotkeys:
- Source/Exit: Selects input source when OSD is closed; exits OSD menu. Press continuously for 2 seconds for auto-configure (D-Sub models only).
- Game Mode/<: Opens game mode function when OSD is closed; navigates left in OSD.
- Dial Point/>: Shows/hides Dial Point when OSD is closed; navigates right in OSD.
- Menu/Enter: Displays OSD or confirms selection; turns off monitor if pressed for 2 seconds.
- Power: Turns the monitor on/off.
LED Indicator:
- Full Power Mode: White LED
- Active-off Mode: Orange LED
Maintenance Features
Cleaning:
The monitor cabinet should be cleaned regularly with a soft cloth and mild detergent to remove stains. Strong detergents should be avoided as they can damage the cabinet. When cleaning, ensure no detergent leaks into the product and that the cloth is not too rough to avoid scratching the screen. Always disconnect the power cord before cleaning.
Troubleshooting:
The manual provides a comprehensive troubleshooting guide for common issues:
- Power LED Not ON: Check power button, power cord connection, and grounded outlet.
- No Images on Screen: Verify power cord, signal cable (VGA, HDMI, DP) connections, reboot computer, check for "Input Not Supported" message (adjust resolution/frequency if seen), and ensure AOC Monitor Drivers are installed.
- Fuzzy/Ghosting Picture: Adjust Contrast/Brightness, use auto-adjust, avoid extension cables/switch boxes, and connect directly to the video card.
- Picture Bounces/Flickers/Wave Pattern: Move electrical devices away, use maximum refresh rate for current resolution.
- Monitor Stuck in Active Off-Mode: Check computer power, video card fit, monitor video cable connection, and ensure no bent pins. Verify computer operation using CAPS LOCK key.
- Missing Primary Colors: Inspect monitor's video cable for damage and proper connection.
- Screen Image Not Centered/Sized: Adjust H-Position and V-Position or use auto-adjust hotkey.
- Color Defects: Adjust RGB color or select desired color temperature.
- Horizontal/Vertical Disturbances: Use Windows 7/8/10 shut-down mode to adjust CLOCK and FOCUS, or press auto-adjust.
Safety Precautions:
- Operate the monitor only from the specified power source.
- Use a grounded plug and outlet; do not defeat the safety purpose of the grounded plug.
- Unplug during lightning storms or prolonged disuse.
- Do not overload power strips.
- Use UL listed computers with appropriate receptacles (100-240V AC, Min. 5A).
- Install the wall socket near the equipment for easy access.
- Do not place the monitor on unstable surfaces; use manufacturer-recommended carts/stands.
- Do not push objects into slots or spill liquids on the monitor.
- Do not place the front of the product on the floor.
- Use manufacturer-approved mounting kits for wall/shelf mounting.
- Ensure adequate ventilation around the monitor.
- Avoid tilting the monitor downward by more than -5 degrees to prevent panel damage.
- Do not press the screen when adjusting the angle; grasp only the bezel.
- If the product emits strange smells, sounds, or smoke, disconnect power immediately and contact a Service Center.
- Ensure ventilating openings are not blocked.
- Avoid severe vibration or high impact conditions.
- Do not knock or drop the monitor.