This document is the user manual for the AOC C27V3H LCD Monitor with LED backlight. It provides comprehensive information on the monitor's setup, operation, and maintenance.
Function Description
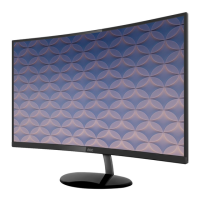
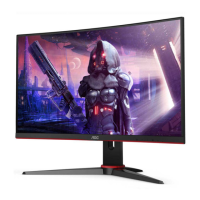
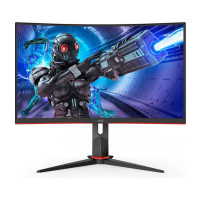
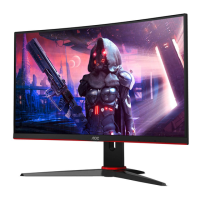
The AOC C27V3H is an LCD monitor designed for general computing use. It features an LED backlight and offers various display modes and adjustment options to optimize the viewing experience. The monitor supports multiple input signals, including HDMI and D-SUB, making it compatible with a wide range of computers. It also includes an earphone output for audio.
Important Technical Specifications
Panel:
- Model Name: C27V3H
- Driving System: TFT Color LCD
- Viewable Image Size: 68.6 cm diagonal
- Pixel Pitch: 0.3114mm(H) x 0.3114mm(V)
- Horizontal Scan Range: 30k-85kHz
- Horizontal Scan Size (Maximum): 597.888mm
- Vertical Scan Range: 48-75Hz
- Vertical Scan Size (Maximum): 336.312mm
- Optimal Preset Resolution: 1920x1080@60Hz
- Plug & Play: VESA DDC2B/CI
Power:
- Power Source: 19Vdc, 2.0A
- Typical Power Consumption (default brightness and contrast): 28W
- Max. Power Consumption (brightness = 100, contrast = 100): ≤ 42W
- Power Saving: ≤ 0.3W
Physical Characteristics:
- Connector Type: HDMI/D-SUB/Earphone out
- Signal Cable Type: Detachable
Environmental Conditions:
- Operating Temperature: 0°C ~ 40°C
- Non-Operating Temperature: -25°C ~ 55°C
- Operating Humidity: 10% ~ 85% (non-condensing)
- Non-Operating Humidity: 5% ~ 93% (non-condensing)
- Operating Altitude: 0 ~ 5000 m (0 ~ 16404ft)
- Non-Operating Altitude: 0 ~ 12192m (0 ~ 40000ft)
Preset Display Modes:
The monitor supports various standard resolutions and refresh rates, including:
- VGA: 640x480 at 60Hz, 72Hz, 75Hz
- SVGA: 800x600 at 56Hz, 60Hz, 72Hz, 75Hz
- XGA: 1024x768 at 60Hz, 70Hz, 75Hz
- SXGA: 1280x1024 at 60Hz, 75Hz; 1280x720 at 60Hz; 1280x960 at 60Hz
- WXGA+: 1440x900 at 60Hz; 832x624 at 75Hz; 1680x1050 at 60Hz
- FHD: 1920x1080 at 60Hz, 75Hz
- IBM Modes: 640x350 at 70Hz; 720x400 at 70Hz
- MAC Modes: 640x480 at 67Hz; 832x624 at 75Hz
Usage Features
Setup and Connectivity:
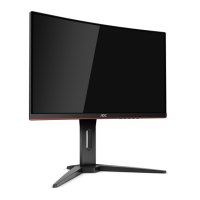
- Stand and Base: The manual provides clear instructions for setting up and removing the monitor's stand and base.
- Adjusting Viewing Angle: The monitor's angle can be adjusted from -5° to 23° for optimal viewing. Users are advised to hold the stand and avoid touching the LCD screen during adjustment to prevent damage.
- Cable Connections: The monitor offers HDMI, D-SUB, and earphone output ports. Users are guided on how to connect the power cord, signal cables (HDMI or D-SUB), and earphone to the monitor and computer. It is recommended to turn off both the PC and LCD monitor before connecting cables.
On-Screen Display (OSD) Settings:
The monitor features an intuitive OSD menu for adjusting various display parameters.
- Hotkeys: Dedicated hotkeys provide quick access to functions like Source/Exit/Up, Eco/DCR/Down, Clear Vision/Left, Volume/Right, and Power/Menu/Enter.
- Menu Navigation: The OSD is navigated using the MENU, Left, Right, and Exit buttons.
- OSD Lock/Unlock: The OSD can be locked or unlocked by pressing and holding the Down button for 10 seconds when the OSD is inactive.
- Luminance:
- Contrast: Adjustable from 0-100.
- Brightness: Adjustable from 0-100.
- Eco Mode: Offers various preset modes including Standard, Text, Internet, Game, Movie, Sports, and Reading, each optimizing display settings for specific content.
- Gamma: Three gamma settings (Gamma1, Gamma2, Gamma3) are available for adjustment.
- DCR (Dynamic Contrast Ratio): Can be enabled or disabled to dynamically adjust contrast.
- Overdrive: Adjusts the response time with options for Weak, Medium, Strong, and Off.
- Image Setup (for D-SUB input):
- Clock: Adjusts to reduce vertical-line noise.
- Phase: Adjusts to reduce horizontal-line noise.
- Sharpness: Adjusts picture sharpness.
- H. Position / V. Position: Adjusts the horizontal and vertical position of the picture.
- Color Setup:
- Color Temp.: Offers Warm, Normal, Cool, sRGB, and User modes. User mode allows custom RGB gain adjustments.
- DCB Mode (Dynamic Color Boost): Includes Full Enhance, Nature Skin, Green Field, Sky-blue, AutoDetect, and OFF options to enhance specific color ranges.
- DCB Demo: Enables or disables a demonstration of the DCB feature.
- Red/Green/Blue: Allows individual gain adjustment for Red, Green, and Blue colors (0-100).
- LowBlue Mode: Decreases blue light wave by controlling color temperature, with options for Multimedia, Internet, Office, Reading, and Off.
- Picture Boost:
- Bright Frame: Allows users to define a specific area on the screen (frame) and adjust its brightness, contrast, and position independently.
- Frame Size: Adjustable from 14-100.
- Brightness / Contrast (for Bright Frame): Adjustable from 0-100.
- H. position / V. position (for Bright Frame): Adjustable from 0-100.
- OSD Setup:
- Language: Selects the OSD language.
- Timeout: Sets the OSD display duration (5-120 seconds).
- H. Position / V. Position: Adjusts the horizontal and vertical position of the OSD menu.
- Transparence: Adjusts the transparency of the OSD.
- Break Reminder: An optional reminder if the user continuously works for more than 1 hour.
- Extra:
- Input Select: Allows manual selection of input signal source (Auto/D-SUB/HDMI).
- Auto Config.: Automatically adjusts the picture to default settings (for D-SUB input).
- Off Timer: Sets a timer for the monitor to turn off (0-24 hours).
- Image Ratio: Selects display format (Wide or 4:3).
- DDC/CI: Enables or disables DDC/CI support.
- Reset: Resets all OSD settings to default.
- Exit: Exits the main OSD menu.
LED Indicator:
- Full Power Mode: White LED.
- Active-off Mode: Orange LED.
Maintenance Features
Cleaning:
- Cabinet: Clean regularly with a soft cloth and mild detergent. Avoid strong detergents that can damage the cabinet.
- Screen: Use a soft cleaning cloth. Ensure no detergent leaks into the product. Do not use rough cloths to avoid scratching the screen surface.
- Safety Precaution: Always disconnect the power cord before cleaning the product.
Safety and General Precautions:
- Power Source: Operate only from the specified power source.
- Grounding: The monitor has a three-pronged grounded plug; ensure it is connected to a grounded power outlet or use an adapter safely.
- Lightning/Power Surges: Unplug the unit during lightning storms or prolonged disuse to prevent damage.
- Overloading: Do not overload power strips or extension cords to prevent fire or electric shock.
- UL Listed Computers: Use only with UL listed computers with appropriate receptacles.
- Wall Socket: Ensure the wall socket is near the equipment and easily accessible.
- Power Adapter: Use only the attached power adapter (Model: ADPC1945EX, Manufacturers: TPV ELECTRONICS(FUJIAN)CO.,LTD.).
- Placement: Do not place on unstable surfaces. Use recommended carts, stands, or brackets. Ensure adequate ventilation (at least 12 inches/30cm above and 4 inches/10cm on sides).
- Foreign Objects/Liquids: Never push objects into slots or spill liquids on the monitor.
- Front Placement: Do not place the front of the product on the floor.
- Mounting: If wall-mounting, use a manufacturer-approved kit and follow instructions.
- Abnormal Operation: If the product emits strange smells, sounds, or smoke, disconnect power immediately and contact a Service Center.
- Ventilation: Ensure ventilating openings are not blocked.
- Impact/Vibration: Avoid severe vibration or high impact during operation or transportation.
Troubleshooting:
The manual includes a troubleshooting section addressing common issues such as:
- Power LED not ON.
- No images on the screen (checking power, cable connections, input signal, resolution/frequency).
- Fuzzy picture or ghosting (adjusting contrast/brightness, auto-adjust, checking extension cables).
- Picture bounces, flickers, or wave patterns (checking electrical devices, refresh rate).
- Monitor stuck in active-off mode (checking computer power, video card, cable connection, CAPS LOCK key).
- Missing primary colors or color defects (checking video cable, adjusting RGB color/temperature).
- Horizontal or vertical disturbances (using Windows shut-down mode to adjust CLOCK and FOCUS, auto-adjust).
Plug and Play (DDC2B Feature):
The monitor is equipped with VESA DDC2B capabilities, allowing it to communicate its identity and display capabilities to the host system via a bi-directional I2C data channel.