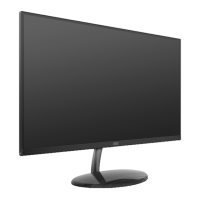
This document is a user manual for AOC LCD monitors, specifically models U27V3, 27V3H, and Q27V3, which feature LED backlighting. It provides comprehensive instructions for setup, adjustment, and maintenance, ensuring users can effectively operate their monitors.
Function Description
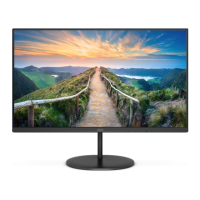
The AOC LCD monitors are designed to provide a visual display for computers and other compatible devices. They function as output devices, translating digital signals into visible images on a screen. The monitors support various input sources, including HDMI and DisplayPort, allowing for connectivity with a wide range of systems. Depending on the model, some monitors may also support D-SUB (VGA) input. The monitors are equipped with LED backlighting, which contributes to energy efficiency and consistent illumination across the screen.
Key functions include:
- Displaying Images: The primary function is to render visual content from a connected computer or device.
- Input Source Selection: Users can switch between different video input sources (e.g., HDMI 1, HDMI 2, DisplayPort, D-SUB) to display content from multiple devices.
- Audio Output: The monitors include an earphone jack, allowing users to connect headphones or external speakers for audio output from the connected source.
- Power Management: The monitors feature power-saving modes and an e-Saver software utility to help reduce energy consumption by automatically shutting down or entering sleep mode based on PC status and user-defined timeframes.
- OSD (On-Screen Display) Control: An intuitive OSD menu provides access to various display settings, allowing users to customize their viewing experience.
- Plug and Play (DDC2B): The monitors are VESA DDC2B compliant, enabling them to communicate their identity and display capabilities to the host system automatically, simplifying setup.
Usage Features
The AOC LCD monitors offer several features designed to enhance user experience and provide flexibility in display customization.
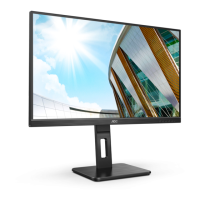
- Adjustable Viewing Angle: The monitor stand allows for tilt adjustment, enabling users to set the screen at an optimal angle for comfortable viewing. This helps in reducing glare and improving ergonomic posture. The tilt range is typically from -5° to 23°.
- Hotkeys for Quick Access: Dedicated hotkeys on the monitor provide quick access to frequently used functions such as input source selection, Eco/DCR modes, Clear Vision, and volume control, streamlining adjustments without navigating the full OSD menu.
- OSD Settings for Fine-Tuning: The OSD menu is a central hub for detailed display adjustments. It is categorized into sections like Image Setup, Color Setup, Picture Boost, OSD Setup, and Extra.
- Luminance: This section allows adjustment of Contrast and Brightness (0-100), selection of various Eco modes (Standard, Text, Internet, Game, Movie, Sports, Reading, Uniformity), Gamma settings (Gamma1, Gamma2, Gamma3), DCR (Dynamic Contrast Ratio) on/off, and Overdrive settings (Weak, Medium, Strong, Off) to adjust response time. The Uniformity mode is specific to the U27V3 model.
- Color Setup: Users can select different Color Temperatures (Warm, Normal, Cool, sRGB, User) or fine-tune RGB gain (0-100). It also includes DCB (Dynamic Color Boost) modes (Full Enhance, Nature Skin, Green Field, Sky-blue, AutoDetect, OFF) and a DCB Demo to preview the effects. Additionally, a LowBlue Mode (Multimedia, Internet, Office, Reading, Off) is available to decrease blue light emission by controlling color temperature, which can reduce eye strain.
- Picture Boost: This unique feature allows users to define a specific "Bright Frame" area on the screen and adjust its brightness, contrast, and position independently. This can be useful for highlighting specific content or enhancing viewing in a particular region of the screen.
- OSD Setup: This section manages the OSD itself, including Language selection, Timeout duration (5-120 seconds), DP Capability (1.1/1.2 for U27V3), H. Position and V. Position (0-100) for OSD placement, Transparence (0-100), and a Break Reminder (on/off) to prompt users to take breaks after continuous work.
- Extra: This section includes Input Select for choosing video sources, Auto Config (for 27V3H) to automatically adjust the picture, Off Timer (0-24 hours) to set a power-off schedule, Image Ratio (Wide, 4:3, 1:1 for U27V3) for aspect ratio adjustments, Movie 1 and Movie 2 modes (for U27V3) with overscan options, DDC/CI (on/off) for display data channel communication, and a Reset option to restore default settings.
- i-Menu (Screen+) Software: This Windows-compatible software (Windows 7, 8, 10) provides a convenient way to adjust monitor settings directly from the computer's desktop, mirroring the OSD functions. It also includes "Screen+", a desktop splitting tool that allows users to divide their screen into multiple panels, each displaying a different window, thereby enhancing multitasking and productivity, especially with multiple monitors.
- e-Saver Software: This utility helps manage monitor power consumption by allowing users to set automatic shutdown times based on the PC's status (On, Off, Sleep, Screen Saver). This contributes to energy saving and extends the monitor's lifespan.
Maintenance Features
Proper maintenance is crucial for the longevity and optimal performance of the AOC LCD monitors. The manual outlines clear guidelines for cleaning and general care.
- Cabinet Cleaning: The monitor cabinet should be cleaned regularly with a soft cloth. A soft detergent can be used to remove stains, but strong detergents should be avoided as they can damage the cabinet material. It is important to ensure that no detergent leaks into the product during cleaning.
- Screen Cleaning: When cleaning the screen surface, a soft cleaning cloth should be used. Rough cloths or abrasive materials should be avoided to prevent scratching the screen.
- Power Disconnection: Always disconnect the power cord from the monitor before cleaning to prevent electrical hazards.
- Ventilation: Ensure that the ventilating openings on the monitor are not blocked by objects like tables or curtains. Adequate airflow is essential to prevent overheating, which can lead to damage or fire.
- Handling and Placement:
- The monitor should be placed on a stable surface (cart, stand, tripod, bracket, or table) to prevent it from falling and causing injury or damage.
- When moving the monitor, especially with a cart, exercise care.
- Avoid pushing objects into the monitor's slots, as this can damage internal circuits and cause electric shock or fire.
- Do not spill liquids on the monitor.
- Do not place the front of the product directly on the floor.
- If wall-mounting, use a manufacturer-approved mounting kit and follow its instructions.
- Avoid subjecting the monitor to severe vibration or high impact during operation or transportation.
- Do not knock or drop the monitor.
- Power Source: The monitor should only be operated from the type of power source indicated on its label. If unsure, consult a dealer or power company. The monitor is equipped with a three-pronged grounded plug for safety; if the outlet does not accommodate it, an electrician should install the correct outlet or an adapter should be used to safely ground the appliance.
- Surge Protection: Unplug the monitor during lightning storms or prolonged periods of non-use to protect it from power surges.
- Electrical Safety: Do not overload power strips or extension cords to prevent fire or electric shock. Use only UL-listed computers with appropriate receptacles (100-240V AC, Min. 1.5A). The wall socket should be easily accessible.
- Troubleshooting: The manual includes a troubleshooting section to address common issues such as the power LED not being on, no images on the screen, fuzzy pictures, flickering, or color defects. This section provides solutions like checking cable connections, power supply, video card settings, and driver installation.
- Signal Cable Care: When connecting or disconnecting signal cables, ensure they are properly fitted and that no pins are bent or damaged. Always turn off both the PC and the LCD monitor before connecting or disconnecting cables to protect the equipment.