Do you have a question about the Apec Water CT Series and is the answer not in the manual?
Inspect all components for damage upon receiving the system. Contact APEC if any part is cracked or broken.
Key operating conditions: 20-85 psi pressure, 40-100°F temperature. Avoid hot water.
Defines common acronyms like GPD (Gallons Per Day) and PSI (Pounds Per Square Inch).
Comply with local laws and use only with safe water. Ensure adequate disinfection if needed.
Ensure the water supply is completely turned off before starting the connection process.
Unscrew the faucet's aerator counter-clockwise to prepare for the diverter valve attachment.
Screw the filter's diverter valve onto the faucet, using provided adapters if necessary.
Turn on cold water, then turn the diverter knob clockwise to direct water into the filter system.
After connecting, carefully inspect all connections for any signs of water leakage.
Flush the filter with water for 5 minutes to rinse out the new cartridge.
Turn the diverter knob counter-clockwise to shut off the water supply to the filter unit.
Replace FI-PB1 cartridge every 2,500 gallons (Lead) or 6,000 gallons (Chlorine), or annually.
Replace FI-CERAMI cartridge every 1,000 gallons, or annually.
Recommended to replace the filter housing O-ring each year for optimal performance.
Ensure the water supply is completely turned off before beginning the filter change process.
Use the plastic wrench to turn the filter housing counter-clockwise to open it.
Discard the old cartridge, wash the inside of the housing with mild soap, and rinse.
Insert the new cartridge, ensure the O-ring is in place, and tighten the housing clockwise.
Turn on cold water and direct it into the system using the diverter knob.
Verify all connections are leak-free after replacing the filter.
Allow water to run through the new cartridge for 5 minutes to rinse it.
Turn the diverter knob counter-clockwise to stop the water flow to the unit.
Details the one-year warranty coverage for defects in materials and workmanship.
Explains the procedures and limitations for product repair or replacement under warranty.
Lists essential requirements for maintaining the validity of the limited product warranty.
Outlines common issues and damages that are explicitly excluded from warranty coverage.
Lists specific actions or circumstances that will cause the limited product warranty to become void.
Covers disclaimers, liability limits, and buyer responsibilities related to the warranty.
Provides contact information and the process for claiming warranty service or making inquiries.
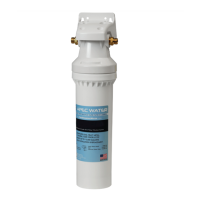
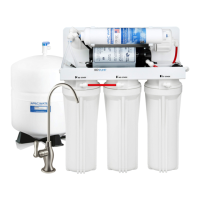
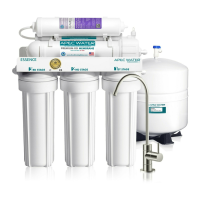
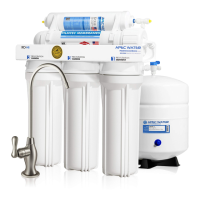
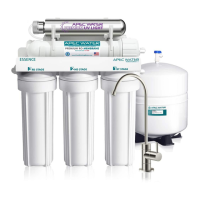
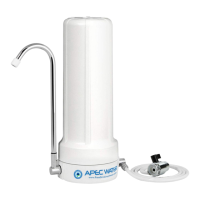
The APEC CT-SERIES Countertop Water Filter is a compact and user-friendly water filtration system designed to provide clean, filtered water directly from your kitchen faucet. This device is intended for residential use and offers an easy-to-install and maintain solution for improving drinking water quality.
The primary function of the APEC CT-SERIES Countertop Water Filter is to filter tap water, removing various contaminants to enhance its taste, odor, and overall quality. It connects directly to your existing kitchen faucet, diverting water through an internal filter cartridge before dispensing it. The system is designed to process cold water only, and users are explicitly warned against running hot water through it, as this could damage the filter.
The manual outlines several key operating parameters for the CT-SERIES filter:
The system is designed for countertop placement and includes a diverter valve that attaches to the faucet, allowing users to switch between filtered and unfiltered tap water.
The APEC CT-SERIES filter emphasizes ease of use with its straightforward installation and operation:
Maintenance of the APEC CT-SERIES filter primarily revolves around timely cartridge replacement and general cleaning:
The product comes with a Limited Product Warranty, covering defects in materials and workmanship for one year from the date of purchase. This warranty is valid only if the product is used, stored, handled, fabricated, and installed according to the manual's recommendations, and if regular maintenance, particularly filter changes, is performed. The warranty does not cover defects caused by improper storage, installation, maintenance, unreasonable use, use of non-APEC replacement parts, damage not from manufacturing defects, or damage from freezing, flood, fire, or acts of God. It also specifies conditions that void the warranty, such as not operating within normal municipal water conditions, being a non-original purchaser, purchasing a used product, or purchasing from unauthorized dealers.
| Brand | Apec Water |
|---|---|
| Model | CT Series |
| Category | Water Filtration Systems |
| Language | English |