4
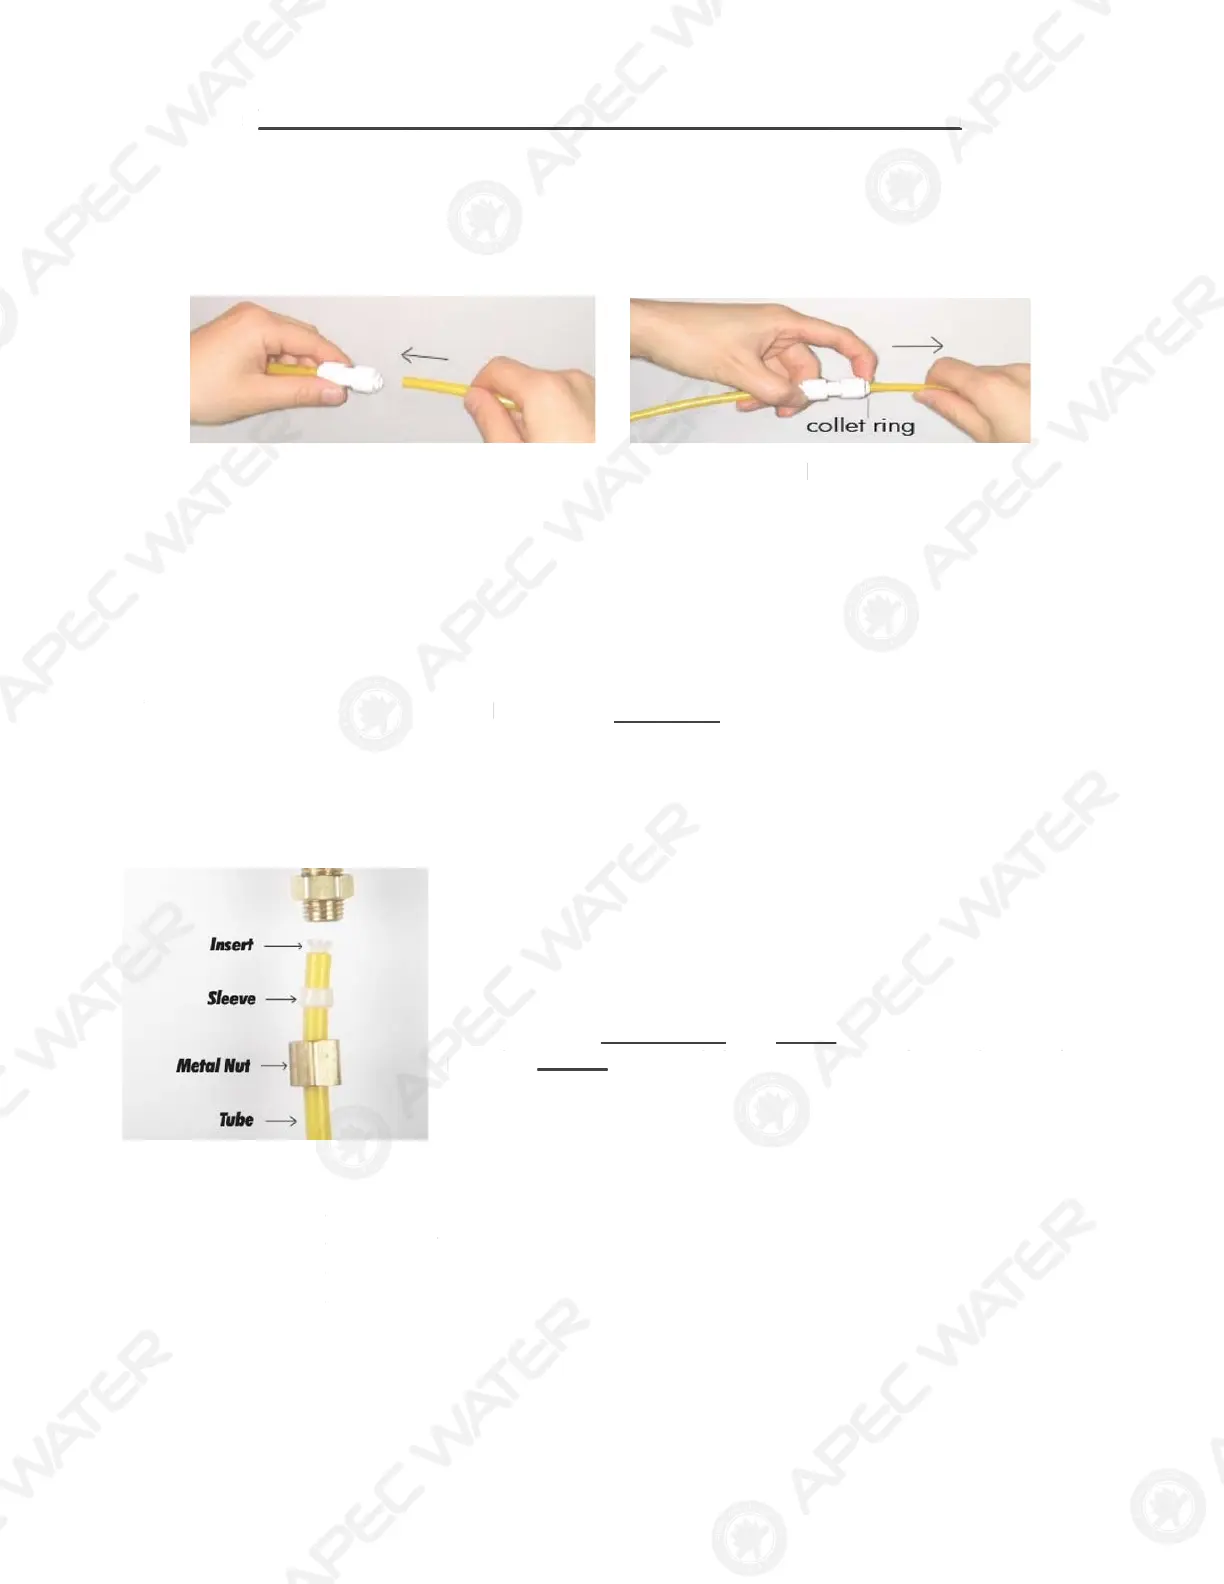
2. Metal compression nut fitting:
(comes with 1 insert, 1 sleeve, 1 nut) This is for feed water adapter
-needle valve only.
Fitting Types: There are 2 types of fittings provided for connecting the system
Important! Use plastic sleeve and inserts on the plastic tubing we
provide. Do Not use metal sleeve or insert on plastic tubing or the
connection will leak!
Fig.1B
How to connect: - See Fig.1B. Slide the compression nut onto the tubing.
- Slide the
plastic sleeve onto the tubing.
- Insert the “insert” into the tubing.
- Insert the tubing into the opening of the fitting.
- Slide the brass nut up, then tighten nut with a wrench. No Teflon tape!
(An extra metal sleeve is provided in case you need to connect your own metal
tubing. Use Teflon tape if connecting metal tubing.)
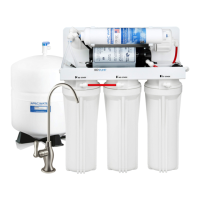
1. Quick-Connect (QC) fitting: (no insert, sleeve, or nut) Most of the fittings on the RO unit are this
type.
How to Connect: - See Fig.1. Push the tubing into the Quick-Connect fitting, then gently
pull back on the tubing to make sure connection was secure.
- No inserts, sleeve, or nuts are needed to secure the connection.
- No Teflon tape is needed!
To Disconnect: - See Fig.1A. Push in and hold down on the collet ring square against
the fitting. With the collet held in this position the tube can be removed.
Fig. 1
Fig. 1A
2. Metal compression nut
itting
omes with 1 insert
1 sleeve
1 nut
This is
or
eed water adapter
-needle valve only.
Fittin
s:
There are 2 types of fittings provided for connecting the system
mportant!
Use plastic sleeve and inserts on the plastic tubing we
provide. Do Not use metal sleeve or insert on plastic tubing or the
connection will leak!
F
g.1
ow to connect: - See F
g.1B. Slide the compression nut onto the tubing.
li
th
plastic sleeve
nto the tubing.
In
rt th
“in
rt” into the tubing.
Insert the tubing into the opening o
the
itting.
Slide the brass nut up, then tighten nut with a wrench. No Te
lon tape
An extra metal sleeve is provided in case you need to connect your own metal
tubing. Use Te
lon tape i
connecting metal tubing.
1. Quick-Connect (QC)
itting
no insert, sleeve, or nut
Most o
the
ittings on the RO unit are this
type.
ow to Connect: - See F
g.
Push the tubing into the Quick-Connect
itting, then gently
pull back on the tubing to make sure connection was secure.
- No inserts
sleeve
or nuts are needed to secure the connection.
- No Te
lon tape is needed
To Disconnect: - See Fig.1
.
Push in and hold down on the collet ring square against
the
ittin
With the collet held in this
sition the tube can be removed.
F
g.
Fig. 1
 Loading...