5
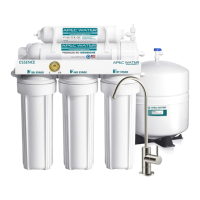
THERE ARE TWO PARTS TO INSTALLING THE RO SYSTEM:
Part I. Assemble the filters and housings onto the main system
Part II. Installing the system
Note: The RO Membrane Element has already been pre-installed.
PART I. ASSEMBLE THE FILTERS AND HOUSINGS ONTO THE MAIN SYSTEM
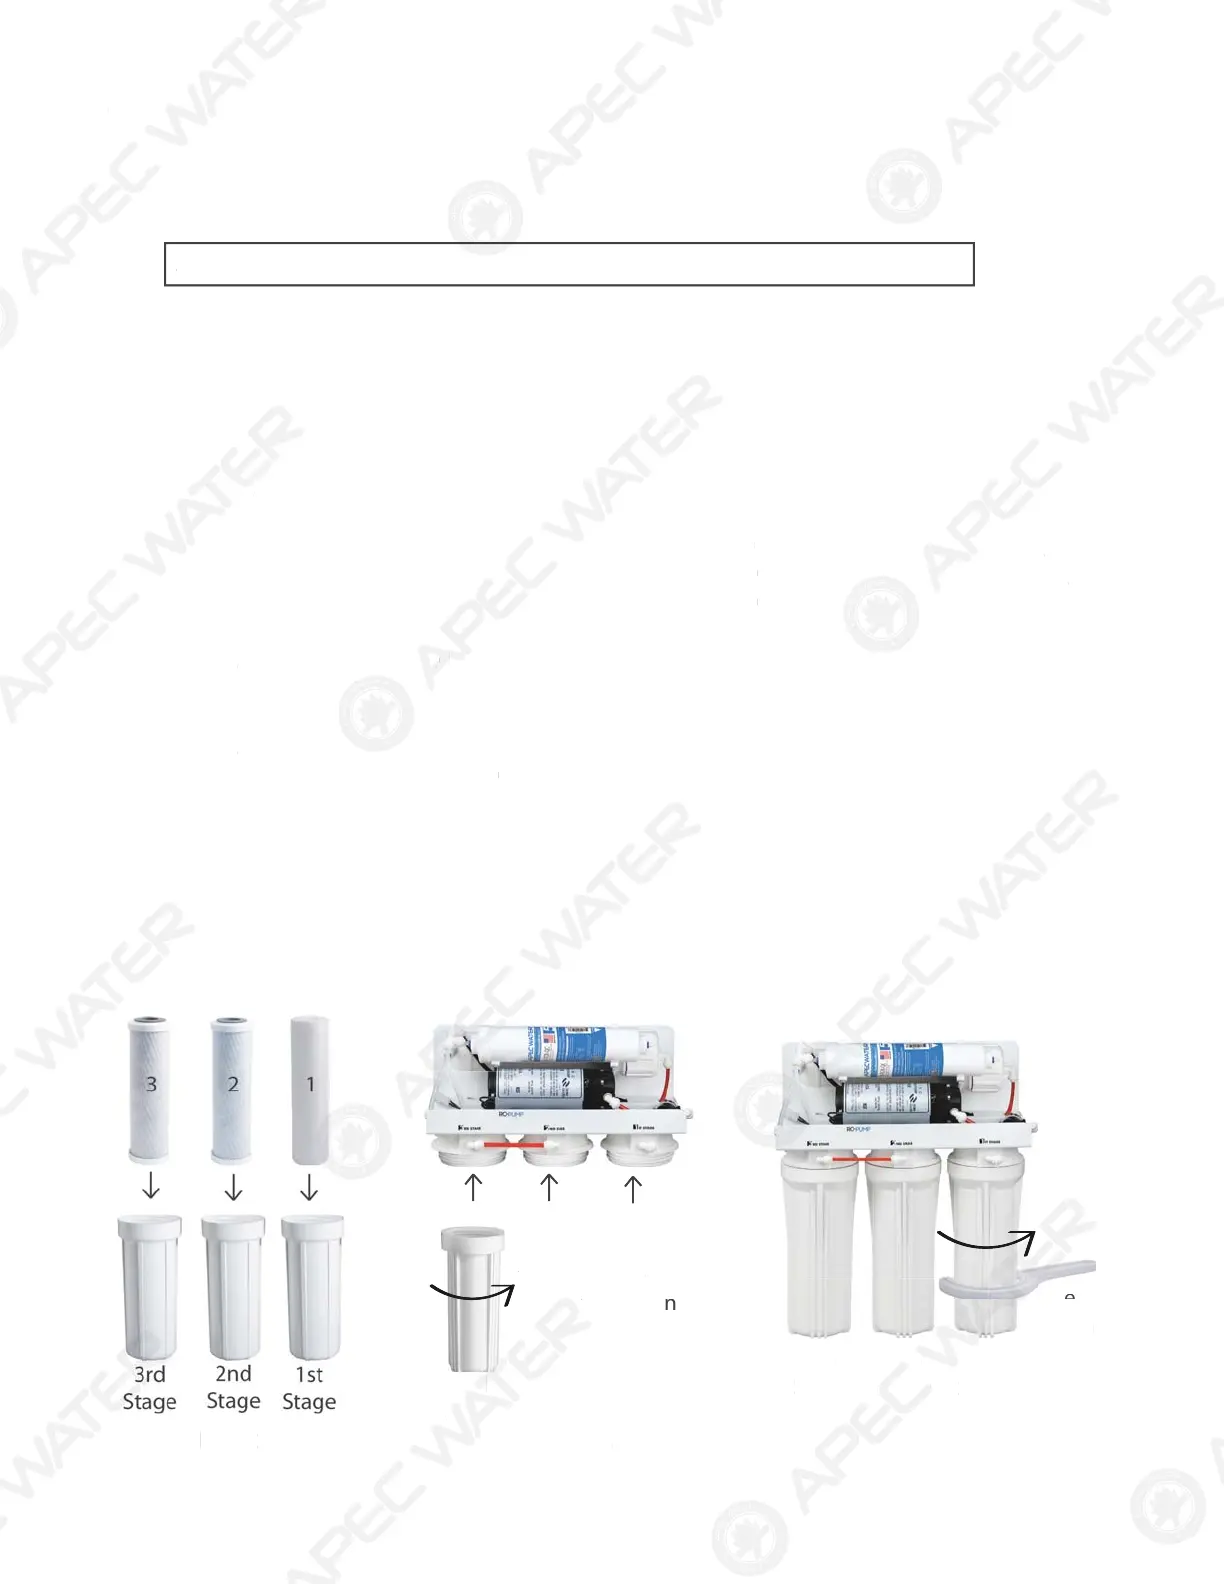
Remove plastic/paper wrappings on the 3 filters, put them into the 3 housings, and assemble the
housings onto the main system as follow:
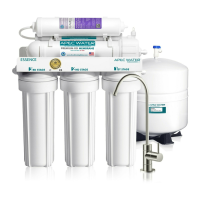
1. See
Fig. 2 Stand the 3 housings upright. Make sure each housing has a rubber O-ring in its
groove.
Put the APEC Sediment filter (1-SED10) into the “1
st
stage” housing on the right.
Put the APEC Carbon filter (23-CAB10) into the “2
nd
stage” housing in the middle.
Put the APEC Carbon filter (23-CAB10) into the “3
rd
stage” housing on the left.
2. See Fig. 3 Starting from the 3
rd
stage housing on the left, hand twist the housing onto the main
system turning counterclockwise, one by one, for all 3 housings.
3. See
Fig. 4 Use the wrench provided to completely tighten the housing starting from 1st-stage.
Repeat this step for the 2
nd
stage housing in the middle, and for the 3
rd
stage housing
on left.
Note: For some people it is easier to use the wrench with the system laid down
(face up).
4. See Pg. 3 Remove 2 end plugs (white color) from Point 10 Fitting & Point12 Product water
outlet ( see component itemization, page 3 )
Fig. 2
Fig. 3
Fig. 4
3rd
Stage
turn counter-clockwise
to tighten
3rd
Sta
e
2nd
Sta
e
1st
Sta
e
Use
Wrench
THERE ARE TW
PART
T
IN
TALLIN
THE R
Y
TEM
P
rt I.
ssemble the
ilters and housings onto the main syste
P
rt II.
nstalling the syste
Note: The RO Membrane Element has already been pre-installed.
PART I. A
EMBLE THE FILTER
AND H
IN
NT
THE MAIN
Y
TE
emove plastic/paper wrappings on the 3
ilters, put them into the 3 housings, and assemble the
housings onto the main system as
ollo
.
F
g. 2 Stand the 3 housings upright. Make sure each housing has a rubber O-ring in its
v
.
ut the APEC Sediment
ilter (1-SED10) into the “
t
stage” housing on the right.
ut the APEC Carbon
ilter (23-CAB10) into the “
n
stage” housing in the middle.
ut the APEC Carbon
ilter (23-CAB10) into the “
r
stage” housing on the le
t.
.
F
g. 3 Starting
rom the 3
r
stage housing on the le
t, hand twist the housing onto the main
ystem turning counterclockwise, one by one,
or all 3 housings.
.
F
g. 4
se the wrench provided to completely tighten the housing starting
rom 1st-stage.
epeat this step
or the
stage housing in the middle, and
or the 3
stage housing
n l
t.
ote
For some people it is easier to use the wrench with the system laid down
ace up
. See Pg. 3
emove 2 end plugs (white color)
rom Point 10 Fitting & Point12 Product wat
outlet ( see component itemization, page 3 )
F
g.
F
g. 3
F
g. 4
r
tag
rn c
nter
c
c
wis
o tig
te
r
ta
e
nd
ta
e
1
ta
r
n
 Loading...