4. Install hard drives:
Sö
3.5" Drive Screw
Thumb Screw
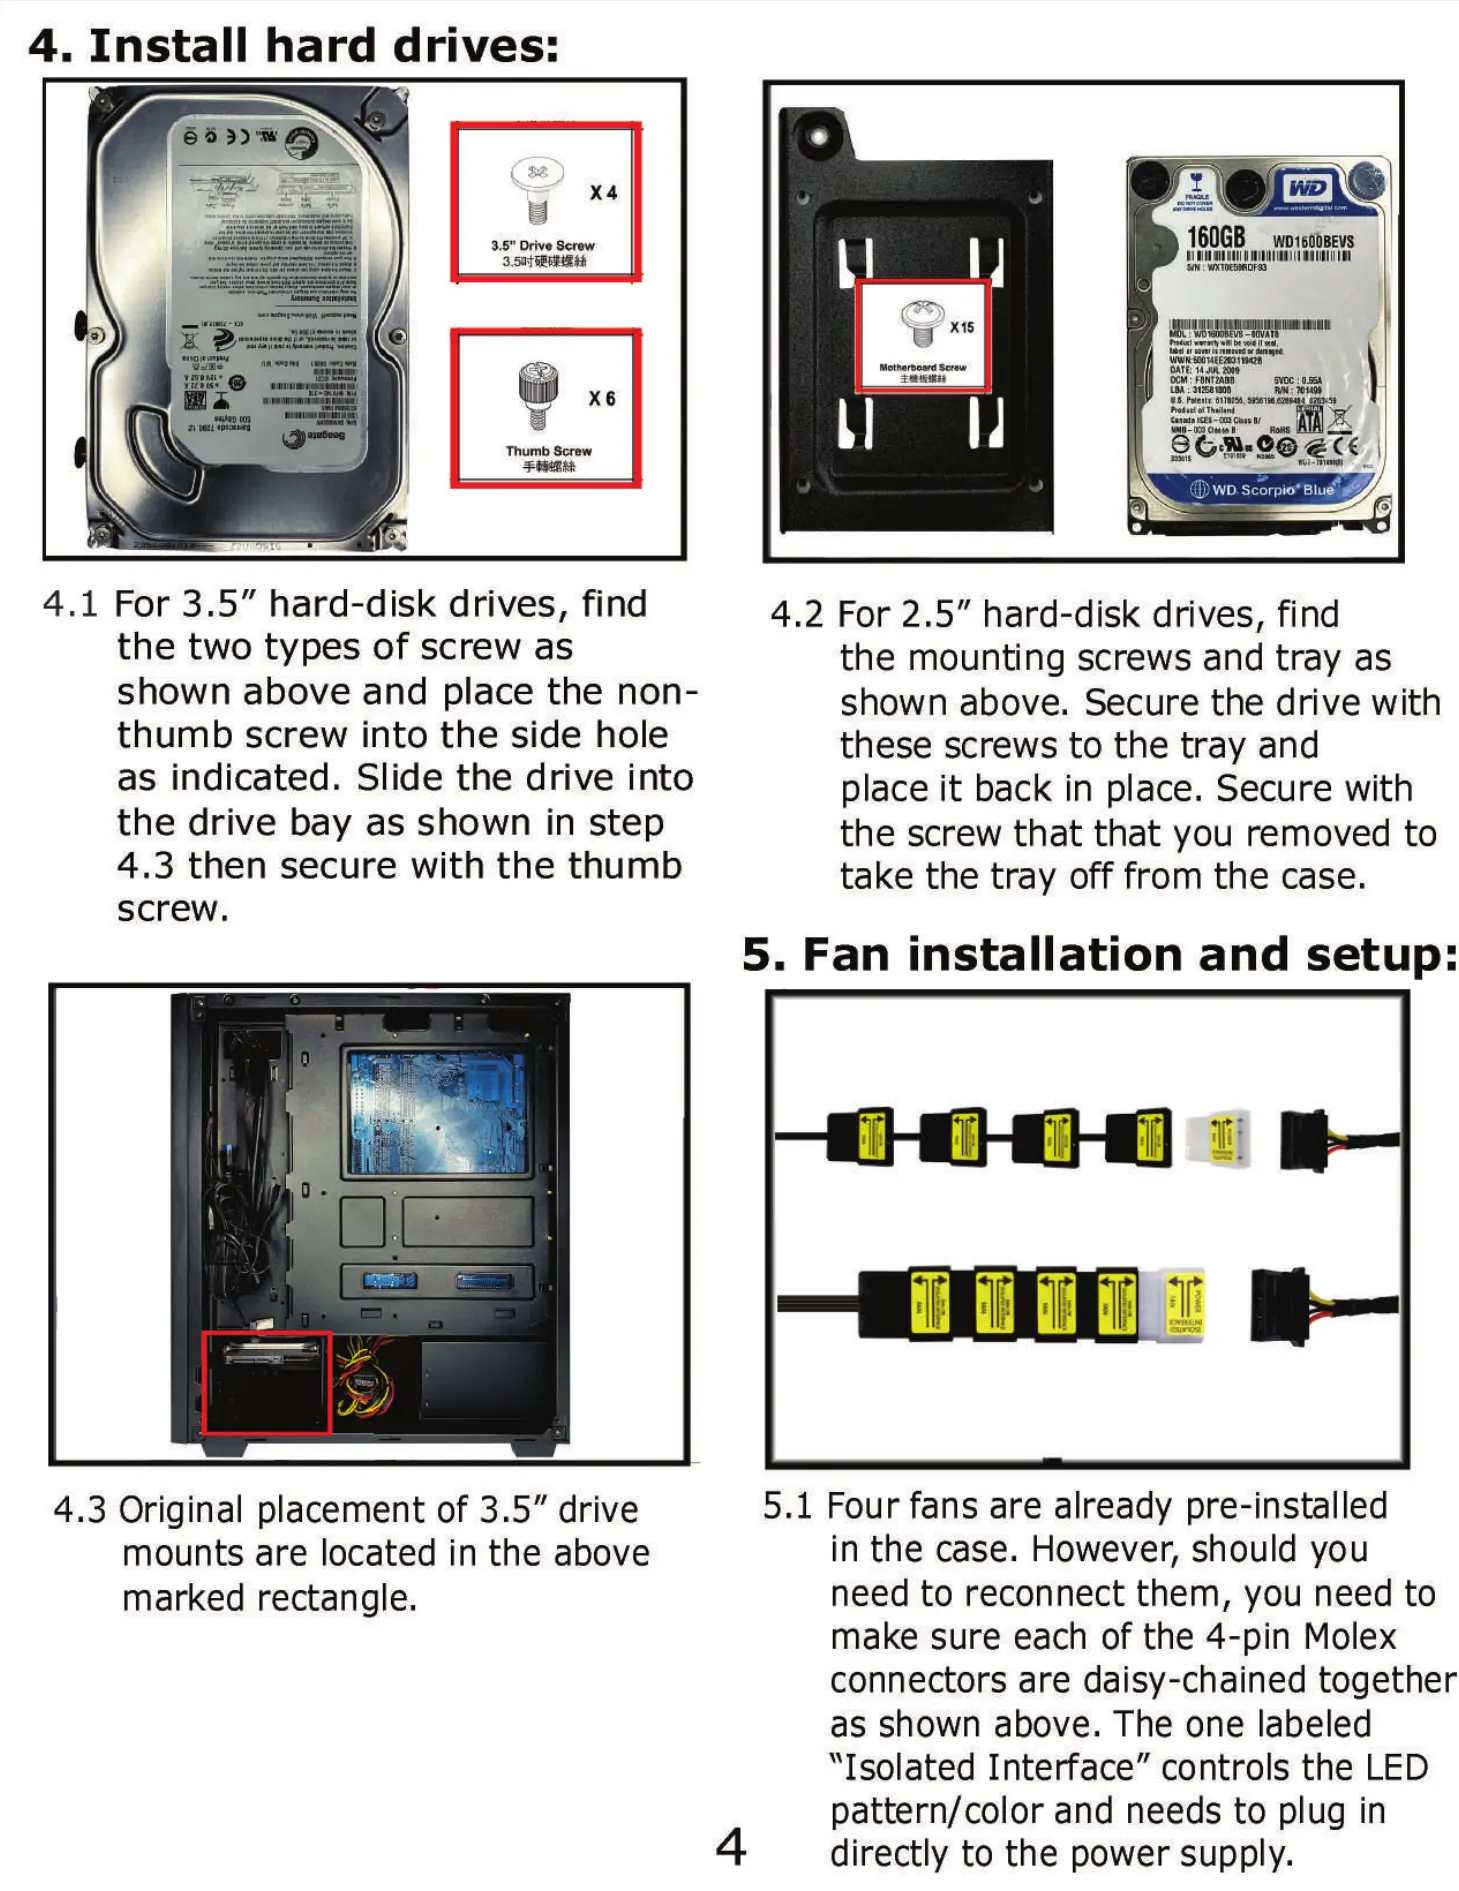
4.1 For 3.5" hard-disk drives, find
the two types of screw as
shown above and place the non-
thumb screw into the side hole
as indicated. Slide the drive into
the drive bay as shown in step
4.3 then secure with the thumb
screw.
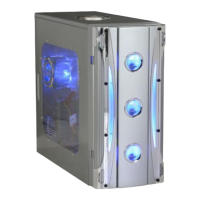
4.3 Original placement of 3.5" drive
mounts are located in the above
marked rectangle.
x 15
160GB WD160tBEVS
DATE: u
noc
LBA :
0) WDScorpio•Blue
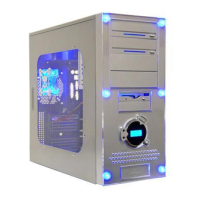
4.2 For 2.5" hard-disk drives, find
the mounting screws and tray as
shown above. Secure the drive with
these screws to the tray and
place it back in place. Secure with
the screw that that you removed to
take the tray off from the case.
5. Fan installation and setup:
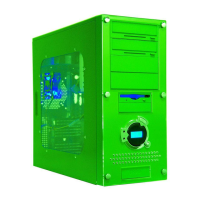
5.1 Four fans are already pre-installed
4
in the case. However, should you
need to reconnect them, you need to
make sure each of the 4-pin Molex
connectors are daisy-chained together
as shown above. The one labeled
"Isolated Interface" controls the LED
pattern/color and needs to plug in
directly to the power supply.