7
BFMM DC4A SBF
Customer Service (704) 841-6000 www.apollovalves.com
TEST NO. 3
PURPOSE: To test leaking #2 shut-o valve
As previously mentioned, the above test is not accurate when the second shut-o valve is leaking. The following test will expose
a leaking shut-o valve.
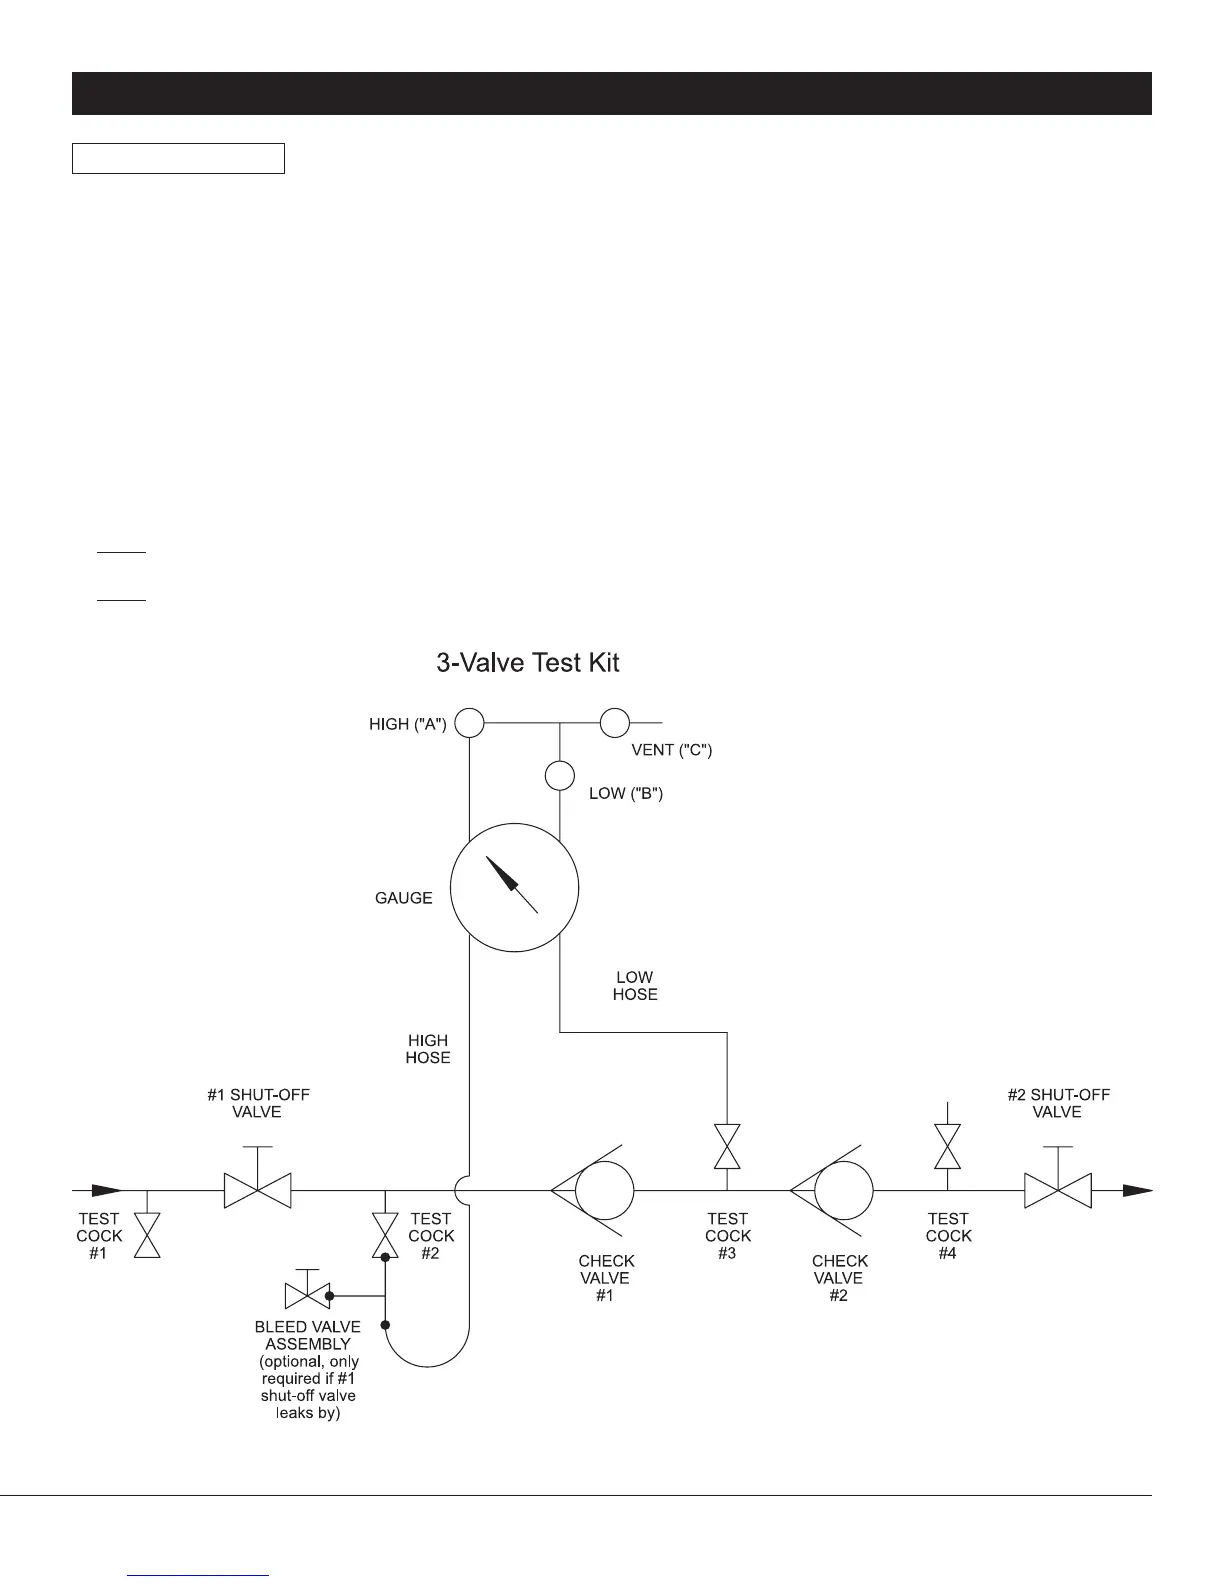
1. Both shut-o valves should be open. Make sure all valves on test kit are closed. Connect the high “A” hose to test cock #2
and the low “B” hose to test cock #3. Open test cock #2 and test cock #3.
2. Open the high “A” valve and vent “C” valve to bleed air from high side of gauge. Open low “B” valve to bleed air from low side
of gauge. Close valves “A”, “B” and “C” on test kit.
3. Connect the vent hose to test cock #4. Open test cock #4.
4. Close shut-o valve #2. The dierential gauge needle should read at least 1.0 psid in order to pass.
5. Open the high “A” valve and vent “C” valve. This will put back pressure on check valve #2.
6. Close test cock #2.
NOTE: If gauge is steady, then shut-o valve #2 is holding tight. However, if gauge drops to zero psid, then shut-o valve #2 is leaking.
NOTE: If the gauge rises then the #2 shut-o valve is still leaking, but is under backpressure from the facility.
Figure 3