8
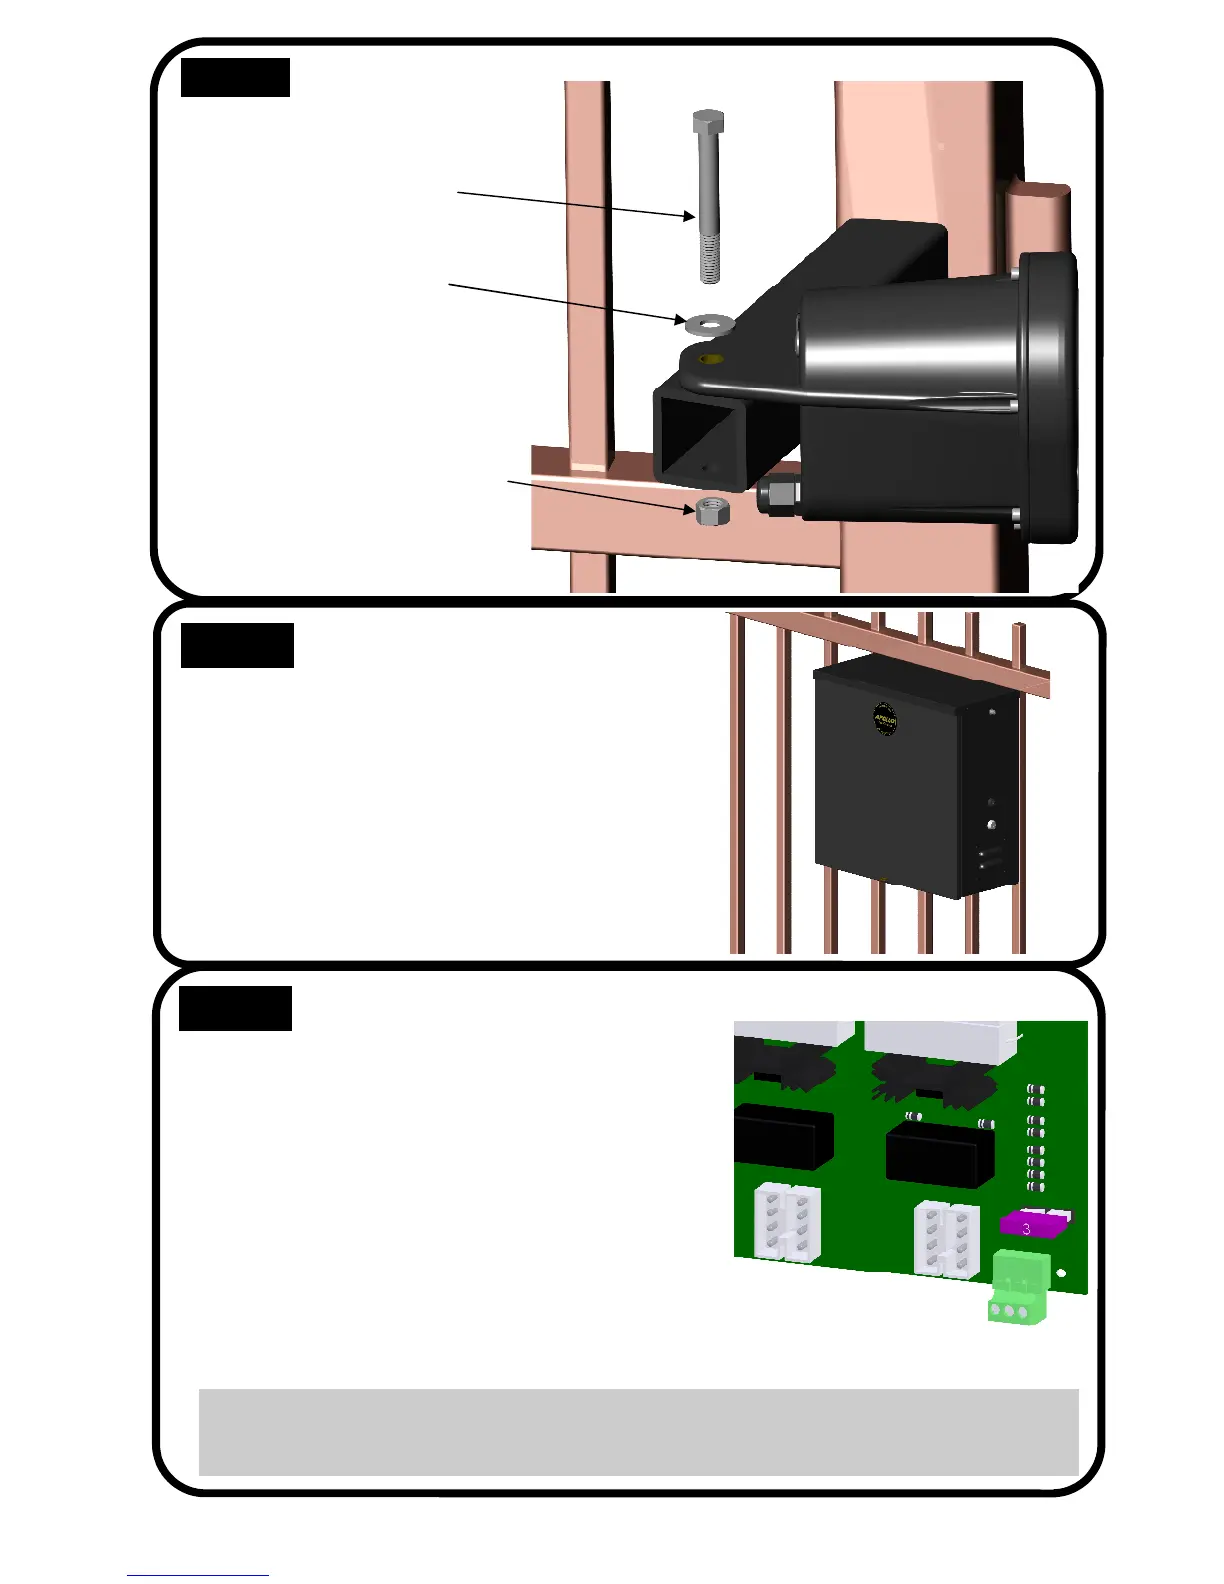
STEP 3 Control Box Installation
Mount the control box within 4 feet of the pivot arm.
Do not mount the control box where the person
using the push button on side of the box can
come in contact with the gate. Use mounting
hardware capable of supporting the weight of the
control box with the battery installed.
STEP 4 Connecting the Actuator (s)
Set battery inside of control box with terminals
toward the front (Do not use any battery with side
terminals).
Connect actuator cable to the “MASTER” connector on the
control board.
If a 1650 Dual Operator is being installed and conduit is
being used under the drive (recommended), cut the slave
(opposite side where control box is mounted) actuator cable
about 12” from the white connector. Run the remaining
cable across the drive through conduit and up through the
control box. Cutoff any excess cable and splice the short
piece back to the cable.* Connect to the “SLAVE” connector
on the control board.
Connect the RED power wire (s) to the battery positive ( + )
and the BLACK power wire (s) to the battery negative ( - )
1/2” x 3 1/2” Hex Bolt
1/2” Washer
1/2” Lock Nut
Do not over tighten nut
Actuator Installation
STEP 2
* Instead of cutting the slave cable, remove the pins on the plug with a jeweler's common blade
screwdriver or appropriate tool (the staples on the actuator shipping carton work great) ,run the
cable through the conduit and reinsert the pins into the plug.
MASTER
SLAVE
 Loading...