Find the brake lever located
on the right hand side of the
wheel and lift it up. Then gently
pull the line down to release the
tension on the brake line. If the
brake is too loose then you can
tighten the nob.
3Release the line and the lever
to check the brake on the
handlebars. If you find your brakes
are too tight now, then you can
reverse the process and loosen
the brakes a little bit. A properly
adjusted brake should leave about
2 cm of space between the brake
lever and the grip handle.
Your brakes are an important
component of your scooter. If
you feel your brakes are not
performing as well as they should,
you might want to tighten your
brakes.
The first point of control of your
brakes is your brake handle. Locate
the adjustment screw at the
connection of the brake line to the
brake handle. Turn it
counterclockwise to tighten your
brake. Turning it clockwise will
loosen your brake. If you have
reached the maximum position of
the adjustment screw and the
brakes are not comfortably tight,
proceed to the
next step.
3
4
4
5 6 7
6
3
2
1
Note: this section describes a
basic adjustment to your brakes.
For an in-depth brake adjustment
tutorial, please visit the help centre
at apolloscooters.co/support.
22 23
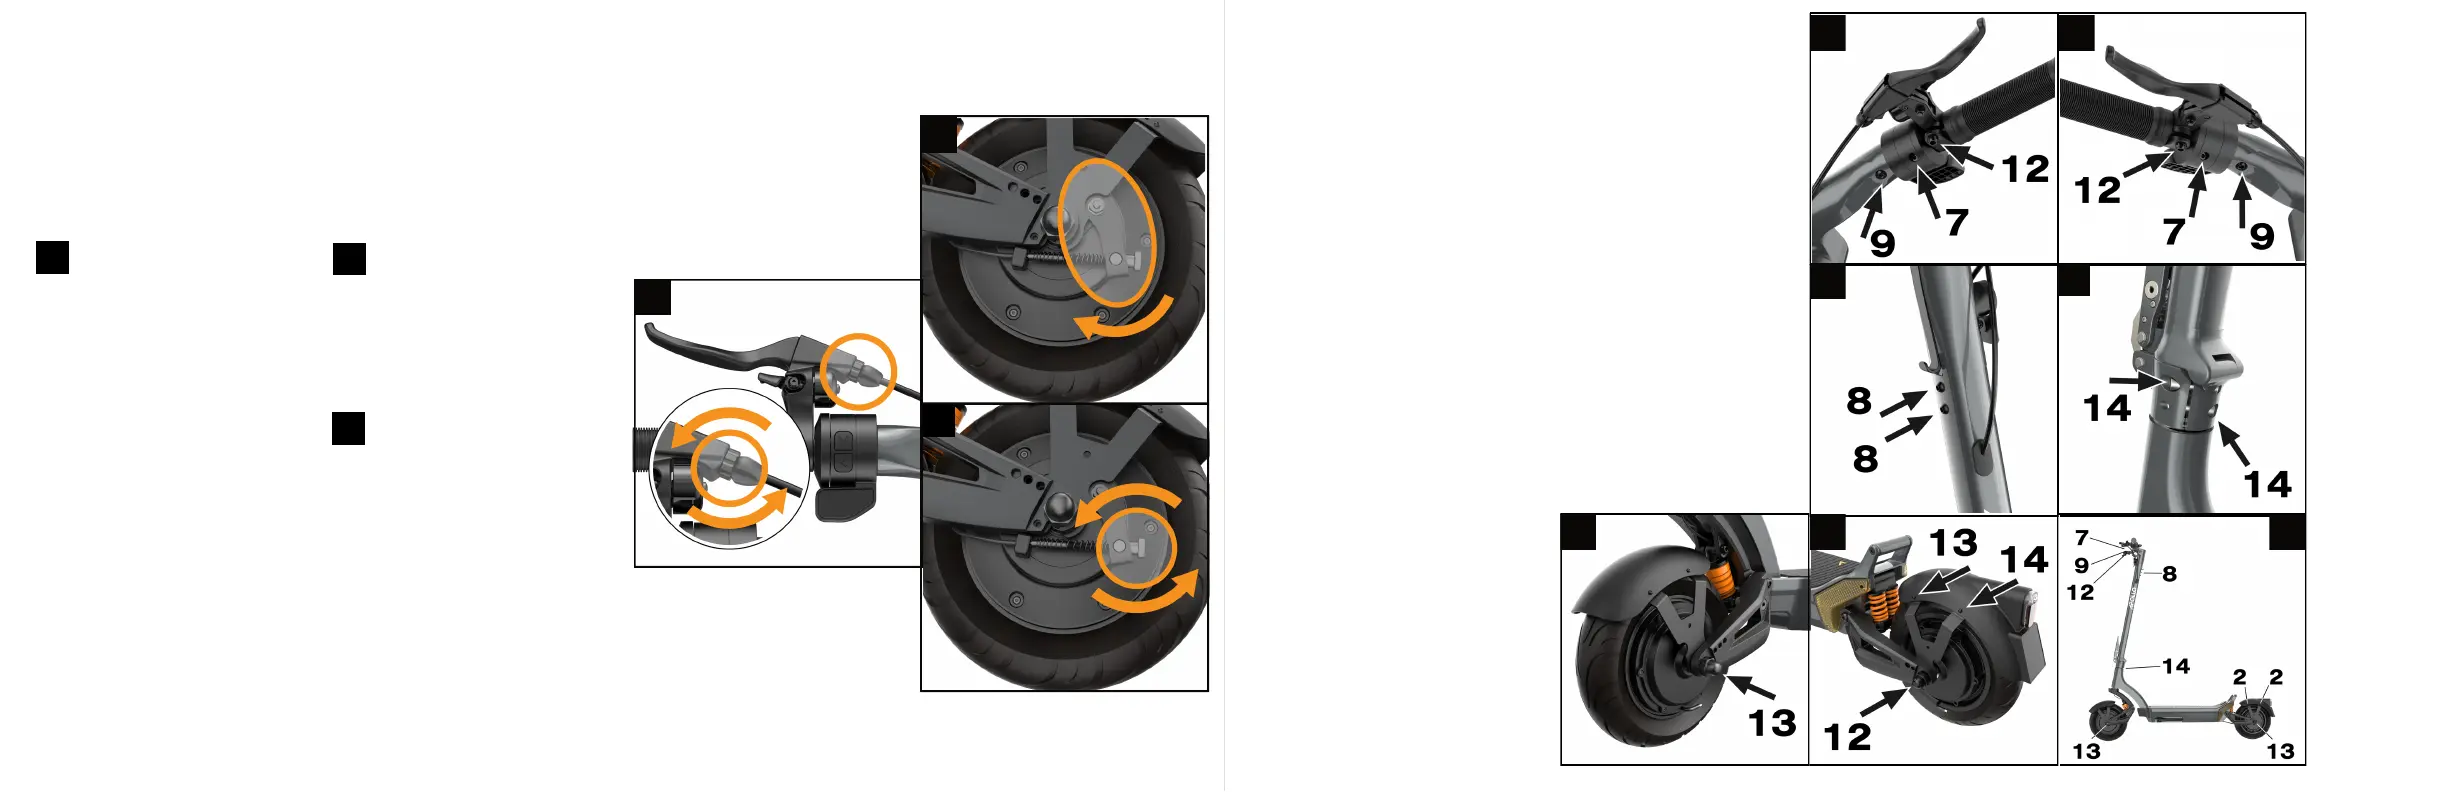
Drum Brake Adjustment Screw Tightening
*For a detailed step-by-step video,
please visit our help desk center at
apolloscooters.co/support
Use the included allen key to tighten
the screws highlighted on the following
graphics. Please refer to p. 29 for the
full screw list and location.
Your scooter motor creates vibrations
when you ride it, which may cause
the screws on your scooter to loosen
over time. We recommend checking
your screws every few months to make
sure they remain tight. You can use a
medium strength threadlocker adhesive
to further improve their stability.
1
4
2