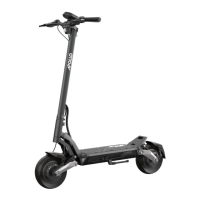
8
Locate key attached to
the brake line and insert it
into the key ignition. Turn clock-
wise to power on the scooter.
Locate the power button on the
le side of the handlebar and
press it for 3 seconds to power
on the scooter.
You should now be able to
see the display powered on.
Keep the scooter elevated
on the stool or bench, as the
testing will involve spinning
both wheels. If you notice one
of the motors not spinning,
please contact us immediately.
You may notice either motor
emitting a noise at low speeds,
or perhaps even moving back-
wards for a split second before
rolling forward. This is perfectly
normal. The motor is commu-
nicating with the controller
and identifying its position as
well as which direction to roll
in. This is perfectly standard
Perform test
and does not pose any risk of
damage to the scooter.
Begin by pressing the
throttle. You should no-
tice both wheels start to accel-
erate. Continue to accelerate
for 5 seconds, then release the
throttle and slam both brakes
at the same time. Slamming the
brakes adjusts the position of
your brake callipers when used
for the first time. If you notice
the brakes emitting repeating
sounds, it is likely the rubbing
of brake pads, which will
disappear aer a few weeks of
riding. To clarify, rubbing brake
pads are not a defect - they are
a consequence of our choice to
set up the brakes on the tighter
side. This allows for more effec-
tive braking, and the rubbing
sound does disappear within a
few weeks of usage.
Next, press the light
button and confirm all
four lights (headlight, two front
deck lights, and one rear tail
light) are powered on. If all of
the lights do not power on,
please contact us immediately.
Next, grab an air pump
and locate the air valve
on the front tire. Remove the
safety cap and attach the pump
tube to the tire valve. Turn on
the air pump and read the PSI
measure - the ideal tire pres-
sure for the Phantom is 50PSI.
Inflate or deflate the tire as
needed until the pressure is
50PSI. Repeat the step with the
rear tire.
For charging instructions,
please refer to the "Operation"
section on page 10.
Congratulations, you have
successfully set up your new
Apollo Phantom. If you experi-
ence difficulties with the setup
at any step, please refer to
our support centre for a video
walkthrough of the process.
Alternatively, you can contact
our support team at
support@fluidfreeride.com
for assistance.
1
2
3
4

 Loading...