Mobile Digital Video Recorder
37
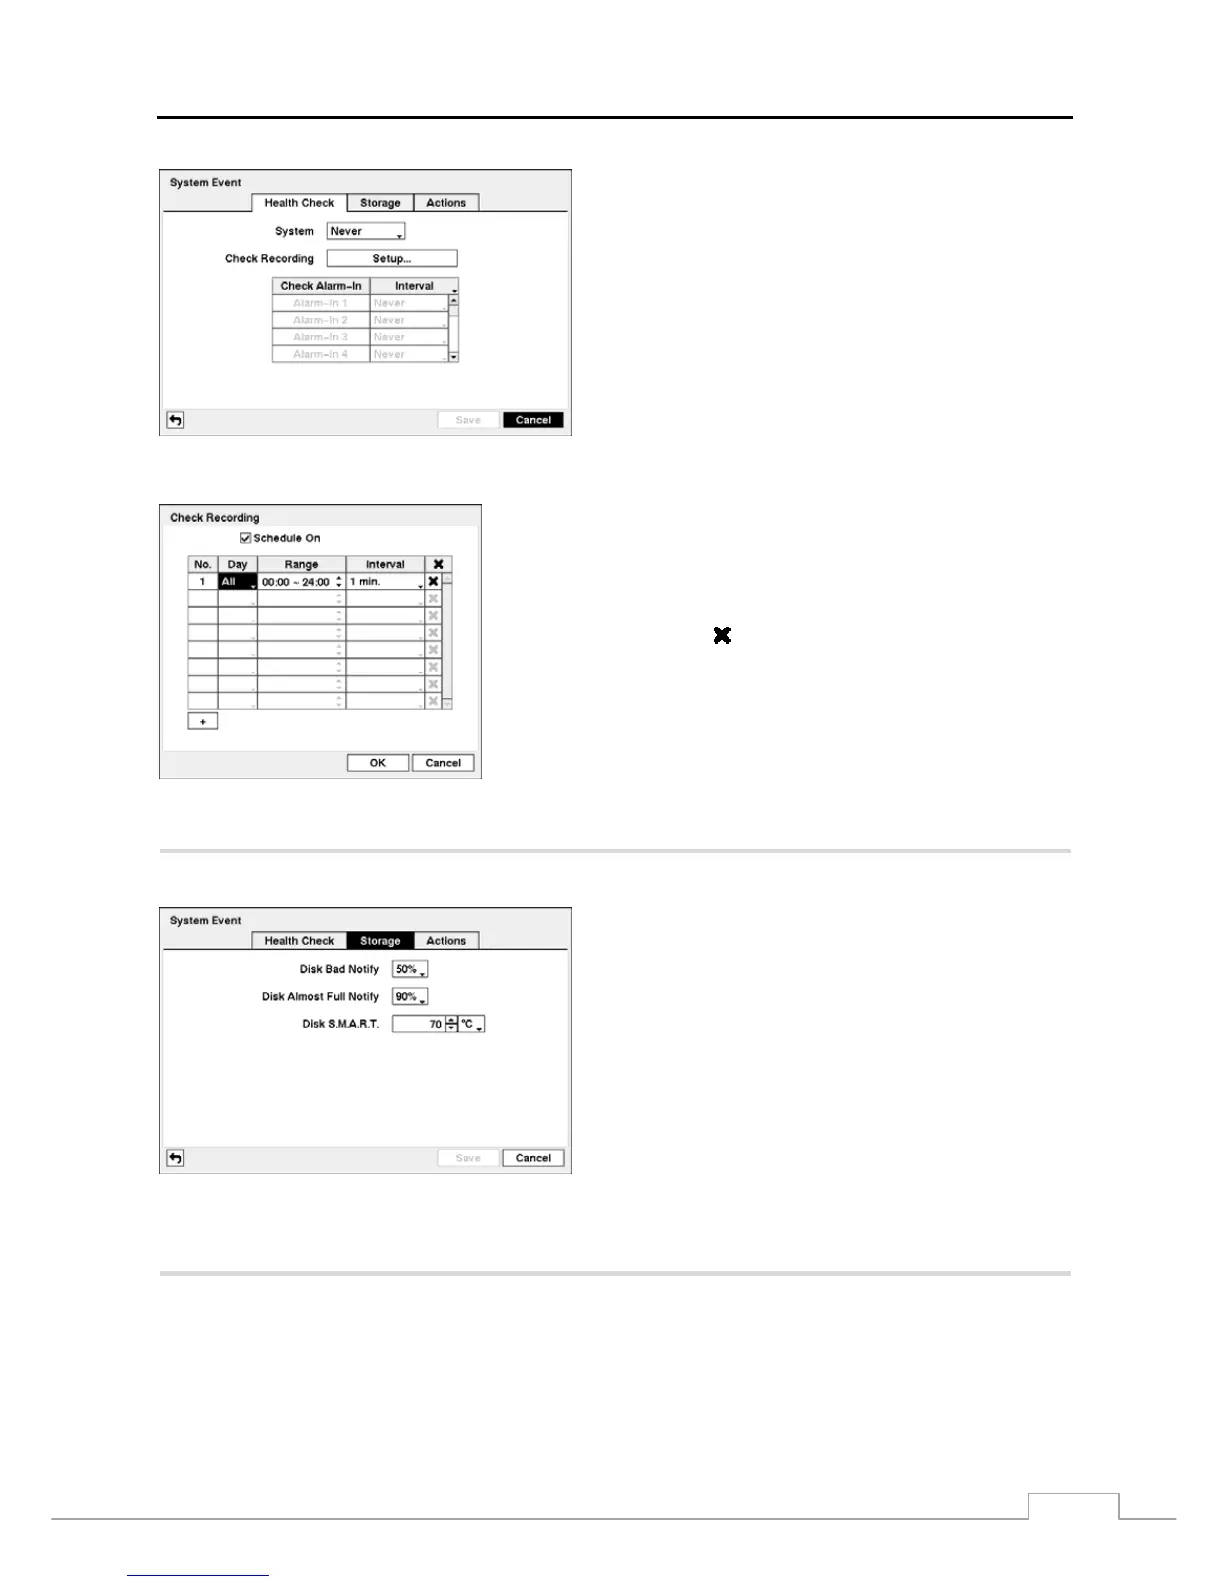
Figure 52 — Health Check screen
The DVR can be configured to run self-diagnostics and report
the results.
Selecting the box beside System allows you to select the
interval that you want the DVR to run self-diagnostics on
the system. You can select from 1 hr. to 30 days or Never.
Select the Setup... box beside Check Recording, and the Check
Recording screen appears.
Selecting Schedule On toggles On and Off. When set to On, you can
select the day, time range and interval that you want the DVR to run
self-diagnostics on the recorder. The Interval can be selectable from 1 min.
to 7 days or Never. The
box allows you to delete a check recording
schedule.
Selecting the box under the Interval heading beside each alarm-in allows you to change the interval that you want the
DVR to run self-diagnostics on Alarm Inputs. You can select from 1 hr. to 30 days or Never.
PATH: Event menu > System Event > Storage tab
Figure 53 — Storage screen.
Select the box beside Disk Bad Notify, and select percentage
level of bad disk sectors at which you want the DVR to trigger
an alert. Percentage levels range from 10% to 90%.
Select the box beside Disk Almost Full Notify, and select the
percentage level of disk usage at which you want the DVR to
trigger an alert. Percentage levels range from 80% to 99%.
Select the first box beside Disk S.M.A.R.T., and scroll through
the numbers by using the Up and Down arrows to. Refer to the
hard disk drive manufacturer’s documentation for the correct
temperature setting. If the temperature of hard disk drive
exceeds the defined threshold, the system triggers an alert.
Select the second box beside Disk S.M.A.R.T., and select either ºC (Celsius) or ºF (Fahrenheit).