Step 1
Step 2
Step 3
Verify that the grid voltage matches the microinverter rating
Y3 AC bus cable distribution
Attaching the APsystems microinverters to the racking
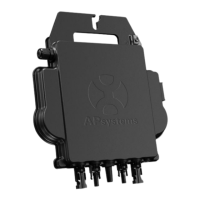
DS3 Series Microinverter Quick Installation Guide
a. One end of the AC bus cable is used to access the junction box connected to the power grid.
b. Wire the conductors of the AC bus as follows:
European Standard: L - BROWN; N - BLUE; PE - YELLOW GREEN;
American Standard: L1 - BLACK; L2 - RED; PE - GREEN.
NOTE: Wiring color codes may vary according to local regulations. Before connecting to the AC bus, ensure that all wires of the installation match. Incorrect
cabling can irreparably damage the microinverters, and such damage is not covered by the warranty.
a. Mark the location of each microinverter on the rack relative
to the PV module junction box or any other obstructions.
b. Install one microinverter at each of these marked locations
using the hardware recommended by your module racking vendor.
2024/01/08 Rev4.0 Quick Installation Guide
1
M8 - Not supplied by Apsystems
Thoroughfare
Tip: When flush-mounting photovoltaic modules on the rooftop, ensure that the DC
connectors, antenna, and LED indicator of the microinverter are facing outwards. This
arrangement facilitates monitoring of indicator status and ensures optimal communication
quality.
ATTENTION: Do NOT carry the microinverter by the AC cable. This could lead to partial or complete disconnection of the AC
cable from the unit, resulting in no operation or poor operation.
NOTE: Install the microinverters (including DC and AC connectors) beneath the PV modules to protect them from direct exposure to rain, UV, or other adverse
weather conditions.
with local electrical codes.
Step 4
Grounding the system
onto the rack as a ground connection. This is also a solution to ground the rack through
inverter when the inverters are grounded.
, an external wire can be bonded to the grounding
lug on the exterior of the inverter and connected to ground.
Step 5
Connecting the APsystems microinverter to the AC bus cable
Insert the microinverter AC connector into the trunk cable connector.
Ensure you hear the “click” sound as evidence of a secure connection.
From left to right are:
L-PE-N or L1-PE-L2.
click
the connectors.
to protect them.
Step 6
Installing a bus cable end cap at the end of the AC bus cable
a. Strip cable jacket.
b. Insert the cable end into the seal.
the base.