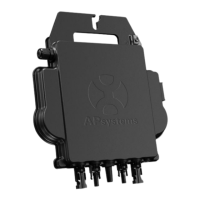
The APsystems YC500-A is a photovoltaic grid-connected inverter, commonly referred to as a microinverter, designed for utility-interactive applications. It is a key component of a comprehensive solar energy system that also includes the APsystems Energy Communication Unit (ECU) and the APsystems Energy Monitor and Analysis (EMA) web-based monitoring and analysis system. This integrated approach ensures efficient energy production, reliable operation, and intelligent system management.
Function Description
The primary function of the APsystems YC500-A microinverter is to convert the direct current (DC) electricity generated by individual solar photovoltaic (PV) modules into alternating current (AC) electricity that can be used by a home or business and fed back into the utility grid. Unlike traditional string inverters that connect multiple PV modules in series, the YC500-A operates independently for each pair of PV modules, offering significant advantages in terms of energy harvesting and system reliability.
Each APsystems YC500-A microinverter features two independent DC inputs, each equipped with its own Maximum Power Point Tracking (MPPT) control. This means that each connected PV module can operate at its optimal power output, regardless of the performance of other modules in the array. For example, if one module is partially shaded, dusty, or oriented differently, the YC500-A ensures that the affected module's reduced performance does not negatively impact the output of the other, unaffected module. This individual MPPT capability maximizes the overall energy production of the PV array.
The microinverter is designed to operate only when it senses power coming from the grid. This safety feature ensures that it will not energize the AC circuit until it can read power from the utility grid, preventing islanding situations. It connects with split-phase grids and is compatible with most 60 and 72-cell PV modules.
The APsystems YC500-A is part of a distributed inverter system, which inherently enhances system reliability. In a distributed system, the failure of a single microinverter does not lead to the shutdown of the entire PV array, unlike a centralized or string inverter system where a single point of failure can disable the entire array. This design ensures continuous energy production from the remaining operational microinverters.
Usage Features
The APsystems YC500-A microinverter system is designed for simple installation and flexible deployment.
- Easy Installation: Each microinverter easily mounts on the PV racking, typically directly beneath the PV modules. Low voltage DC wires connect directly from the PV module to the microinverter, eliminating the risks associated with high DC voltage found in string inverter systems. The installation process involves several steps:
- AC Branch Circuit Junction Box Installation: An appropriate junction box is installed on the PV racking, usually at the end of a branch of modules. The AC branch end cable is connected to this box, and the conductors (L1-RED, L2-BLACK, NEUTRAL-WHITE) are wired.
- Microinverter Attachment: Microinverters are mounted on the rack, ensuring proper spacing to avoid obstructions from PV module junction boxes. Mounting hardware recommended by the module racking vendor is used. Grounding washers can be used to ground the microinverter chassis to the PV module racking.
- PV Module Connection: DC cables from the PV modules are connected to the microinverter. During this connection, the microinverter provides a visual indication (blinking red then green three times) to confirm correct functioning. This check occurs within 5 seconds of the initial DC voltage application.
- System Grounding: The system is grounded using the ground clamp on each microinverter, which accommodates a single #6 AWG strand and #4 AWG solid conductor.
- AC Cable Connection: The AC female connector of the first microinverter is plugged into the male connector of the next, forming a continuous AC branch circuit. A protective end cap is installed on the open AC connector of the last microinverter in the branch circuit. It is crucial not to exceed the maximum number of microinverters per AC branch circuit, as indicated on the unit label.
- Installation Map Completion: Removable serial number labels from each microinverter are affixed to an installation map, which is used for system registration and warranty purposes.
- Flexible System Design: The APsystems YC500-A allows for individual PV modules to be installed in any combination of quantity, orientation, type, and power rate. This flexibility is particularly beneficial for roofs with complex layouts, varying sun exposure, or future expansion needs.
- Smart Monitoring and Analysis: The system integrates with the APsystems Energy Communication Unit (ECU) and the web-based Energy Monitor and Analysis (EMA) system.
- The ECU is easily installed by plugging it into a wall outlet and connecting it to a broadband router or modem via Ethernet or Wi-Fi.
- Once the ECU is installed, the network of APsystems microinverters automatically reports performance data to the EMA web server.
- The EMA software provides detailed performance trends, alerts users to abnormal events, and allows for system shutdown when necessary. This comprehensive monitoring provides users with insights into their system's performance and helps in proactive maintenance.
- Operational Sequence: To operate the system, the AC circuit breaker on each microinverter branch circuit is turned ON, followed by the main utility grid AC circuit breaker. The system will begin producing power after a five-minute wait time. Microinverters will blink green every 2 seconds, indicating normal power production but not yet connection to the ECU. After the ECU is plugged in and acknowledges the microinverters, they will blink green every 10 seconds, signifying successful communication and data transmission over the power line.
Maintenance Features
The APsystems YC500-A is designed for robust and reliable operation, with built-in features to aid in troubleshooting and maintenance.
- Durable Design: The inverter housing is designed for outdoor installation and complies with the NEMA 6 environmental enclosure rating, ensuring protection against harsh weather conditions. It is also designed to operate at full power in high ambient outdoor temperatures.
- Status Indications and Error Reporting: The microinverter provides visual cues through an LED light for status indications and error reporting:
- Start-up LED: One quick red light followed by three short green blinks upon DC power application indicates a successful microinverter startup.
- Operation LED:
- Flashing Slow Green (10-second gap): Indicates the microinverter is producing power and communicating with the ECU.
- Flashing Fast Green (2-second gap): Indicates the microinverter is producing power but not communicating with the ECU.
- Flashing Red: Indicates the microinverter is not producing power.
- GFDI Error: A solid red LED indicates a DC Voltage Ground Fault Detector Interrupter (GFDI) error. The LED remains red, and the ECU reports the fault until it is cleared. Instructions for clearing this error are found in the ECU Installation and Operation Manual.
- Other Faults: All other faults are reported to the ECU, with additional troubleshooting procedures detailed in the ECU manual.
- Troubleshooting a Non-Operating Microinverter: The manual provides a structured approach to diagnose issues:
- Identify Problem Area: Determine if the issue lies with the microinverter itself or a communication problem with the ECU. A red or no light on the microinverter typically points to a microinverter problem, while no-data-display or erratic data display on the ECU often indicates a communication issue.
- Verify Utility Voltage and Frequency: Check if these parameters are within the specified ranges.
- Check Grid Connection: Ensure utility power is present at the inverter by temporarily removing AC, then DC power. Reconnect DC module connectors and observe for the one red, three green LED flashes.
- Inspect AC Branch Circuit Interconnection: Verify connections between microinverters, as loose wires in AC plugs can occur.
- Confirm AC Breaker Functionality: Ensure all AC breakers are properly functioning and closed.
- Check DC Connections: Inspect connections between the microinverter and the PV module.
- Verify PV Module DC Voltage: Confirm that the PV module's DC voltage is within the allowable range for the microinverter.
- Microinverter Replacement Procedure: In case of a failed microinverter, a clear replacement procedure is outlined:
- Disconnect AC Power: Turn off the branch circuit breaker.
- Disconnect AC Connector: Disconnect the AC connector from adjacent inverters in the branch circuit.
- Disconnect DC Wires: Disconnect the PV module DC wire connectors from the microinverter.
- Remove Microinverter: Detach the microinverter from the PV array racking.
- Install Replacement: Mount the new microinverter, observing the flashing LED light upon DC cable connection.
- Reconnect AC Cable: Connect the AC cable of the replacement microinverter to the neighboring microinverter.
- Restore Power: Close the branch circuit breaker and verify the operation of the replacement unit.
- Safety Precautions: Throughout the manual, critical safety instructions are emphasized, including warnings against disconnecting PV modules from microinverters without first disconnecting AC power, the importance of qualified professionals for installation and replacement, adherence to electrical codes, and avoiding contact with hot microinverter bodies. Users are explicitly warned not to attempt repairs themselves, as this voids the warranty, and to contact APsystems Customer Support for assistance and Return Merchandise Authorization (RMA) if troubleshooting fails. Strict warnings are also given regarding never disconnecting DC wire connectors under load and always disconnecting AC power before disconnecting PV module wires.
The APsystems YC500-A microinverter system is designed to be a robust, efficient, and user-friendly solution for solar energy generation, offering enhanced energy harvesting, high reliability, and comprehensive monitoring capabilities.