4
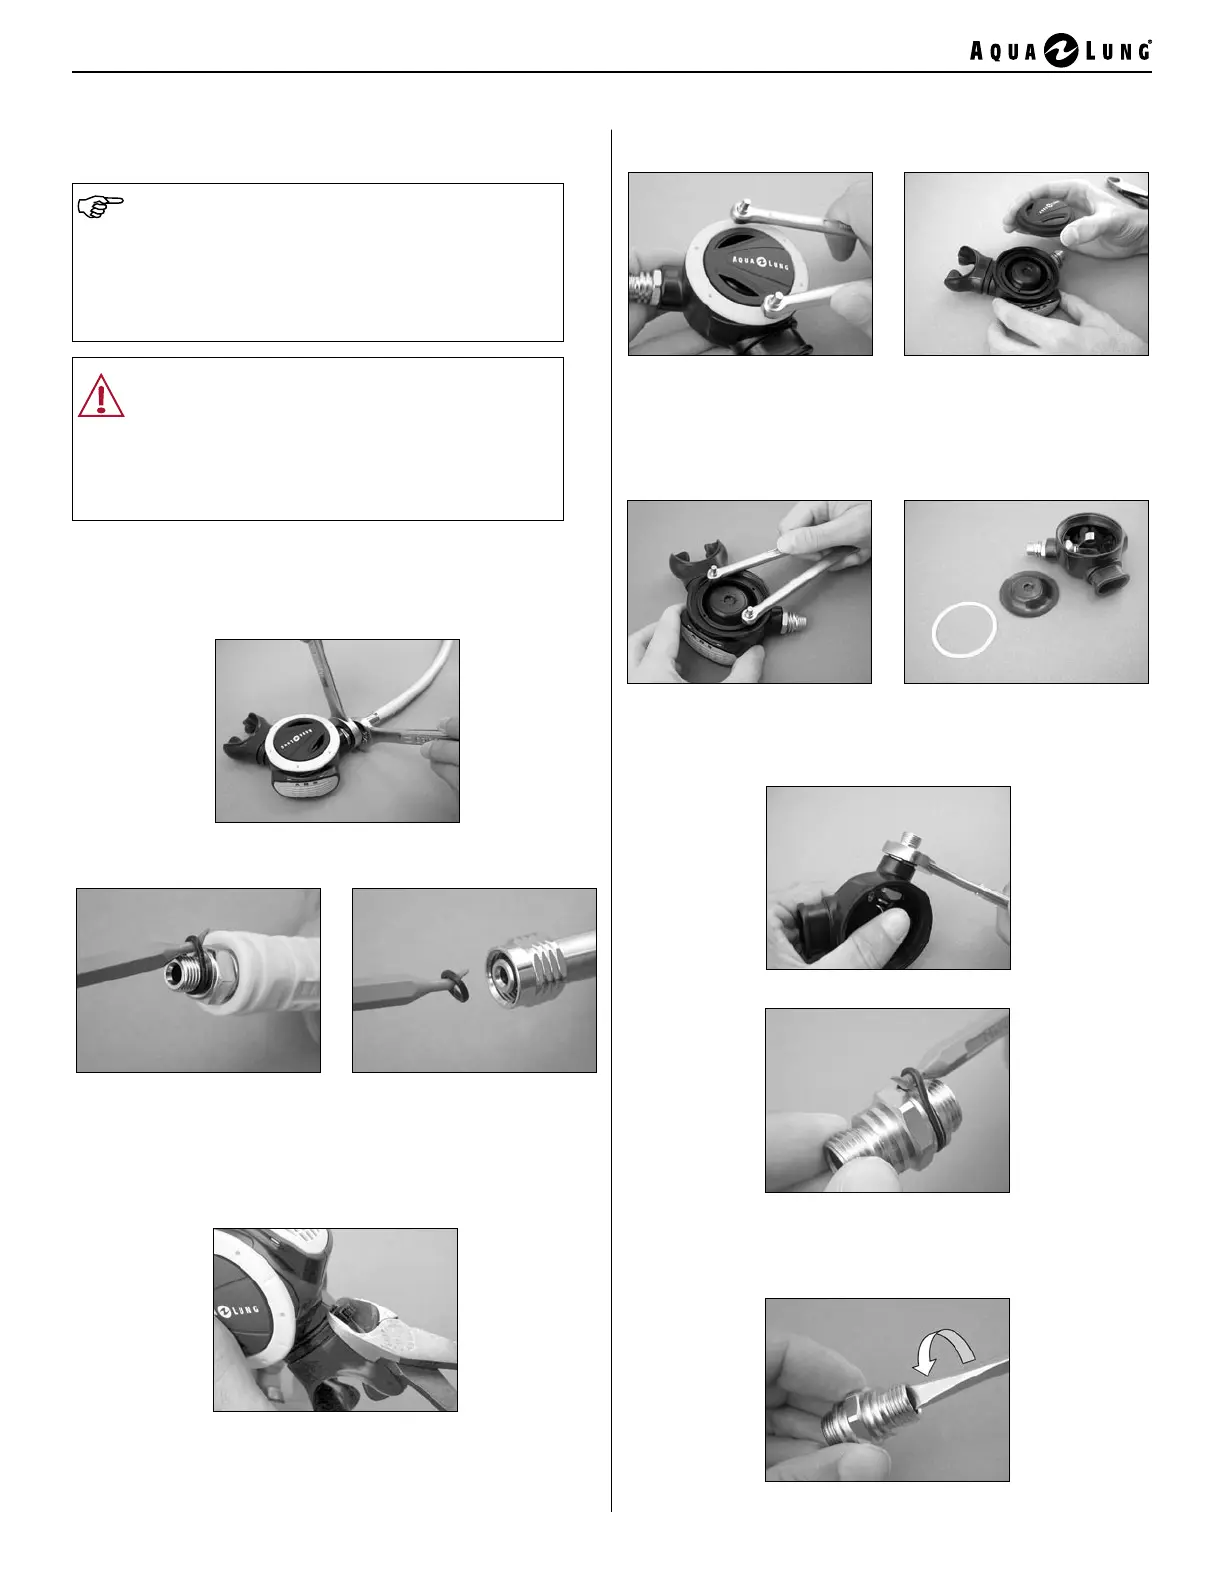
1. While holding the inlet fitting (12) of the second stage
secure with a ¾" (19mm) open end wrench, apply 11/16"
(17mm) open-end wrench to the female fitting of the LP hose
(26). Turn the fitting counter-clockwise to remove the hose
from the second stage.
2. Remove the o-rings (24&27) from the hose and discard.
Set the hose aside.
3. Using sidecutters, carefully snip the plastic mouthpiece
clamp (23) and remove the mouthpiece (22) from the box bot-
tom (19). Inspect the mouthpiece to ensure it is free of any
tears or cuts that may cause leakage of water into the second
stage or other discomfort. Discard the mouthpiece or set it
aside to be reused, depending on its condition.
5. Using the adjustable spanner wrench (p/n 129198),
remove the diaphragm retainer (16). Remove washer (17)
and diaphragm (18). Inspect the diaphragm for any signs
of tears, deterioration, or other damage. If deterioration or
damage is found, discard the diaphragm and do not attempt
to reuse.
6. While holding the box bottom (19) secure, apply a 3/4”
open end wrench to the inlet fitting (12). Hold the lever (3)
depressed, and carefully turn the fitting counter-clockwise to
loosen and remove.
7. Remove and discard the o-ring (11).
8. Apply a medium blade screwdriver to the slotted head of
the crown (21) inside the inlet fitting (12), and hold the inlet
fitting secure while turning the crown counter-clockwise to
disengage the threads.
DISASSEMBLY PROCEDURES
NOTE: Before performing any disassembly, refer
to the exploded parts drawing, which references all
mandatory replacement parts. These parts should
be replaced with new, and must not be reused
under any circumstances – regardless of the age
of the regulator or how much use it has received
since it was last serviced.
CAUTION: Use only a plastic or brass o-ring
removal tool (p/n 944022) when removing o-rings
to prevent damage to the sealing surface. Even
a small scratch across an o-ring sealing surface
could result in leakage. Once an o-ring sealing
surface has been damaged, the part must be
replaced with new. DO NOT use a dental pick,
or any other steel instrument.
4. Using the adjustable spanner wrench (p/n 129198), re-
move the retaining ring (14). Remove the purge cover (15).
 Loading...