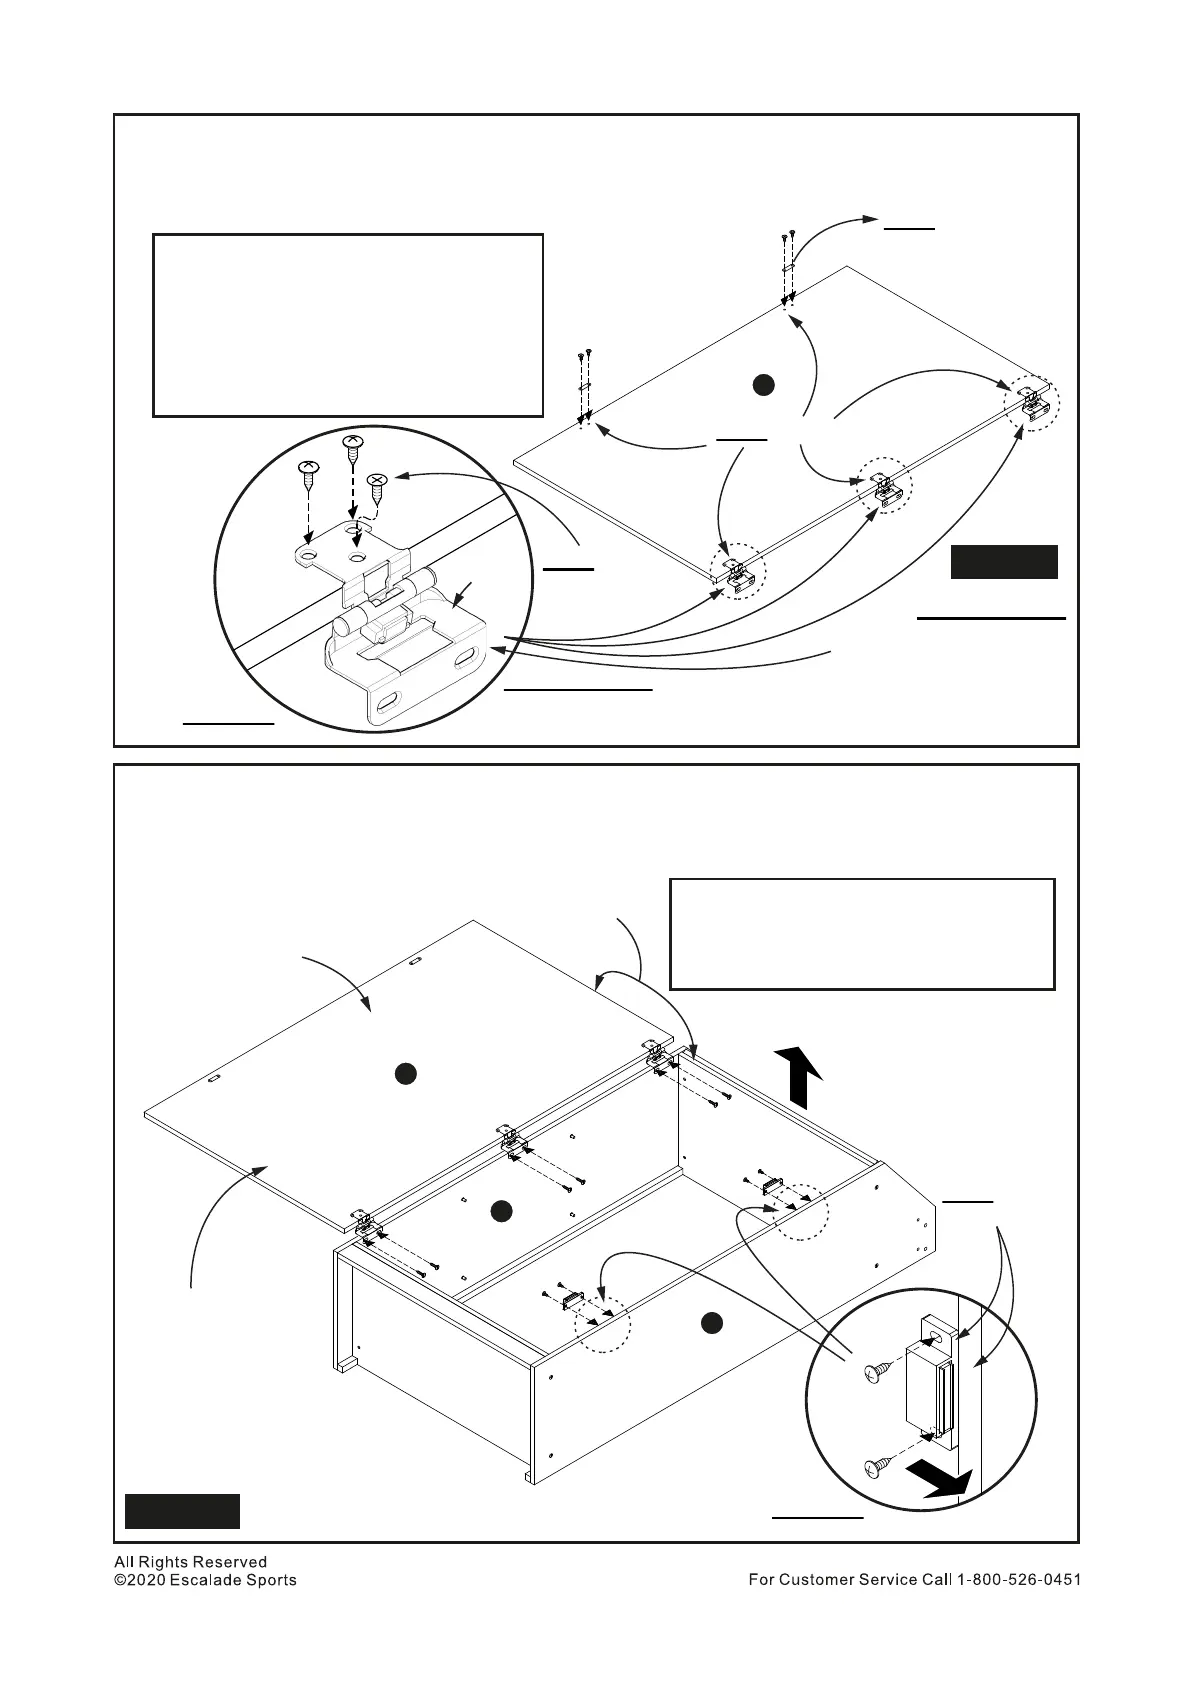
Install 2 pcs H14 Door Magnet Plate to predrilled pilot holes on Part G using 4 pcs H10 Phillips Flat
Head Screws. See Figure 5.
Install 3 pcs H12 Door Hinges to Pilot Holes on Part G using 6 pcs H9 Phillips Round Head Screws
and 3 pcs H10 Phillips Flat Head Screws. See Figure 5A.
9.
10.
H9
H10
H12
H14
G
Phillips Screw Driver
Phillips Round Head Screw - 6 pcs
Phillips Flat Head Screw - 7 pcs
Door Hinge - 3 pcs
Door Magnet Plate - 2 pcs
Door Panel - 1 pc
PARTS REQUIRED
Figure 5
Important Note:
Be sure to use the screws as per diagram
when installing the door hinges.
Note:
One H10 Screw
in this position
H9
H9
H10
H12
Figure 5A
H10
H10
H14
H14
H10
H10
G
Front
H9
H9
Figure 6
Figure 6A
Note:
Must be flush
Install 2 pcs H13 Door Magnet to the predrilled pilot holes on Part B inner side using 4 pcs H9 Round
Head Screws. See Figure 6A.
Install Cabinet Door with Hinges installed to the Bottom cabinet. Align all holes on hinges to the Pilot
Holes on Part A inner side, then install it using 6 pcs H9 Round Head Screws. See Figure 6.
11.
12.
H9
H13
Phillips Screw Driver
Phillips Round Head Screw - 10 pcs
Door Magnet - 2 pcs
PARTS REQUIRED
9
Note: Pilot Holes
Front
Have helper hold
door while you
install H9 Screws
into pilot holes
Important Note:
Must be flush
H13
H9
H9
H9
H9
H9
H9
H9
H9
H9
H9
B
G
A
Cabinet door with
hinges installed
Note:
Holes in H10
beveled side up
Important Note:
Hinges must be orientated
exactly as per diagram for
correct assembly