Install the Phoenix PC mount 4 pin jack at the location on the PC
board marked "Power". It should be installed so it fits inside the
outline marked on the PC board.
( ) Power 4 pin (green)
Voltage Regulators
IC1 is installed laying down on the PC board with the heatsink
between it and the PC board . Carefully bend IC1’s leads 90
degrees and insert into the appropriate holes in the board. Slide the
heatsink in place and use the supplied 4/40 screw and nut to
secure the assembly through the hole in the board.
( ) IC1 78M05 (LM340T5)
IC7 looks like a transistor. It should be installed just like the
transistors.
( ) IC7 78L033 (CZ-3.3)
Inductor
L1 looks like a 1 watt resistor. Bend one lead over and install it
vertically on the board so it is standing up.
( ) 1 L1 (silver-black-black-red-silver)
Crystals
Install the following 2 crystals with the body 1/8 inch above the
surface of the PC board (Caution: Make sure you space the crystal
as stated, to avoid shorting traces on the PC board).
( ) Y1 3.579 Mhz crystal (3.57ECSV)
( ) Y2 16.00 Mhz crystal (160ECSV)
Crystal X1 looks differently from the other 2 crystals - it is a small,
cylindrical type with close-spaced leads. X1 should be mounted 1/4
above the PC board, then bent over so it lays flat against the board,
away from the Mega128.
( ) X1 32768 Khz crystal
Fuse
The RC210 uses a special, self-resetting fuse. It looks like a yellow
ceramic capacitor and is marked "X050"
( ) F1 Fuse
Resistor Networks
The resistor networks are a 10 pin single in-line package. There is
a white dot on one end, which indicates pin 1. Line pin 1 up with "1"
marking silkscreened on the PC board at RN1 and RN2.
( ) RN1 470 ohm resistor network
( ) RN2 10K ohm resistor network
Jumper Headers
Locate the 2 - 32 pin jumper header connectors. Carefully cut them
between pins (in the notches in the plastic) to create the following:
( ) 7 3 pin
( ) 3 5 pin
( ) 1 6 pin
( ) 1 8 pin
( ) 4 2 pin
You may add the leftover to your junkbox!
Install the following pin headers you just created, being careful to
keep them perpendicular to the pc board
( ) JP1, JP2, JP3 3 pin
( ) JP4, JP5, JP6 3 pin
( ) JP7, JP8, JP9, JP13 2 pin
( ) JP10, JP11, JP12 5 pin
( ) J6 3 pin
( ) J7 8 pin
( ) J9 6 pin
Now install J5, the 10 pin dual row header
( ) J5
Locate the push-on jumpers and slide them over pins 1 & 2 or 2 & 3
of the jumper headers depending on your COS polarity
requirements. Don't worry if you don't know which you need right
now, as you can easily change them later.
( ) JP1, JP2, JP3, JP4, JP5, JP6
Install push-on jumpers over pins 2 & 3 of JP10, JP11 and JP12.
This completes the audio path for the receiver amplifiers when the
audio delay board is not installed:
( ) JP10, JP11, JP12
Install a push-on jumper on each of the 3 de-emphasis jumpers.
You can skip this step if you plan on using flat audio on your
repeater.
( ) JP7, JP8, JP9
Install a push-on jumper on JP13. This enables the LED's (you can
remove it later if you wish to reduce current draw)
( ) JP13
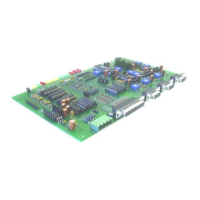
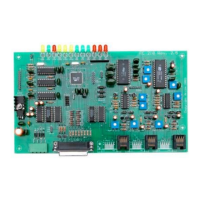
RC210 Repeater Controller
Assembly Manual
Hardware Version 3.3
 Loading...