7. Natural air circulation must be permitted around the unit at all times.
NOTE: Provide a minimum of 36" clearance at all times around the unit for service access to
Filters, Blower, and Motor and for air circulation.
8. A suitable electrical disconnect switch needs to be installed somewhere in plain view of the
equipment for servicing purposes (this is not a code requirement in all localities, it is a safety
recommendation).
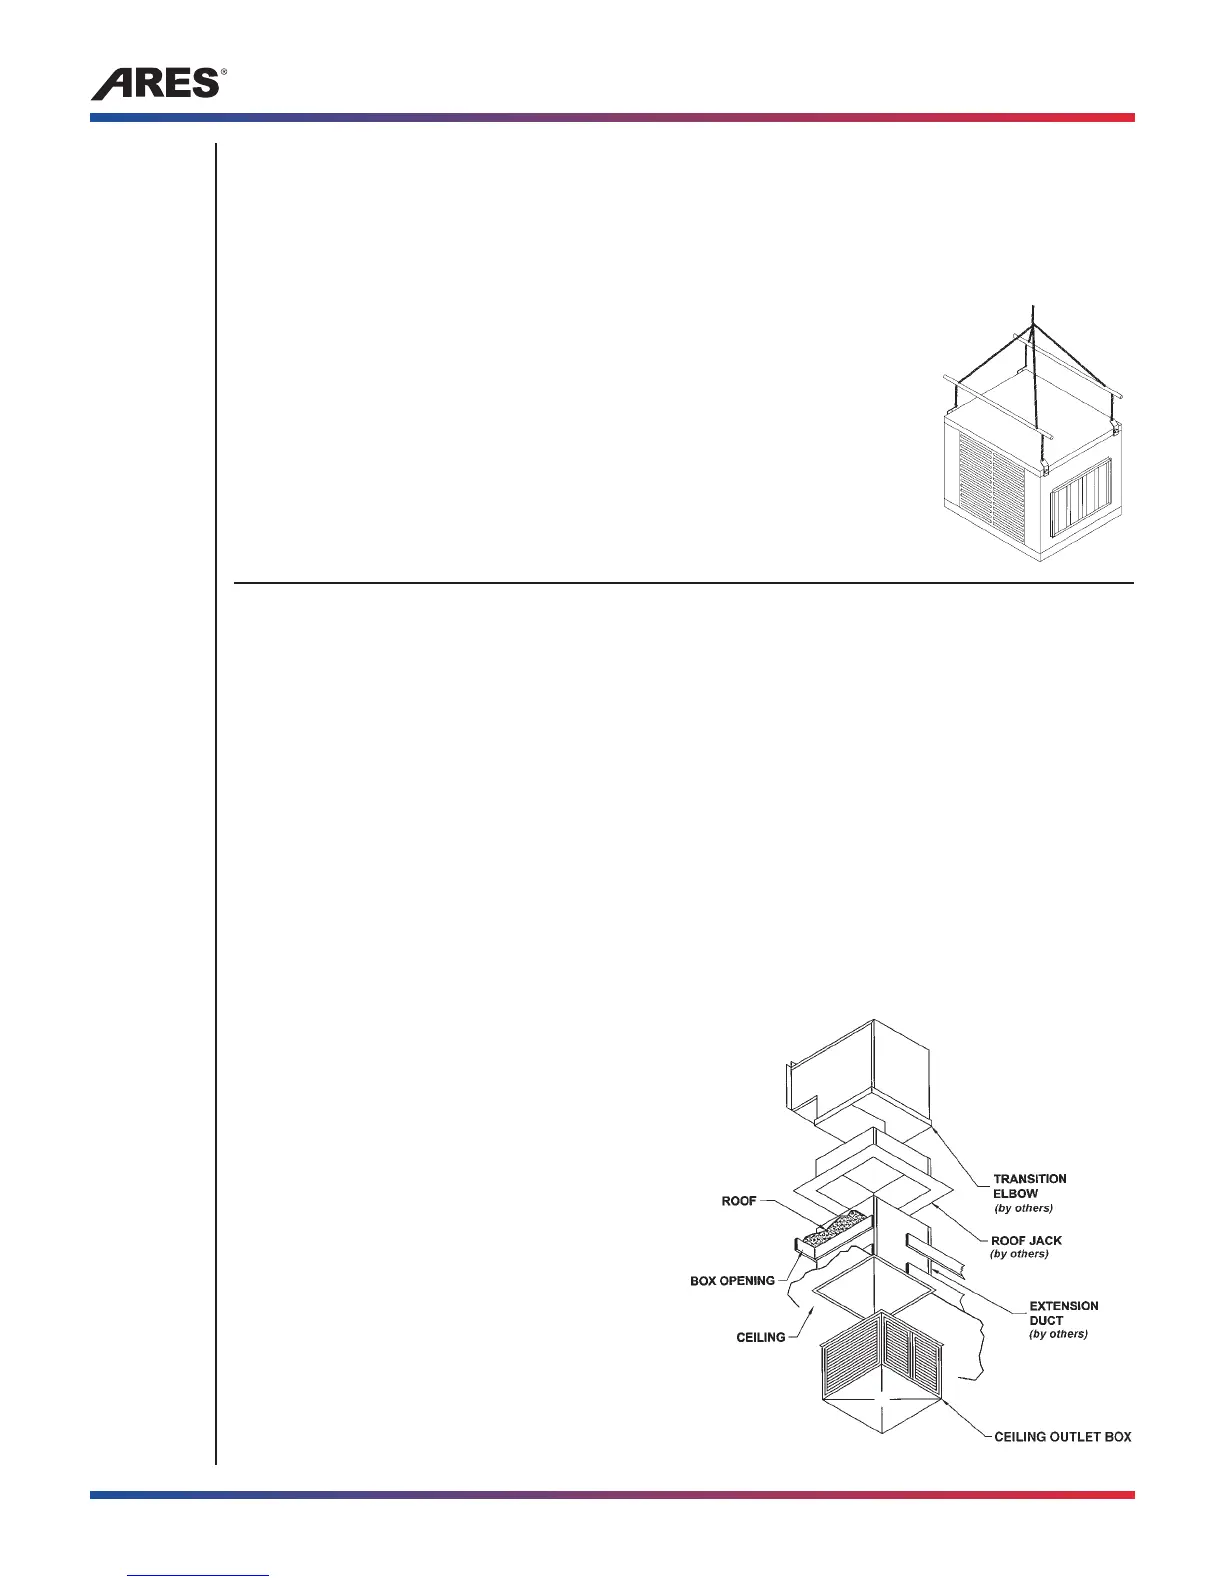
HOISTING EYE INSTALLATION
Remove the blower pad frames.
Position the hoisting eyes on corners of the unit with the angle towards the
center of the unit. (See illustration at right)
Run the bolt through the unit housing and hoisting eye, then attach the nut.
(See illustration at right).
INSTALLATION
DUCTWORK
1. Sizing and layout of ductwork and outlets should provide maximum uniform airflow throughout the
area. Make-up air should be introduced at a location inside the area, but as far away from existing
exhaust hoods as possible to permit conditioned air to flow throughout the entire area before
reaching the exhaust zone, or unless connected to an engineered make-up air system.
2. Ductwork must be adequately sized and designed for minimum resistance (static pressure) to
provide required airflow. Check rating plate for minimum allowable CFM.
3. To avoid pressure losses, all short radius rectangular elbows should have turning vanes, offsets
should not be avoided, and small ducts and takeoffs should be undersized.
4. Main supply duct normally consists of a rectangular vane elbow at the unit and vertical duct
extension, both pieces having the same dimensions as the unit discharge opening. The ductwork
gauge size must be according to local codes. Ceiling registers should be the fixed type (if
adjustable, modify so full closing is not possible). (See illustration below)
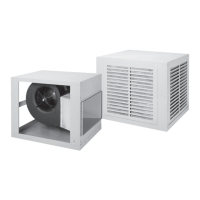
CEILING REGISTER
With the make-up air unit in place on the floor, and
the framed roof opening installed:
1. Position roof jack over the opening.
2. Caulk and attach the transition elbow to the
unit with a flexible connection.
3. Push the extension duct up until it slides
through the roof
jack into the transition elbow
(the bottom flange of the extension duct
should fit flush with ceiling). Seal, caulk and
secure into place.
4. In the building, center the box over the
opening and secure it.
5. Protect outdoor ductwork with weatherproof
insulation material.
6. This is ARES recommendation but you should
always check local codes in your area.
Make-up Air Blower Model SC1/SC2/SC3, SE1/SE2, DC1/DC2 and DE1/DE2
4
Tel: (800)-288-0892 • www.aresmakeupair.com