11
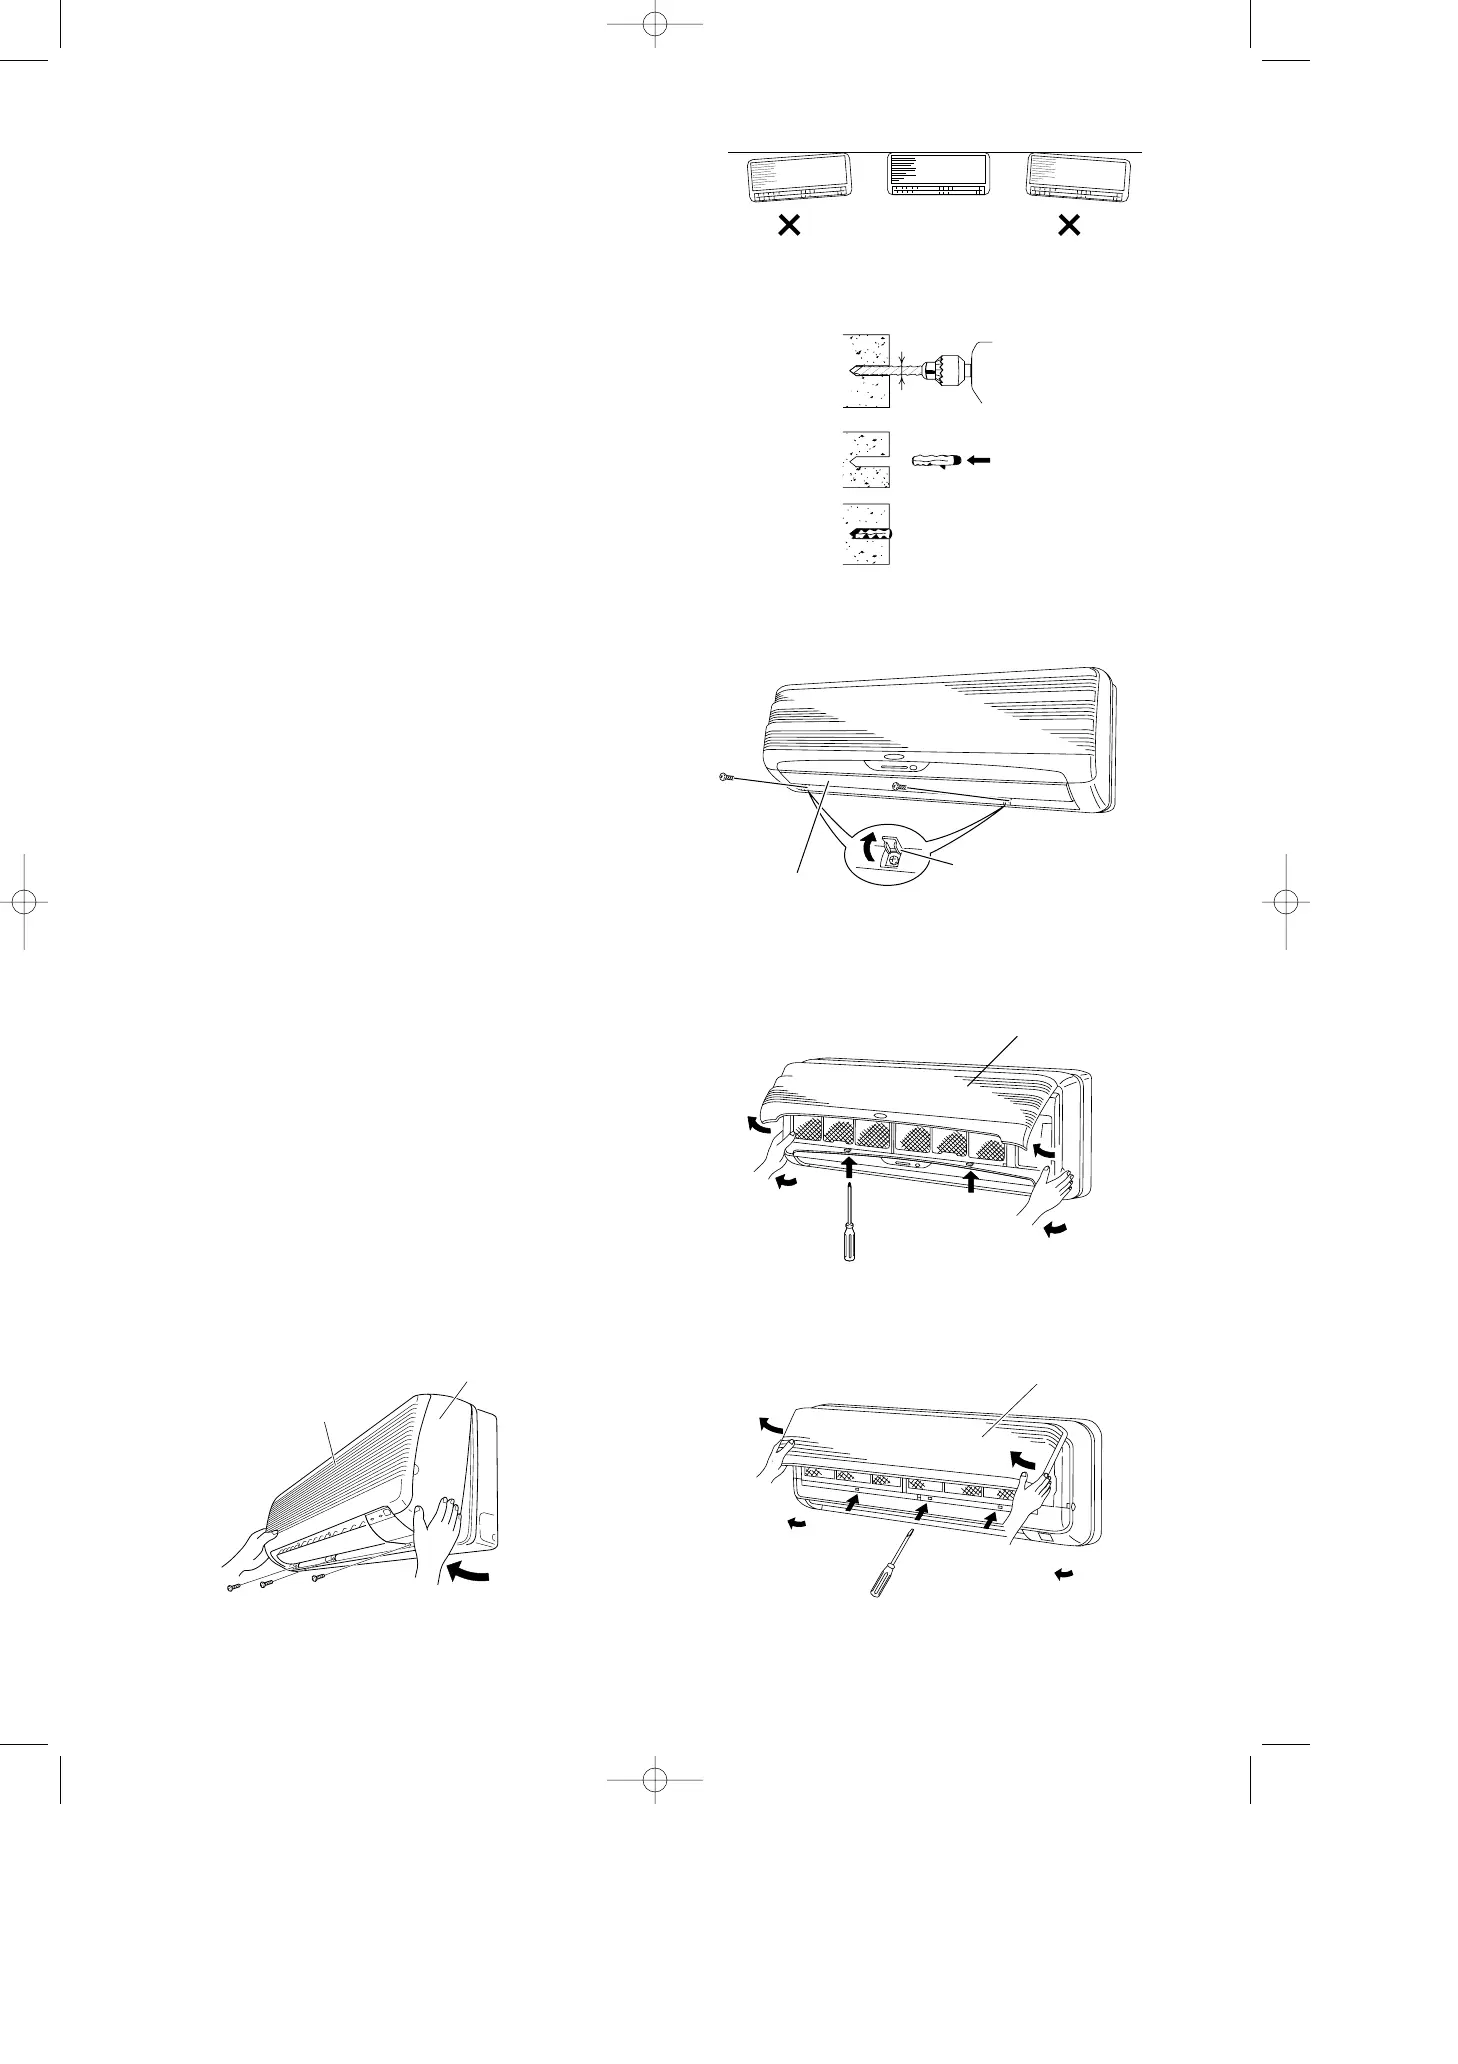
(2) Double check with a ruler or carpenter’s level that
the panel is level. This is important to install the unit
properly. (Fig. 12)
(3) Make sure the panel is flush against the wall. Any
space between the wall and unit will cause noise
and vibration.
b) If Block, Brick, Concrete or Similar Type Wall
Make 4.8 mm dia. holes in the wall. Insert rawl plugs
for appropriate mounting screws. (Fig. 13)
3-4. Remove the Grille to Install the Indoor Unit
Basically, these models can be installed and wired with-
out removing the grille. If access to any internal part is
needed, follow the steps as given below:
How to remove the grille (AWMI28/36/50AHL)
(1) Set the flap in the horizontal position.
(2) Unscrew the 2 screws. (Fig. 14a)
(3) Remove the grille. (Fig. 14b)
(a) Hold both corners of the air intake grille, then
pull out and up to open.
(b) Pull the lower part of the grille toward you to
remove.
(c) Use a standard screwdriver to push up the 2
tabs to remove the grille.
How to remove the grille (AWMI70AHL)
(1) Set the 2 flaps in the horizontal position.
(2) Unscrew the 3 screws. (Fig. 14c)
(3) Remove the grille.
(a) Hold both corners of the air intake grille, then
pull out and up to open. (Fig. 14d)
(b) Use a standard screwdriver to push up the 3
tabs to remove the grille. (Fig. 14d)
(c) Pull the lower part of the grille toward you to
remove. (Fig. 14c)
dia. hole