73
V 09/22
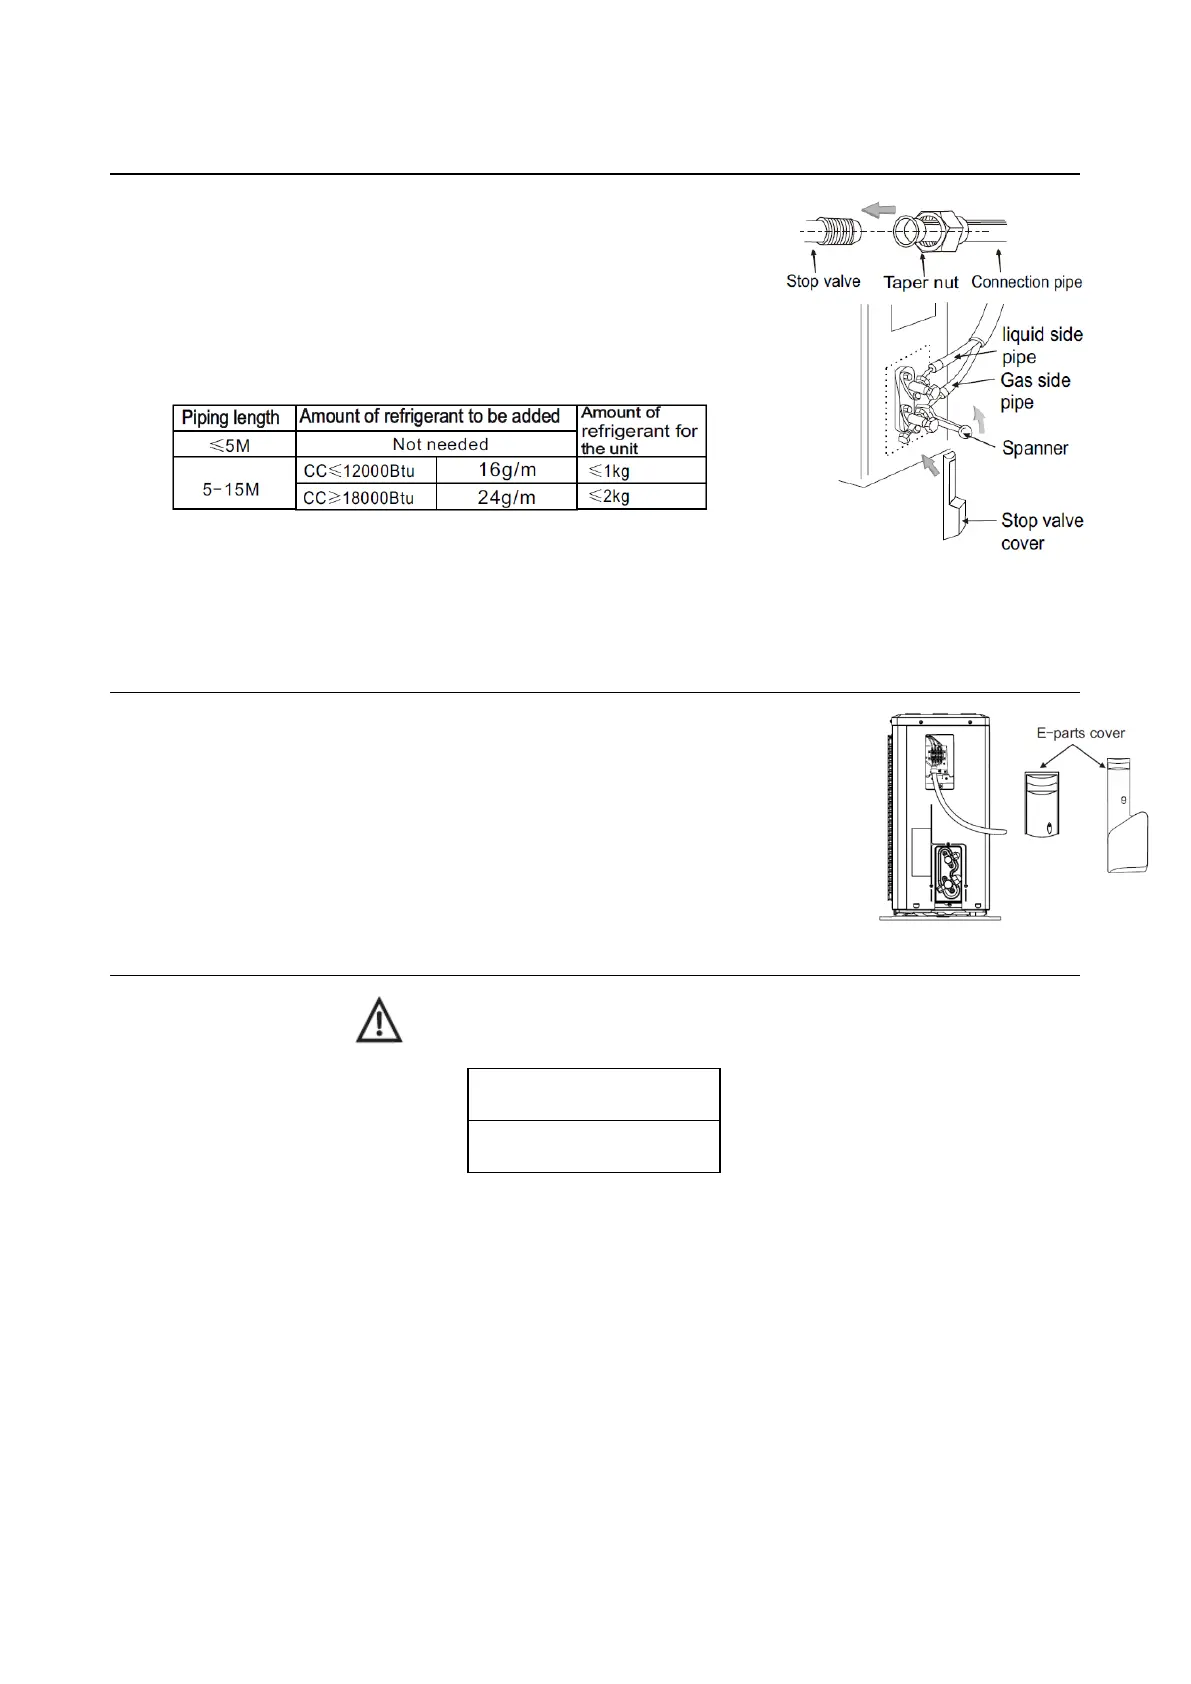
INSTALL THE CONNECTION PIPE
Connect the Outdoor Unit with Connecting Pipe: Aim the counter-bore of the
connecting pipe at the stop valve, and tighten the Taper nut with fingers. Then
tighten the Taper nut with a torque wrench.
When prolonging the piping, extra amount of refrigerant must be added so that the
operation and performance of the air conditioner will not be compromised
Note: 1. This table is for reference only.
2.The joints shall not be reused, unless after re-flaring the pipe.
3.After installation, check the stop valve cover whether be fixed effectively.
WIRING CONNECTION
1. Loosen the screws and remove E-parts cover from the unit.
2. Connect the cables respectively to the corresponding terminals of the terminal board of
the outdoor unit (see the wiring diagram), and if there are signals connected to the plug,
just conduct butt joint.
3. Ground wire: Remove the grounding screw out of the electric bracket, cover the
grounding wire end onto the grounding screw and screw it into the grounding hole.
4. Fix the cable reliably with fasteners (Pressing board).
5. Put the E-parts cover back in its original place and fasten it with screws.
Insert a magneto thermic switch with sufficient
power and observe the following table:
Magnetothermal power
switch
Wiring diagrams
Indoor unit
 Loading...