Do you have a question about the Ariens 927 Series and is the answer not in the manual?
Read and understand manual and engine instructions before operating unit.
Thoroughly inspect and clear work area of objects which might be picked up and thrown.
Keep equipment in good condition. Keep all shields in place and safety devices operating properly.
Keep all nuts, bolts and screws tight and be sure equipment is in safe working condition.
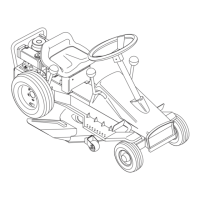
Place steering wheel onto column shaft with holes lined up and drive roll pin through holes.
Place seat on seat bracket and install four cap screws with lock washers.
Wheel brakes are properly adjusted at factory. Test brakes after riding mower is assembled.
Mower belt tends to 'seat-in' during first few hours of operation. Ariens recommends adjustment of belt tension.
Engine is shipped without oil. Refer to Lubrication and Maintenance Section to fill.
Reduce tire pressure to 12 PSI before operating unit. Mower shipped over inflated.
Battery is shipped without electrolyte. Fill each cell with electrolyte to level indicator.
DANGER: Failure of interlock can result in severe personal injury. Ensure proper function.
Complete Riding Mower Warranty Registration Form and mail original copy to Ariens Company.
Instruct customer on controls and operation. Emphasize safety and discuss Safety Precautions.
Check engine oil level, air filter, and safety interlock system before starting.
WARNING: Gasoline is highly flammable. Handle with care. Never fill tank when engine is running or hot.
Ensure controls are reachable. Loosen bolts to move seat to desired position.
Read manual. Ensure Speed Selector is neutral and Mower Clutch is disengaged before starting.
Use Choke for cold start. Move to Fast when engine warms up. Do not change governor settings.
Pull starter rope slowly to compression stroke, then pull rapidly for full arm stroke.
WARNING: Turn Ignition Key (OFF) and remove it before maintenance or leaving unit unattended.
Depressing Brake Pedal with Clutch Pedal depressed stops mower on friction wheel hub.
Depressing Clutch Pedal disengages transmission, allowing gear shifting and smooth acceleration.
Select neutral (N) or travel speeds (six forward, one reverse) using the Speed Selector lever.
Engage Parking Brake and Latch before leaving operator's position to prevent rolling.
Move Mower Clutch Lever forward to (ON) to start blade cutting. Pull rear to (OUT) to stop blade rotation.
Move Mower Height Control to rear for max height (4"), forward for min height (1").
Depress Clutch and Brake Pedals, disengage Mower Clutch, engage Parking Brake, turn key OFF.
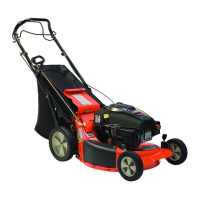
Tips to mow safely, achieve maximum performance, and maintain lawn appearance.
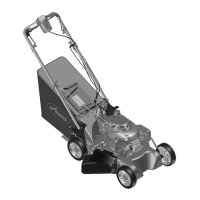
Mower may be tipped on its service bar for access during lubrication and maintenance procedures.
Wipe grease zerk fittings clean before and after lubrication. Keep grease and oil off belts.
Check oil daily or every 5 hours. Change oil after first 2 hours, then every 25 hours.
Inspect filter every 25 hours. Wash filter element in warm water and detergent.
Ensure air circulation for cooling fins. Clean fins and external surfaces every 100 hours.
Clean or replace spark plugs and reset gap to 030" every 100 hours or yearly.
Replace worn mufflers. Handle batteries with care due to explosive gases.
Stop engine, remove key, disconnect spark plug wire before replacing mower belt.
Install new belt around engine pulley, drive disk, and idler. Ensure belt is properly seated.
Check blades for wear. Sharpen both ends at 25 degrees for balance. Replace if necessary.
Remove key, disconnect spark plug wire. Remove pan from rider in reverse order.
Keep tires inflated to 12 psi. Check pressure monthly. Proper inflation is crucial.
Adjust seat to suit operator by loosening four cap screws and sliding seat to comfortable position.
Adjust clutch rod and brake band if mower doesn't stop properly or hold on hill.
Adjust belt after first five hours of operation. Tighten cap screw to prevent slippage under load.
Stop engine, remove key, disconnect spark plug. Measure blade tip to surface for 1" height.
Adjust front/rear lift links to achieve proper balance between cutting height and pitch.
Turn adjustment cap screw on adjustment lever to raise or lower right side of mower pan.
Adjust runners using spacers to prevent scalping or set for lowest cutting height.
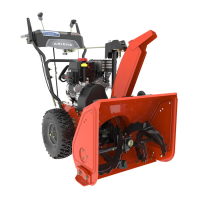
| Clearing Width | 27 inches |
|---|---|
| Stages | Two-Stage |
| Cutting Width | Not Applicable |
| Deck Material | Not Applicable |
| Starting System | Recoil |
| Warranty | 3 years |