4 - 7
4.2 FILLING FUEL TANK
To add fuel to fuel tank:
1. Put unit in open or well-ventilated area.
2. Stop engine and allow to cool.
3. Clean fuel cap and surrounding area to prevent
dust, dirt and debris from entering fuel tank.
4. Remove cap.
IMPORTANT:
DO NOT use gasohol or gasoline
containing alcohol because alcohol will cause internal
parts to deteriorate. See Engine Manual for correct
type and grade of fuel.
5. Fill fuel tank. (See
Specifications
for tank capacity.)
6. Replace fuel cap and tighten.
7. ALWAYS clean up any spilled fuel.
4.3 TO STOP IN AN EMERGENCY
To stop in an emergency, release control bail. When all
moving parts have stopped, push throttle control lever
to stop.
4.4 REPLACING TRIMMER LINE
Replace the trimmer line when it is less than 4 inches
(10.1 cm) long. For best results, use only genuine
Ariens replacement trimmer line.
1. Stop the engine and wait for all moving parts to
stop. Disconnect the spark plug wire and place it
securely away from the spark plug.
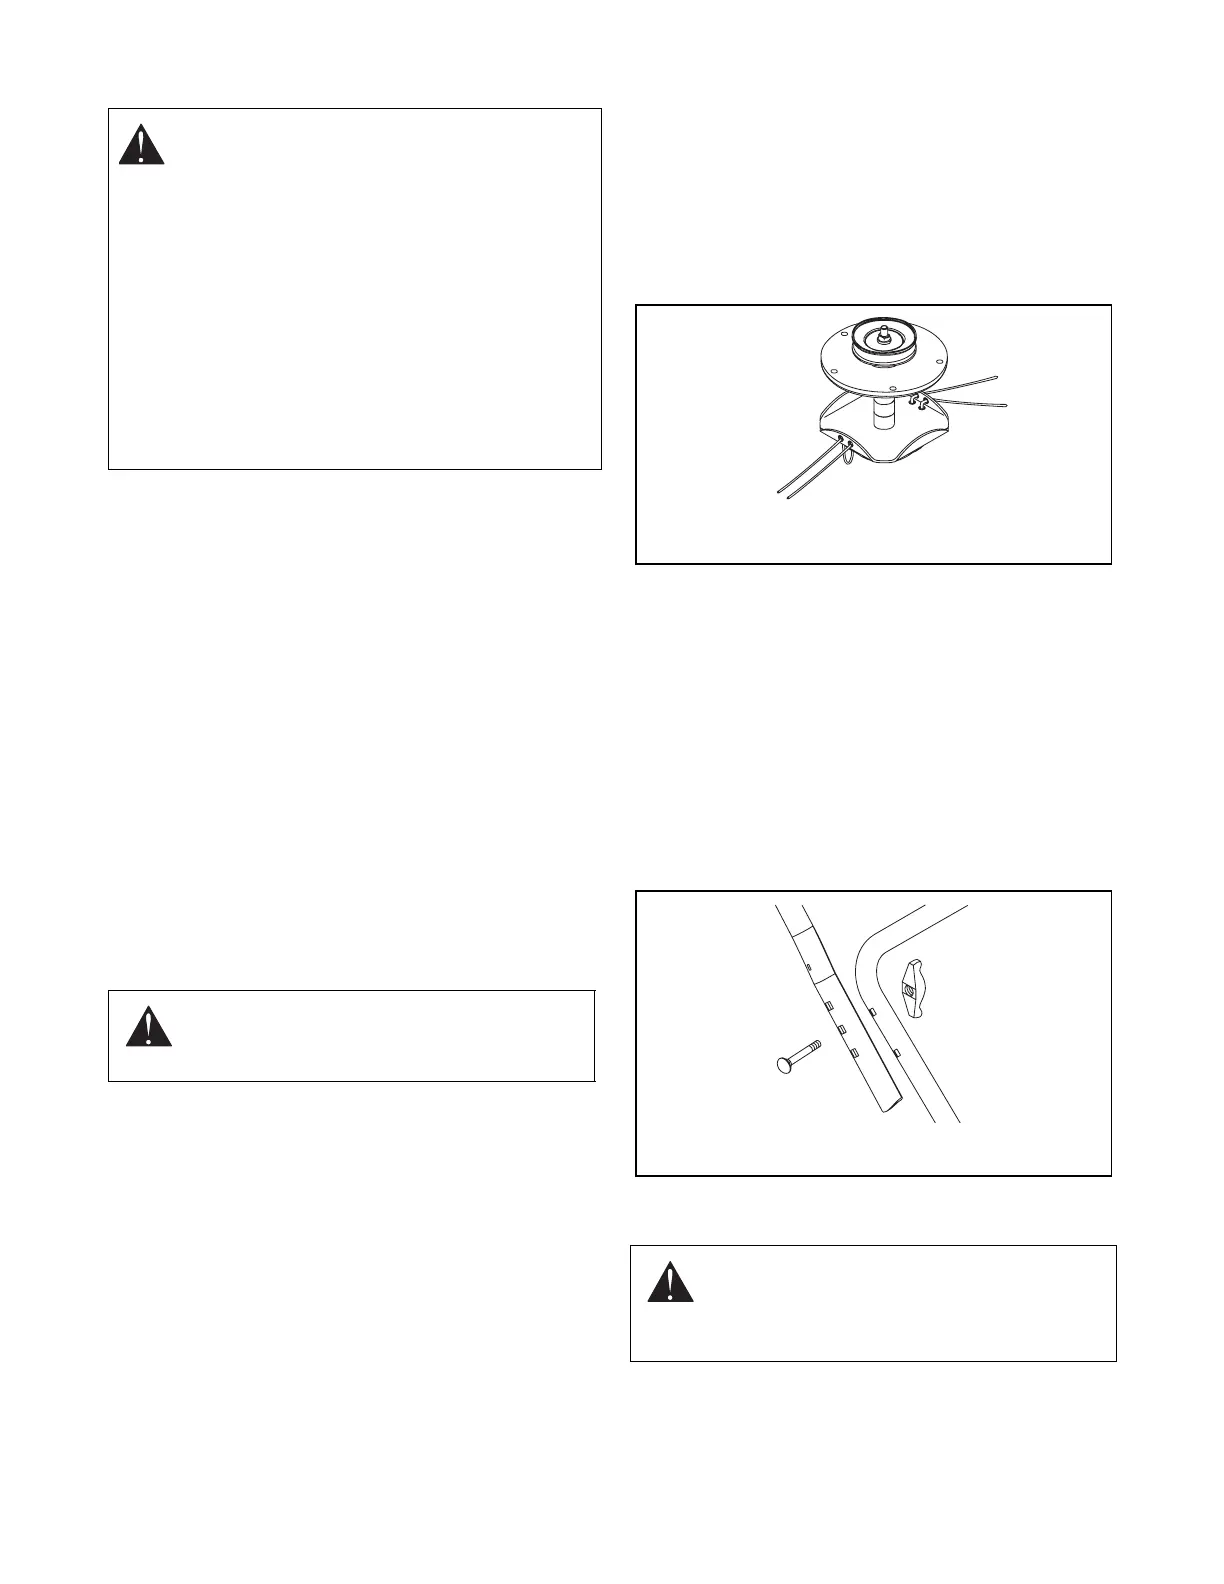
2. Remove the worn trimmer line from the cutter disk.
3. Thread the two ends of the trimmer line up from the
bottom, through the two holes in the cutter disk.
4. Thread the ends of the line through the two holes
on the side of the cutter disk.
5. Make sure the ends of both lines extend through
the cutter disk at the same length on both sides of
the cutter disk. Uneven trimmer lines cause the
trimmer head to be out of balance, which results in
excessive vibration.
6. Pull trimmer line tight.
7. If necessary, cut the ends of the trimmer line to the
same length.
4.5 HANDLEBAR HEIGHT ADJUSTMENT
1. Loosen and remove both wing knobs from
handlebar.
2. Remove carriage bolts, taking care to support
handlebar.
3. Set handlebar to desired height.
4. Line up holes in upper handlebar with holes in
lower handlebar. Be sure to use the same holes on
each side.
5. Reinstall carriage bolts and wing knobs. Tighten
securely.
4.6 CUTTING HEIGHT ADJUSTMENT
The standard cutting height is adjustable from 2" to
4-3/8" (5 to 11.11 cm). To raise the cutting height, place
more spacers (up to 4) below the cutter disk. Spacers
not used under the cutter disk must be assembled
WARNING:
EXPLOSIVE VAPORS and
FLAMMABLE FUEL can result in death or
serious injury. Handle fuel with care.
ALWAYS use an approved fuel container.
No Smoking! No lighted Materials!
No Open Flame!
Allow engine to cool before maintenance.
Never fill tank when engine is running or is hot
from operation. DO NOT overfill tank. Allow
about 1/4" of space at the top of the filler neck
for fuel expansion. Wipe up any spills and
allow vapors to dissipate before starting
engine. Use approved gasoline container.
CAUTION:
ALWAYS shut off unit and
disconnect spark plug wire before servicing
or making any adjustments.
CAUTION:
ALWAYS shut off unit,
disconnect spark plug wire and allow hot
parts to cool before making any cutting
height adjustments.


 To Next Page