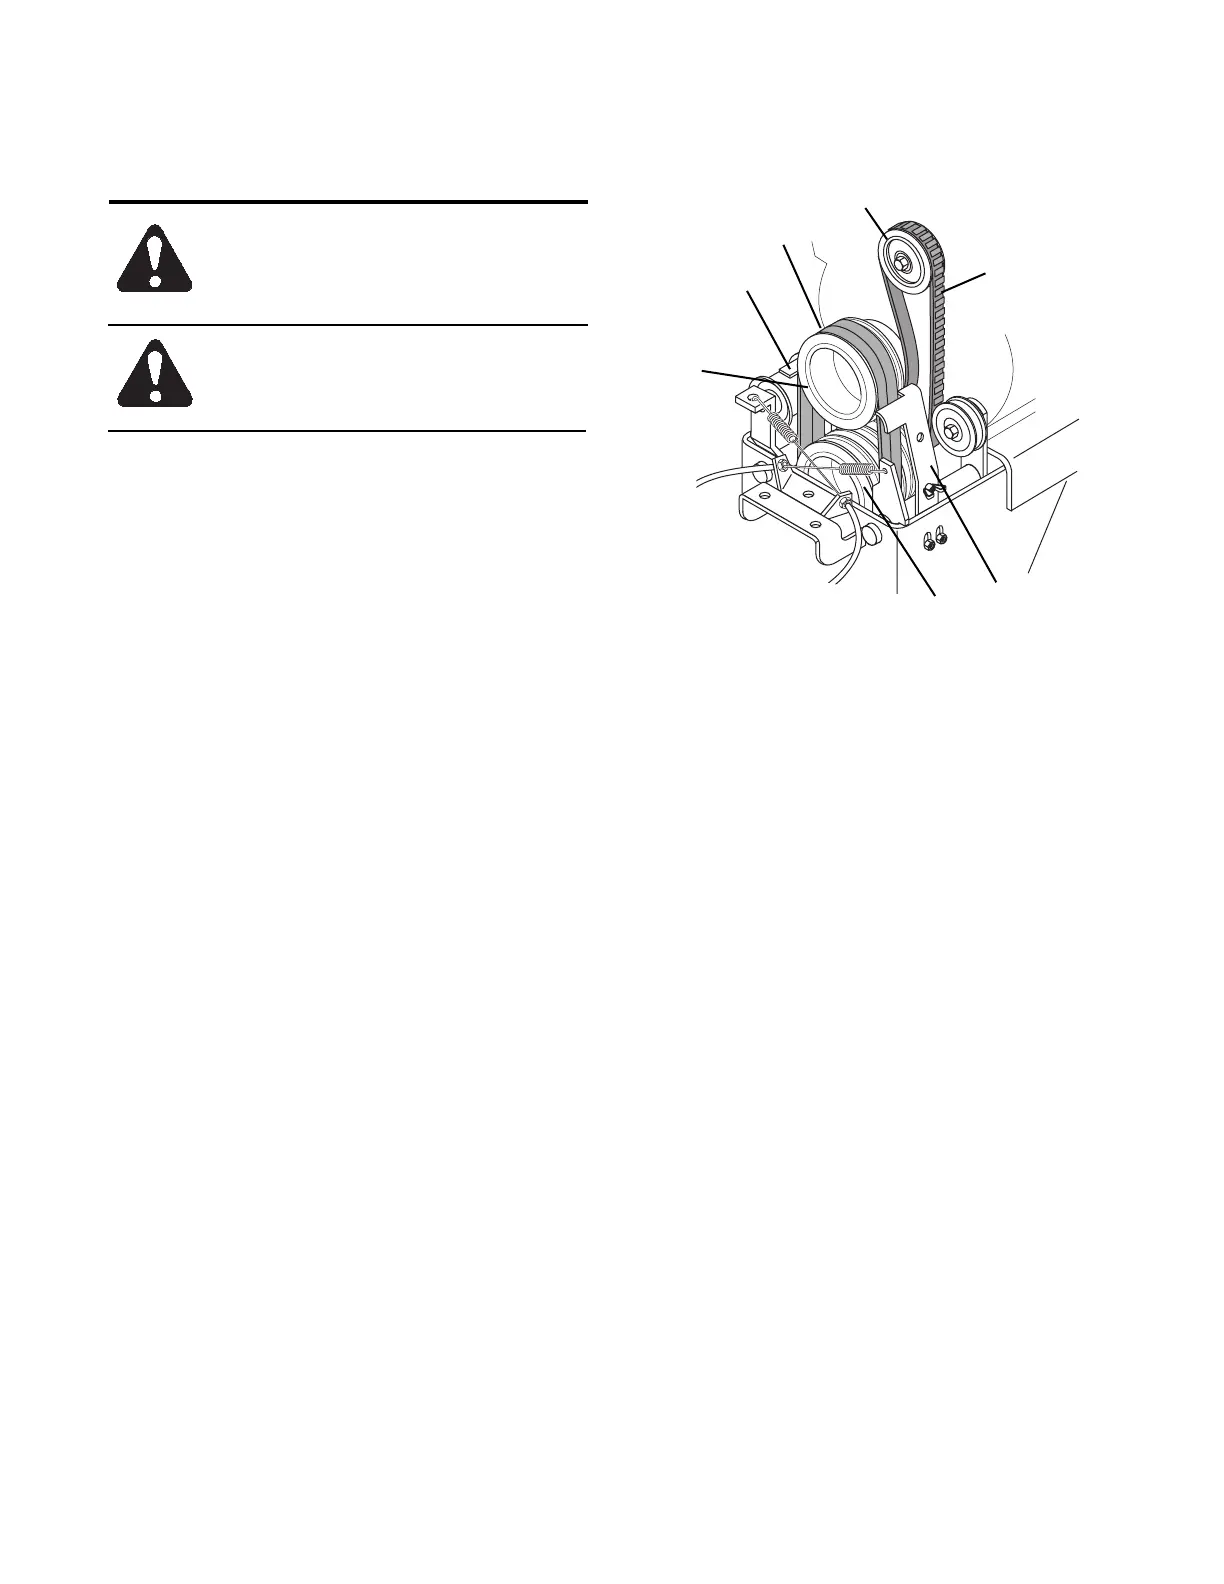
Forward Drive Belt Replacement
WARNING: Disengage Main Clutch,
stop engine, wait for moving parts to
stop and remove wire from spark plug
before changing belt speed.
CAUTION: DO NOT touch engine or
tiller drive parts which are not from
operation. Allow such parts to cool.
To replace forward drive belts, remove belt cover by
removing hex bolt and lifting cover off. Remove belt
fingers mounting hardware and belt fingers. Work
belts to high speed position then remove belts from
engine sheave first, transmission sheave second.
Replace new belts in reverse order making sure belts
align. If alignment is necessary, loosen engine
sheave setscrews, reposition engine sheave and
retighten setscrews. Replace belt fingers and adjust
them properly (see Adjustments).
Reverse Drive Belt Replacement
To replace the reverse belt remove drive belt per
instruction above, loosen cap screw and locknut
securing stationary reverse idler. Position idler lower
in slotted bracket. Roll reverse belt from transmission
sheave and remove from unit.
Install new belt on engine sheave and roll it into
position on lower sheave. Adjust reverse stationary
idler. (See Adjustments).
11
Lubrication and Maintenance (Continued)
1
2
3
4
5
7
6
1. Left Belt Finger
2. Forward Belts
3. Stationary Reverse Idler
4. Reverse Belt
5. Right Belt Finger
6. Transmission Sheave
7. Engine Sheave
Figure 6: Forward and Reverse Belts
OB0610
 Loading...