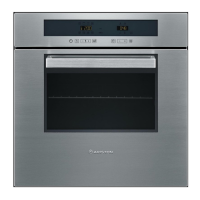
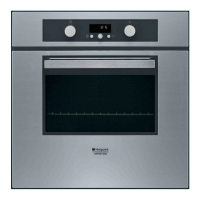
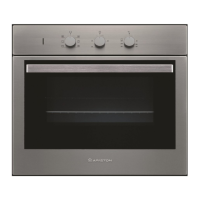
This document is an operating manual for an Ariston FZ 51 AUS / FZ 51 IX AUS oven. It provides comprehensive instructions for installation, use, cooking modes, precautions, and maintenance.
Function Description
The Ariston FZ 51 AUS / FZ 51 IX AUS is an electric oven designed for domestic use, offering various cooking modes to prepare a wide range of dishes. It features top and bottom heating elements, a fan for forced air circulation, and a grill function. The oven is equipped with a control panel for selecting cooking modes, setting temperature, and using a timer (on certain models).
Important Technical Specifications
- Dimensions:
- Width: 43.5 cm
- Height: 32 cm
- Depth: 41.5 cm
- Volume: 58 liters
- Electrical Connections:
- Voltage: 240V~50/60 Hz
- Maximum power absorbed: 2400W
- Compliance: Conforms to European Economic Community directives: 73/23/EEC (Low Voltage), 89/336/EEC (Electromagnetic Compatibility), and 93/68/EEC.
- Light Bulb: Wattage 25 W, cap E 14.
Usage Features
The oven offers several cooking modes, each designed for specific culinary needs:
- TRADITIONAL OVEN mode: Utilizes both top and bottom heating elements. Best for single-rack cooking to ensure even heat distribution. Temperature can be set between 60°C and Max.
- MULTI-COOKING mode: Engages top, bottom, and fan heating elements. Provides constant heat throughout the oven, cooking and browning food uniformly. Suitable for cooking on up to two racks simultaneously. Recommended for pizza cooking. Temperature can be set between 60°C and Max.
- TOP OVEN mode: Activates only the top heating element. Ideal for browning food at the end of cooking. Temperature can be set between 60°C and Max.
- GRILL mode: Uses the top heating element for high, direct heat. Excellent for browning surfaces of meats, roasts, steaks, veal, rib steak, fillets, and hamburgers, locking in juices and keeping them tender. Always cook with the oven door closed. Recommended to set to MAX power level.
- GRATIN mode: Combines the top heating element with the fan. Enhances the effectiveness of thermal radiation through forced air circulation, preventing surface burning while allowing heat to penetrate food. Always cook with the oven door closed. Recommended not to exceed 200°C.
Starting the Oven:
- Turn the SELECTOR knob to choose the desired cooking mode.
- Turn the THERMOSTAT knob to set the desired temperature (refer to the cooking advice table for recommendations).
- The THERMOSTAT indicator light will stay on during preheating and turn off when the set temperature is reached, indicating the oven is ready.
- Food can be placed in the oven once preheating is complete.
- Cooking mode or temperature can be adjusted during operation.
- To stop cooking, turn the SELECTOR knob to the "0" position.
Timer (on certain models):
- Turn the TIMER knob clockwise almost one complete revolution to activate the buzzer.
- Turn the knob anticlockwise to set the desired time, aligning minutes with the indicator on the control panel.
- The timer operates in minutes and sounds a buzzer when the selected time has elapsed.
- The timer does not control the oven's on/off function.
Practical Cooking Advice:
- Avoid placing racks in positions 1 and 5 during fan-assisted cooking to prevent burning of temperature-sensitive foods.
- In GRILL and GRATIN modes, use the dripping pan in position 1 to collect cooking residues.
- For MULTI-COOKING, use positions 2 and 4, placing food requiring more heat on position 2.
- For grilling, insert the rack in position 3 or 4 and place food in the center.
- For pizza, use MULTI-COOKING mode with a light aluminum pizza pan on the rack. Avoid the dripping pan for a crispy crust. Add mozzarella cheese halfway through cooking for pizzas with many toppings.
Safety Precautions:
- Always use oven gloves when placing or removing cookware.
- Do not place objects directly on the oven bottom.
- Keep the oven door closed when using GRILL and GRATIN modes.
- Ensure proper ventilation by removing the cabinet's back panel and installing the oven on two wood strips or a flat surface with a 45 x 560 mm opening.
- The appliance must be installed by a qualified person.
- Do not touch hot parts of the oven or door during use; keep children away.
- Ensure the power supply cable of other electrical appliances does not contact hot oven parts.
- Never cover ventilation openings.
- Do not use aluminum foil to line the oven bottom.
- Do not place flammable materials in the oven.
- Always ensure knobs are in the "/"0" position when not in use.
- When unplugging, pull the plug, not the cable.
- Never attempt to repair the appliance yourself. Contact a Service Centre for malfunctions.
Maintenance Features
Switching the Appliance Off:
- Disconnect the appliance from the electricity supply before performing any maintenance or cleaning.
Cleaning the Appliance:
- External Parts (stainless-steel or enamel-coated) and Rubber Seals: Clean with a sponge soaked in lukewarm water and neutral soap. For stubborn stains, use specialized products. Rinse and dry thoroughly. Avoid abrasive powders or corrosive substances.
- Inside the Oven: Ideally, clean after each use when still lukewarm. Use hot water and detergent, rinse, and dry with a soft cloth. Avoid abrasive products.
- Accessories: Can be washed like everyday crockery, including in a dishwasher.
- Oven Door (Glass): Clean with non-abrasive products and sponges, then dry with a soft cloth. For thorough cleaning, the oven door can be removed by following these steps:
- Open the oven door fully.
- Lift and turn the small levers on the two hinges.
- Grip the door on the two external sides, close it halfway, press on clamps F, and pull the door out of its seat. Reverse the sequence to replace.
Inspecting the Seals:
- Periodically check the door seals. If damaged, contact an After-sales Service Centre and avoid using the oven until seals are replaced.
Replacing the Light Bulb:
- Remove the glass cover of the lamp-holder.
- Remove the old bulb and replace it with a new one (Wattage 25 W, cap E 14).
- Replace the glass cover.
Assistance:
- When contacting assistance, provide the appliance model (Mod.) and serial number (S/N), found on the data plate or packaging.
Respecting and Conserving the Environment:
- Use the appliance during off-peak hours (late afternoon to early morning) to reduce the electrical load.
- Keep the oven door closed during GRILL and GRATIN modes to save energy (approx. 10%).
- Regularly check and clean door seals to ensure proper sealing and prevent heat dispersion.
- Dispose of packaging materials and the old appliance according to local environmental standards and legislation.
- Make the appliance unusable by cutting the electrical cable before disposal.