2
2000 Series Addressable Fire Sensors
Installation & Service Instructions
CLASS A STYLE WIRING DIAGRAM (SEE FIGURE ) AND
CLASS B STYLE WIRING DIAGRAM (SEE FIGURE )
Fire control panel
Earth
First detector
Isolator
Last detector
Remote indicator
Shield: strongly recommended
A Initiating circuit
B Supervision return
Note:
- Detectors are not polarised; isolators are polarised!
- Polarity must be observed when using remote indicators.
- Ground shield is optional, but not required.
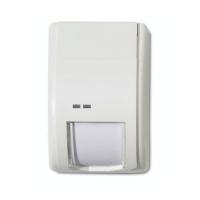
FIRE SENSOR PLACEMENT AND SPACING
In general, ceiling mounted smoke detectors should be located
near the centre of the room or hall whenever possible. Sensors
should always be placed a minimum of 100 mm from any wall.
When the sensor is wall mounted, the top of the detector should
be 100 - 300 mm from the ceiling.
When more than one detector is required, spacing of 9 m may
be used as a guide on smooth ceilings. Other spacing may be
used depending on ceiling height, high air movement, and other
conditions or response requirements. Local regulations should
be observed at all times.
WHERE NOT TO PLACE SMOKE SENSORS
One of the major causes of nuisance alarms is improper
placement of sensors. Avoid locating sensors too close to
kitchens or wood stoves where smoke can be generated.
Garages and furnace rooms are also poor locations, due to
exhaust fumes. Placing sensors too close to bathrooms can
cause problems from steamy baths or showers.
SETTING THE ADDRESS
To install a detector address (see Figure ), use a screwdriver
to adjust the two rotary switches on the back of the sensor. Set
the left rotary switch (0 through 12) for the 10's and 100's digit
and the right rotary switch for the 0 through 9 digit.
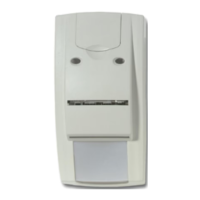
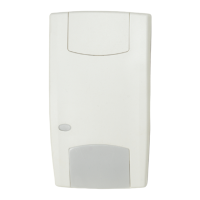
INSTALLING THE DETECTOR HEAD
To install a detector head, simply insert the head and rotate it
clockwise until it is properly aligned and "sets" into the base
(Figure ). Then rotate it an additional 15º to lock it in place.
CONSIDER THE LOCKING MECHANISM BEFORE
INSTALLATION
Each 2000 Series universal mounting base is equipped with a
moulded locking mechanism to prevent unauthorised removal of
the detector head (Figure ). If you want detectors to be locked
in the base, remove tab before inserting into the base. To
remove the detector head, insert a small screwdriver into the slot
on the side of the base and press in while simultaneously turning
the detector head counter clockwise (Figure
).
TESTING THE INSTALLATION
After all connections are completed and the wiring is checked,
apply power to the system. There should not be an alarm nor a
fault. If there is, determine whether the detectors are correctly
wired, addressed and if the type is correct.
TESTING EACH DETECTOR
All 2000 Series smoke detectors are shipped with a plastic dust
cover for use in areas where construction is on-going. Smoke
detectors will not work with the dust cover in place. Remove the
dust cover when installation is completed, prior to testing.
All smoke detectors should be tested in place at least annually
or according to local regulations, to ensure smoke entry into the
sensing chamber and alarm response. If canned smoke (test
aerosol) is used, carefully follow the manufacturer's directions to
avoid damage to the detector.
Test heat sensors by using a hot air gun. Aim at heat sensor
from 15 to 25 cm away. Be careful not to melt plastics.
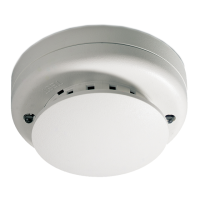
MAINTENANCE AND CLEANING
The sensing chamber of the 2000 Series photoelectric detector
unsnaps for easy field cleaning and service (Figure
).
Whenever the diagnostics indicates cleaning is necessary,
remove the photoelectric detector cap, snap off and throw away
the optical block chamber (Figure
: À Detector cap; Á Field
replaceable optical chamber). Then blow off the optical block
base and snap on a new block chamber back in place, replace
the cap and verify sensitivity.
Détecteurs adressables Série 2000
Manuel d'installation et de
maintenance
SCHEMA DE CABLAGE CLASSE A (VOIR FIGURE ) ET CLASSE
B (VOIR FIGURE )
À Centrale de détection incendie
Á Terre
 Premier détecteur
Base isolateur
Dernier détecteur
Indicateur à distance
Ecran : recommandé
A Départ de la boucle
B Retour de la boucle
Notes:
- Les têtes de détection sont insensibles à la polarité. Les isolateurs
nécessitent la polarité correcte!
- La polarité doit être respectée lorsqu’on utilise des indicateurs
d’action.
- Du câble faradisé peut être utilisé mais n’est pas obligatoire.
INSTALLATION DU DETECTEUR ET ESPACEMENT
En général, les détecteurs sont montés au plafond et doivent
être installés au milieu de la pièce chaque fois que c’est
possible. Les détecteurs doivent être placés à plus de 100 mm
d’un mur. Lorsque le détecteur est installé sur un mur, le haut du
détecteur doit se trouver de 100 à 300 mm du plafond.
Lorsqu’il est nécessaire d’installer plus d’un détecteur, un
espacement tous les 9 m est requis pour des hauteurs normales
de plafond. D’autres espacements peuvent être choisis,
dépendant en cela de la hauteur du plafond, des turbulences
d’air importantes ou d’autres conditions d’environnement. Les
GB
F
 Loading...