Take out the feet from the carton, and place the legs at the bottom of heater in the first and
last fins and screw them on. Make sure the hole on the body correctly matches the hole on the feet.
Shown as the following pictures:
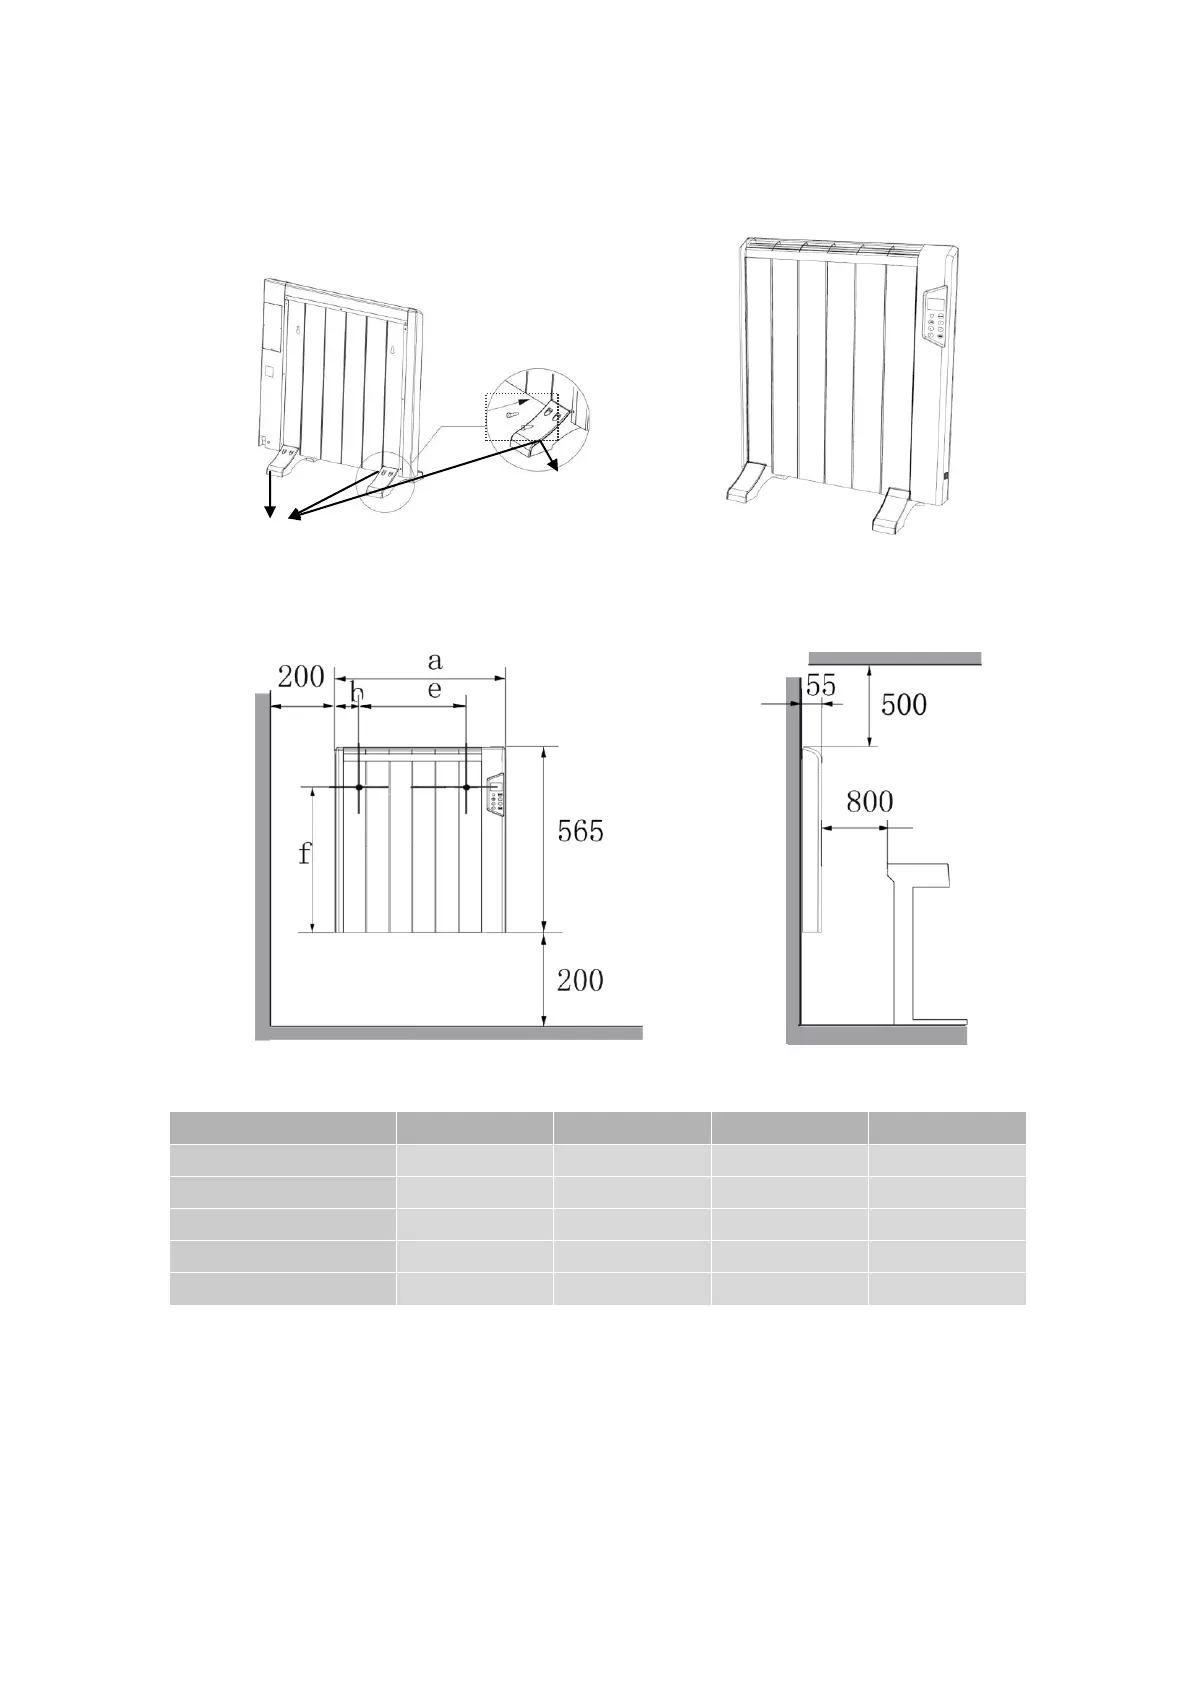
3. Installation instructions for wall-mounted type
1)Before fixing heater on a wall, be sure that once unit installed it must be kept at a minimum
distance (shown in below pictures) from the wall.(Unit:MM)
The distances marked above vary depending on the model of heater that you have bought.
The dimensions are as follows:
First, drill 2 holes on the wall (diameter: 10mm; depth: 60mm), the 2 holes’ distance is
corresponding to the “e” position shown on the above pictures. Fix the hooks (letter E item as
below picture) on the wall with the big expansion screws (letter F item as below picture). Use
screws (letter H item as below picture) to fix the fixing flat (letter C item as below picture) to the
body appliance. (Notes: the fixing flat usually fixed on the holes in the first 2
nd
and last 2
nd
fins at