INSTALLATION GUIDE continued…
Check that all joints are securely tightened, test for leaks.
11
10
6
7
8
9
24
24 & 25
Outlet pipe to
shower head
Water supply
pipe from
ceiling
9
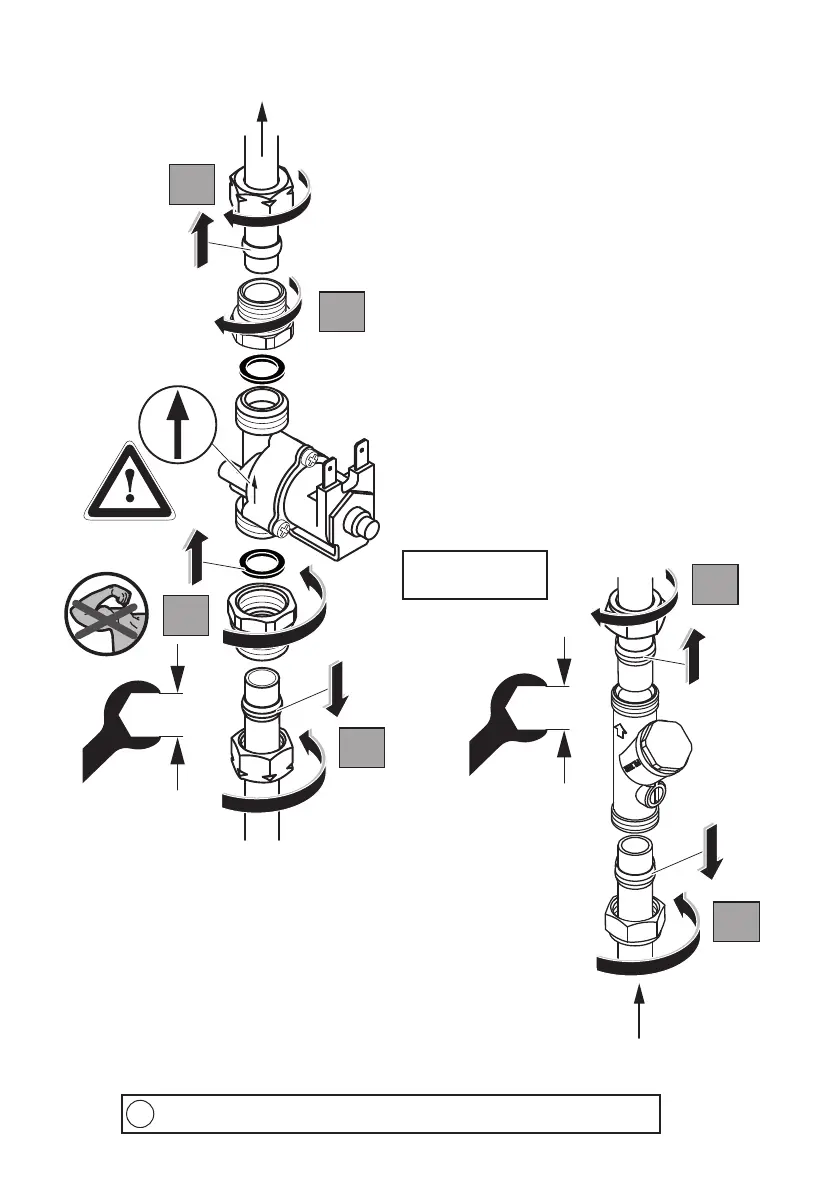
6 & 8. To t solenoid valve:
The couplers can be screwed onto both sides
of the in-line solenoid valve. Ensure the seals
providedarettedasshown.Makegoodthe
joints, taking care not to use excessive force.
Tighten with an adjustable spanner
(25mm A/F).
7 & 9. Slip the compression nuts & olives onto
the pipes. Fit the solenoid valve into the pipe-
work & make good the joints.
Observeowdirection.
Make sure the solenoid valve is orientated
such that the electrical connectors are easily
accessible.
10 & 11. To t service valve:
Slip the compression nuts & olives onto the pipes. Fit the service valve into
thepipe-work&makegoodthejoints.Observeowdirection.
Makesuretheservicevalveisorientatedsuchthattheltercap&isolating
screw are easily accessible for future maintenance.
Integral isolating/service valve
When the isolator screw slot is parallel to the
valvebody,thevalveisopen&permitswatertoow.
To close the valve, rotate the isolator screw 90°.
!
Pipe-work diagram is
shown upside down
 Loading...